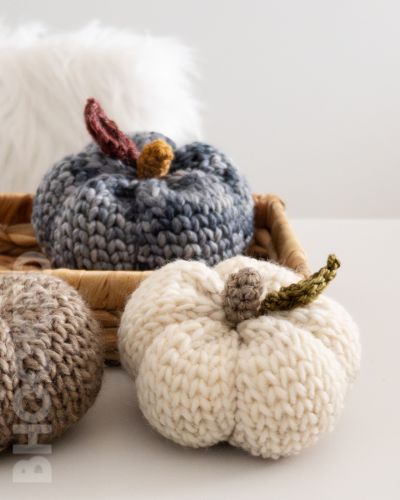
A simple crochet pumpkin like this one is perfect for using up scrap yarn, and it looks really cute with your fall decor! This free pattern and tutorial will guide you through the whole project from start to finish. The pattern is completely free right here, or you can get an ad-free, printable PDF from our shop. I also have a video you can crochet along with!
UPDATED: OCTOBER 1, 2024 BY BRITTANY
This post may contain affiliate links. See our Disclosure Policy for more information.

Skill Level | Easy
Finished Size | About 4.5″ diameter, and about 3″ tall
Making these little crochet pumpkins is a fun fall project. They’re great for decorating any space in your home and are perfect for using up those bits of scrap yarn you’ve been saving!
These pumpkins are on the smaller side – about the size of the mini pumpkins you find at the store. If you’re looking for a bigger pumpkin with different size options, check out this other pattern!
About This Crochet Pumpkin Pattern
Pumpkins are one of my favorite projects to kick off the fall season, and I have them all over my house. You can finish this pattern in one sitting, and it’s easy enough for newer crocheters.
There are several ways to crochet a pumpkin, and this pattern will show you a classic method: crocheting a tube and shaping it into a pumpkin. It’s quick, simple, and works with different kinds of yarn. For the pumpkins you see in the photos, I used scrap yarn from my stash. I’ll share more about the yarn in the supplies section below!
If you want more details, have questions, or just want to dive into the pattern, keep reading. Happy crocheting!
Pattern Overview:
- Supplies
- Buy the ad-free, printable pattern
- Abbreviations
- Pattern Notes
- Gauge & Finished Size
- Easy Crochet Pumpkin Pattern Instructions
- How to Assemble Your Crochet Pumpkins
- How to Shape Your Crochet Pumpkins
- Decorating Your Pumpkins
- Easy Crochet Pumpkin Step-by-Step Video
- More Fall Crochet Projects + Free Patterns

You can view the pattern completely free on this page. But, if you prefer having a digital copy that you can save or print, we’ve got you covered with that option as well.
If you’d like to support our work here at B.Hooked, purchasing the digital pattern is a wonderful way to do so!
Recommended Supplies
- Bulky Weight Yarn (#5), About 60 yds per Pumpkin
- 6 mm Crochet Hook (Pumpkin)
- 5 mm Crochet Hook (Stem)
- 4 mm Crochet Hook (Leaf)
- Fiber Fill Stuffing
- Yarn Needle
- Scissors
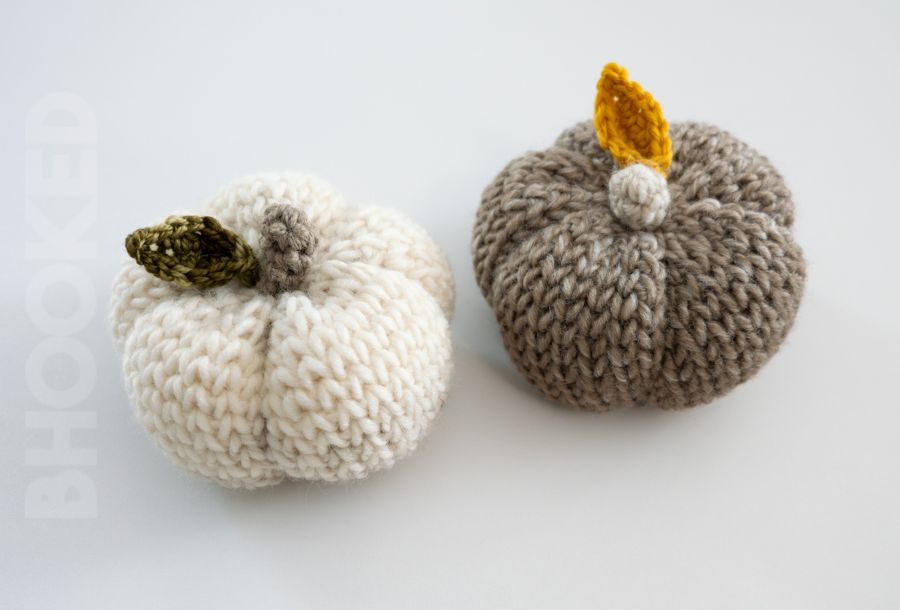
One of my favorite yarns for crocheting pumpkins is Lion Brand Scarfie. I love how the colors fade – it’s perfect for ombre pumpkins! The brown and cream pumpkins in the pictures are made from the same skein, in the Cream/Taupe color.
The blue-gray pumpkin came from a yarn that’s been in my stash for so long, I don’t even remember what brand it is! I haven’t always been great at keeping track of yarn labels.
This blue pumpkin worked out perfectly for the step-by-step video. I found that with just a few simple tweaks, you can make a pumpkin with any scrap yarn you have. I’ll share the adjustments I made in the pattern notes!
While I’m not sure what this lovely blue-gray yarn is, I do know it’s thicker than Scarfie, probably a #6 super bulky weight. So don’t worry if you don’t have Scarfie yarn – you can use any yarn you like.
For my pumpkins, I also used a different color for the stem and leaf. These extra touches are optional, but you can easily use a medium-weight (#4) or even a lightweight (#3) yarn for them.
Feel free to experiment with different yarns for this pattern! It’s very flexible, and so far, I haven’t found a yarn that didn’t work or that I didn’t love!
Abbreviations
This pattern is written using standard US crochet terminology.
- Ch Chain
- Cont Continue
- Dc Double Crochet
- Hdc Half Double Crochet
- Hk Hook
- Rem Remaining
- Rep Repeat
- Sc Single Crochet
- Sk Skip
- Slst Slip Stitch
- St(s) Stitch(es)
Pattern Notes
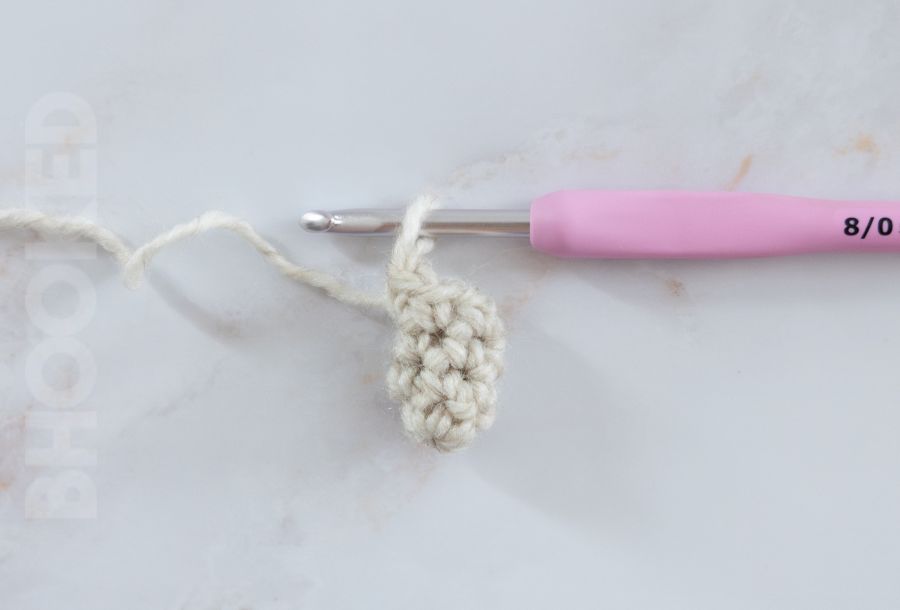
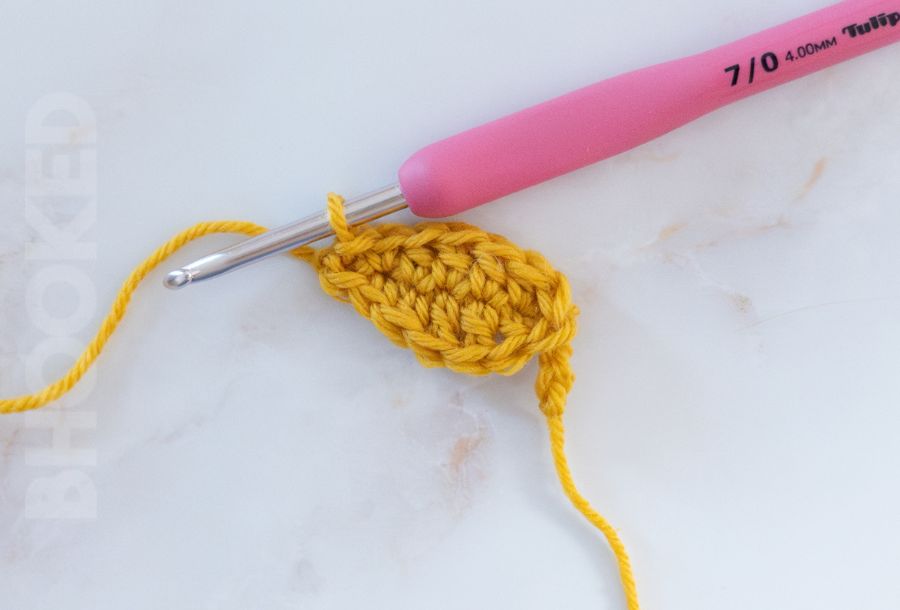
Each pumpkin is crocheted in a round tube and shaped with minimal seaming. To get the knit-like look of the stitches, you’ll use single crochet through the front of the stitch instead of the usual spot. This stitch is sometimes called the “waistcoat” stitch. Here’s what it looks like:
Gauge and finished size: Your pumpkin will be about 4.5″ wide and 3″ tall if you use Lion Brand Scarfie and the recommended hook sizes. But you can easily make it bigger or smaller in a few ways.
Gauge isn’t super important for this pattern because even if your pumpkin turns out a little bigger or smaller, it’ll still look great! You don’t need to stress about it fitting perfectly like a hat or sweater. Just make sure there aren’t any holes where the stuffing could peek through.
If you’re using Scarfie yarn and want to check your gauge, crochet the first several rounds and measure. For a pumpkin the size I mentioned, you should get 10 waistcoat stitches in 3″.
The easiest way to change the size of your pumpkin is by using thicker or thinner yarn but following the same pattern.
- For a bigger pumpkin using super bulky weight yarn, use a 6.5 mm or 7 mm hook.
- For a smaller pumpkin using medium-weight yarn, use a 5 mm hook.
The pattern below lists hook sizes for bulky weight (#5) yarn, but if you’re using something else, use the hook size that matches your yarn. These are just suggestions, so feel free to experiment!
If you want to save time and skip crocheting the stem or leaf, you can use a cinnamon stick or a small stick from your yard as a stem! Just hot glue it in place. I also love using silk leaves on my crochet pumpkins, like I did with the ones I made last year!
Easy Crochet Pumpkin Pattern Instructions
Pumpkin
Round 1: Using the 6 mm hook, ch 38 and being careful not to twist the ch, slst to the first ch to form a ring. Ch 1 (doesn’t count as a st). 1 sc in every ch. Don’t join. Continue working in a spiral here and throughout the pumpkin pattern. (38 sts)
Round 2: Using the waistcoat stitch placement, sc in every st. Don’t join. Continue working in a spiral.
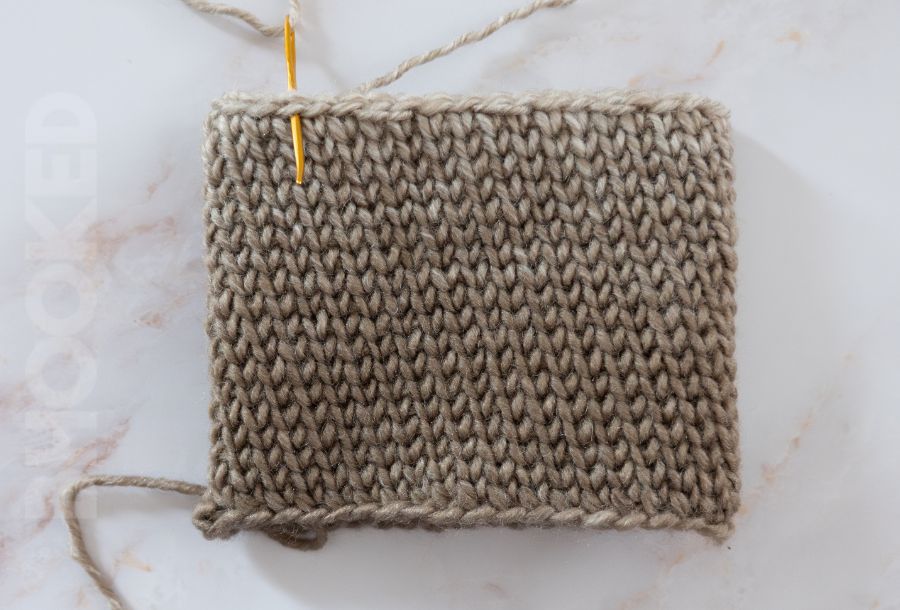
Rep last round until work measures 4.5″ from starting edge. Fasten off leaving a tail that’s about 30″ long for assembly.
A digital pattern is available in our shop so you can print out the pattern
Stem
Round 1: Using a 5 mm hook, make a magic ring with 5 sc. Do not join. Work in a spiral throughout the stem pattern, using a stitch marker to track the first stitch of each round. (5 sts)
Rounds 2-4: Sc in each stitch around. (5 sts)
Fasten off leaving about a 5″ tail and set aside for the assembly.
Leaf
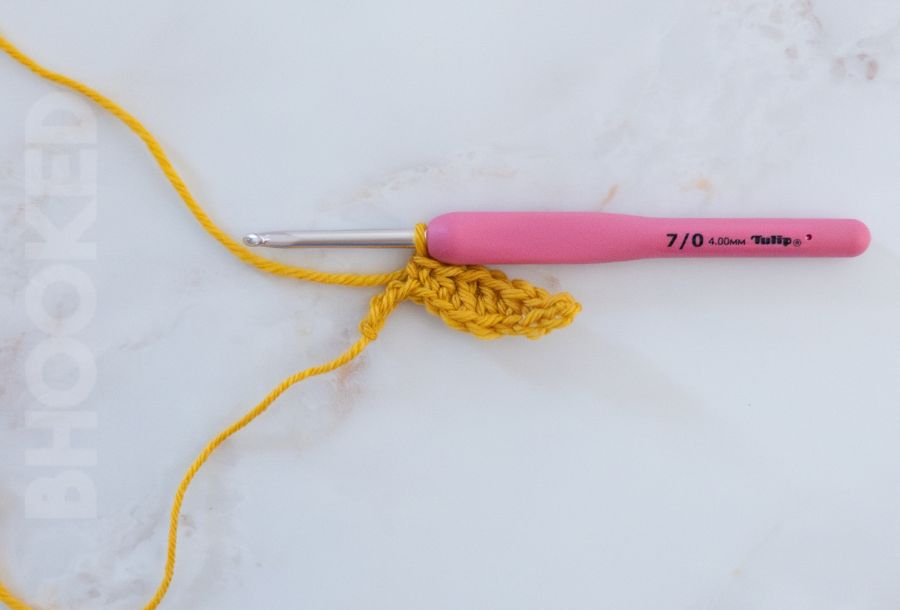
Round 1: Using a 4 mm hook, ch 11. Slst in the first ch. Sc in the next ch, hdc in the next ch, dc in each of the next 2 ch, hdc in the next ch, sc in the next ch. (6 sts)
You should have 3 chains remaining. Leave these chains unworked. This is what your leaf should look like at this point:
Rotate the work so you’re looking at the underside of the chain. Sc in the same stitch as the last sc, but on the opposite side of the chain.
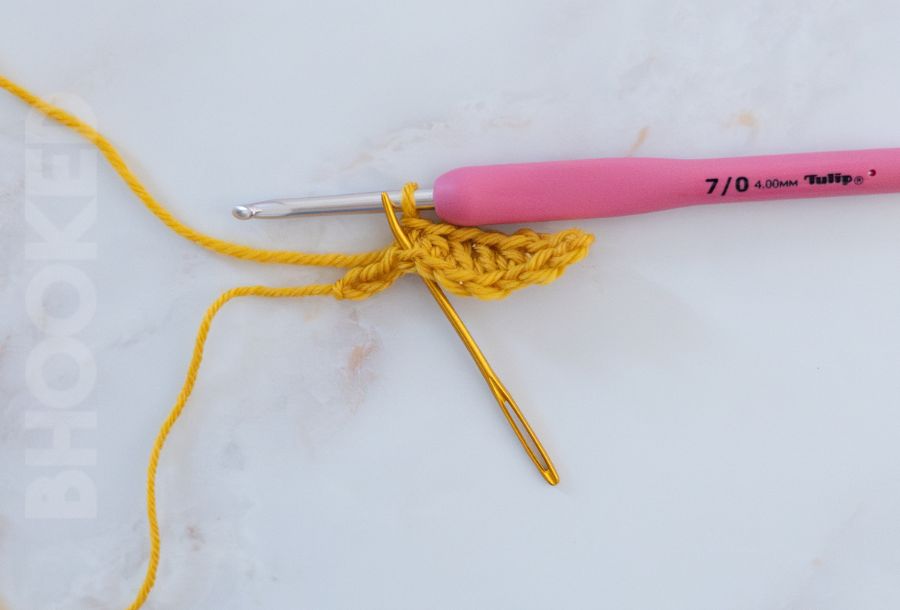
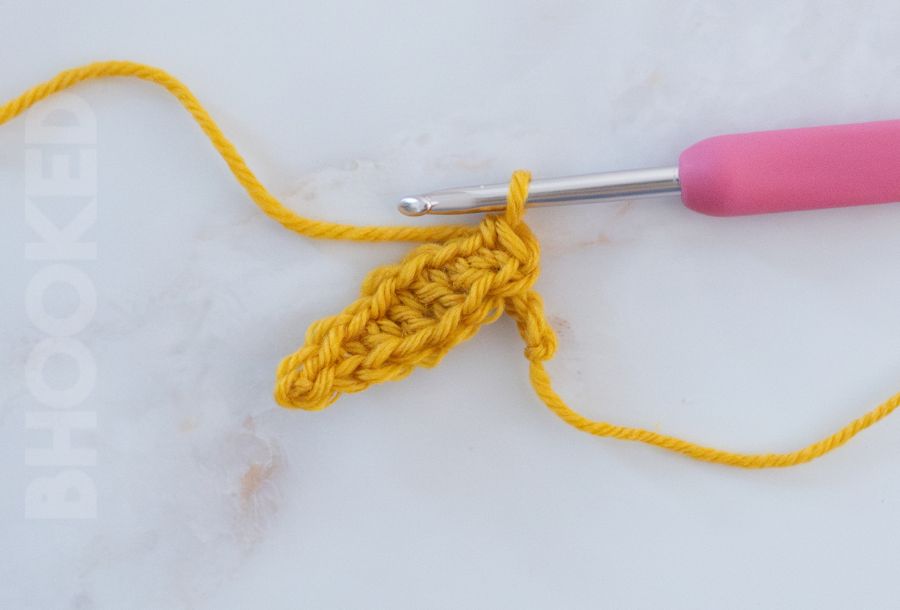
After making this single crochet in the underside of the chain, hdc in the next st, dc in the next 2 sts, hdc in the next st, sc in the next st, slst in the last st.
Fasten off, leaving the starting end for attaching to the pumpkin. Weave in the finishing end.
How to Assemble Your Crochet Pumpkin
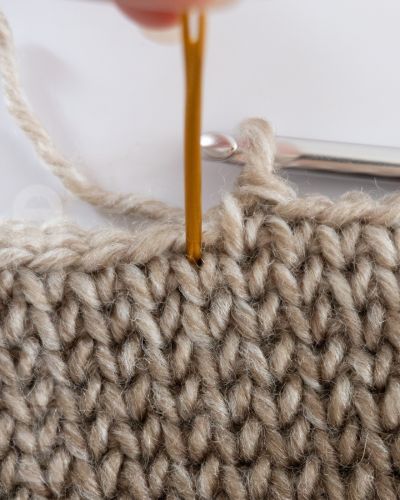
Step 1: To create the first drawstring closure, run the longest tail end in and out as seen in the photo. I find that skipping two stitches between gives the neatest results.
Step 2: Being careful not to break the yarn, pull the tail to draw it up, and then run the tail around the opening several times to tighten it even more.
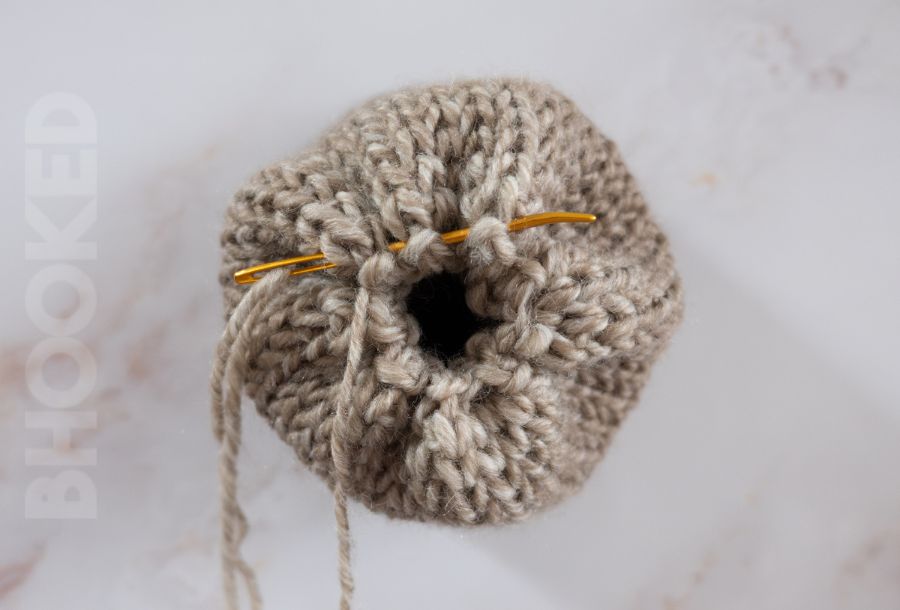
Step 3: Insert the needle through the center of the hole and pull it through to the inside of the pumpkin. Then thread it through any stitch at the top opening.
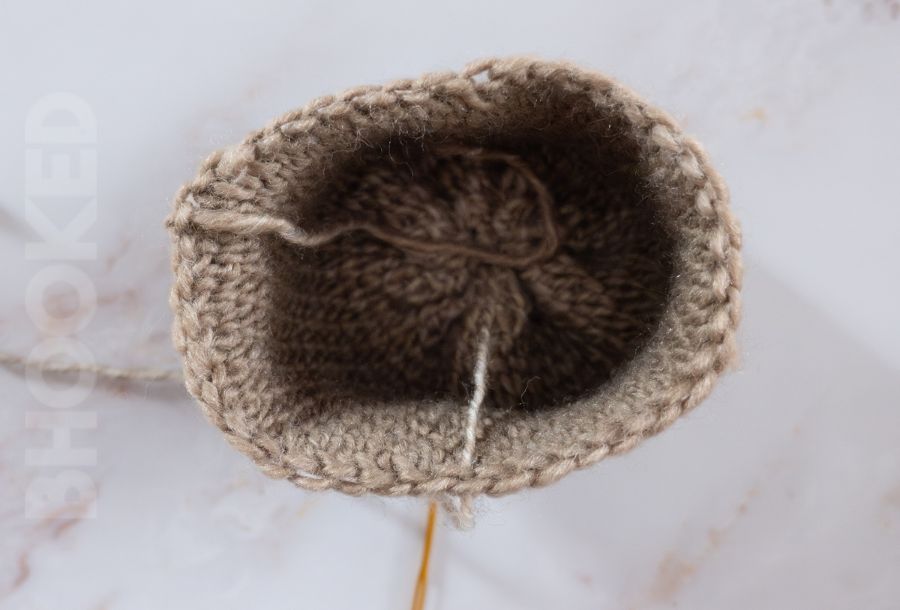
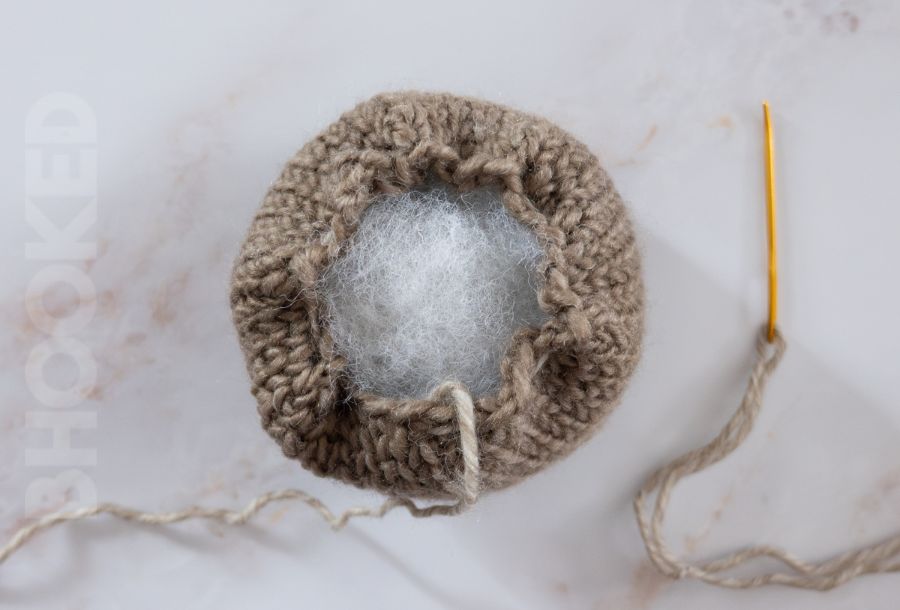
Step 4: Create another drawstring closure at the top in the same way, but add stuffing before drawing it closed.
I find that adding more stuffing leads to a better-shaped pumpkin. You just want to avoid stuffing it so much that you can see the stuffing through the stitches.
Step 5: Draw the top closure tightly and secure it by running the yarn around the opening again.

How to Shape Your Crochet Pumpkins
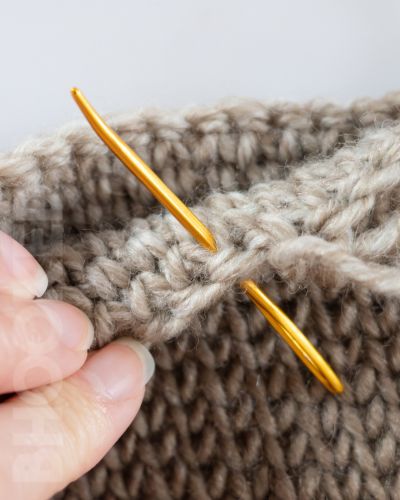
Step 1: Run the needle through the center of the pumpkin and out the opposite side. You’ll need to squash the pumpkin to grab the needle.
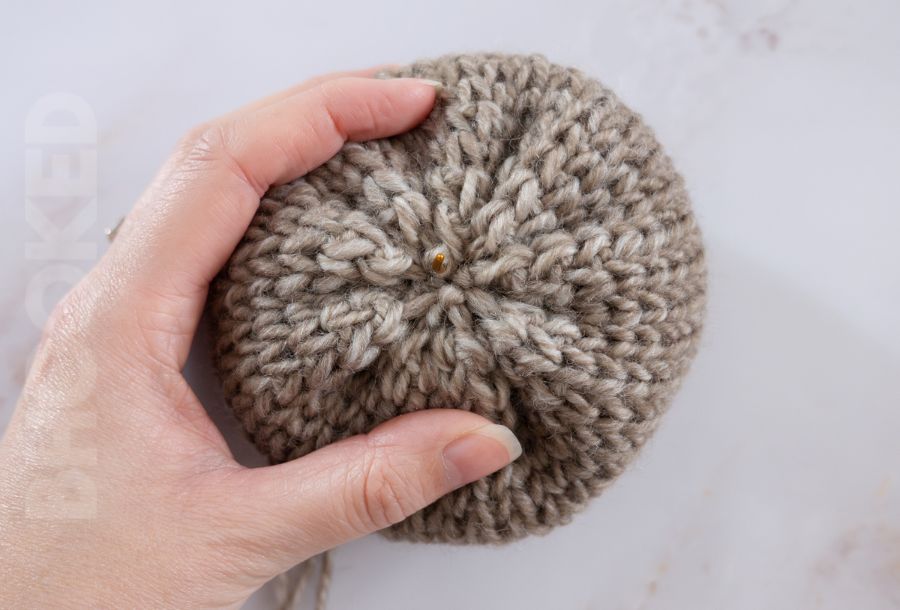
Step 2: Repeat the process of running the needle through the center and out the opposite side, pulling tightly to shape the pumpkin into segments.
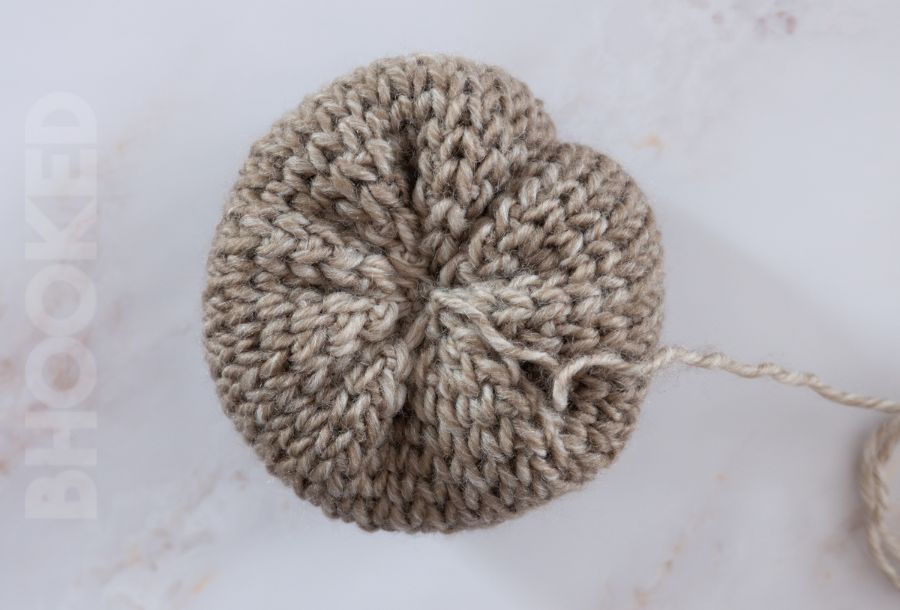
Repeat this step to create 5 segments.
Decorating Your Pumpkins
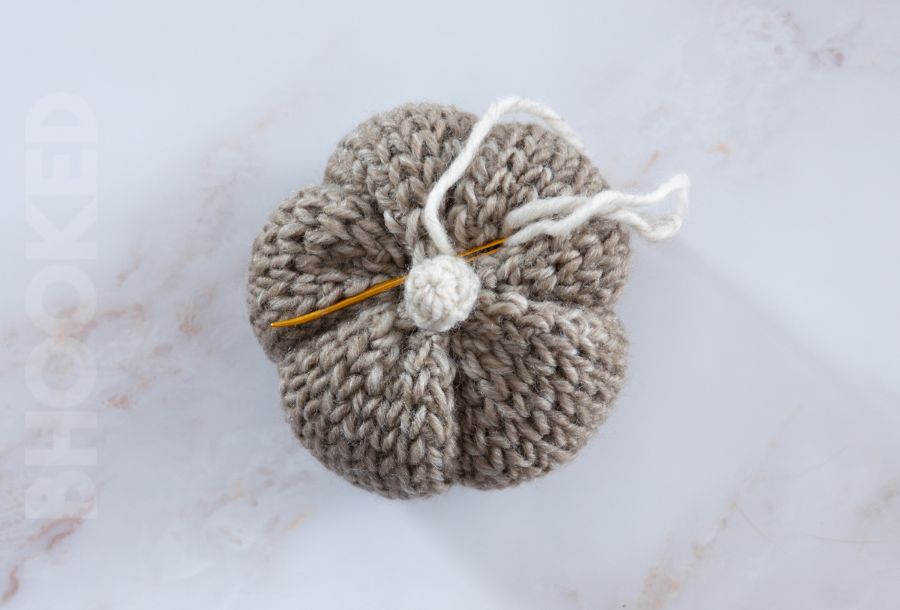
This is where you can get really creative! Attach the stem and leaf with a few stitches, or use a hot glue gun to add a cinnamon stick or other decorative fall foliage.
You can also add a jute or twine bow around the stem for a charming touch.
By using this pattern, you agree to our terms of use:
This pattern is for personal use only.
You agree not to modify, publish, share, sell, or create derivative works from the content on this page, in whole or in part. If you’d like to share this pattern, please share the link to this webpage only. You may sell finished items made from this pattern.
Crochet with Me! Easy Crochet Pumpkin Step-by-Step (Video)
Video not displaying? Watch this tutorial on YouTube instead.
More Fall Crochet Projects + Free Patterns
Making free patterns for fall projects is kind of our thing. Check out some of our other tutorials with free crochet patterns specifically for the fall season:


