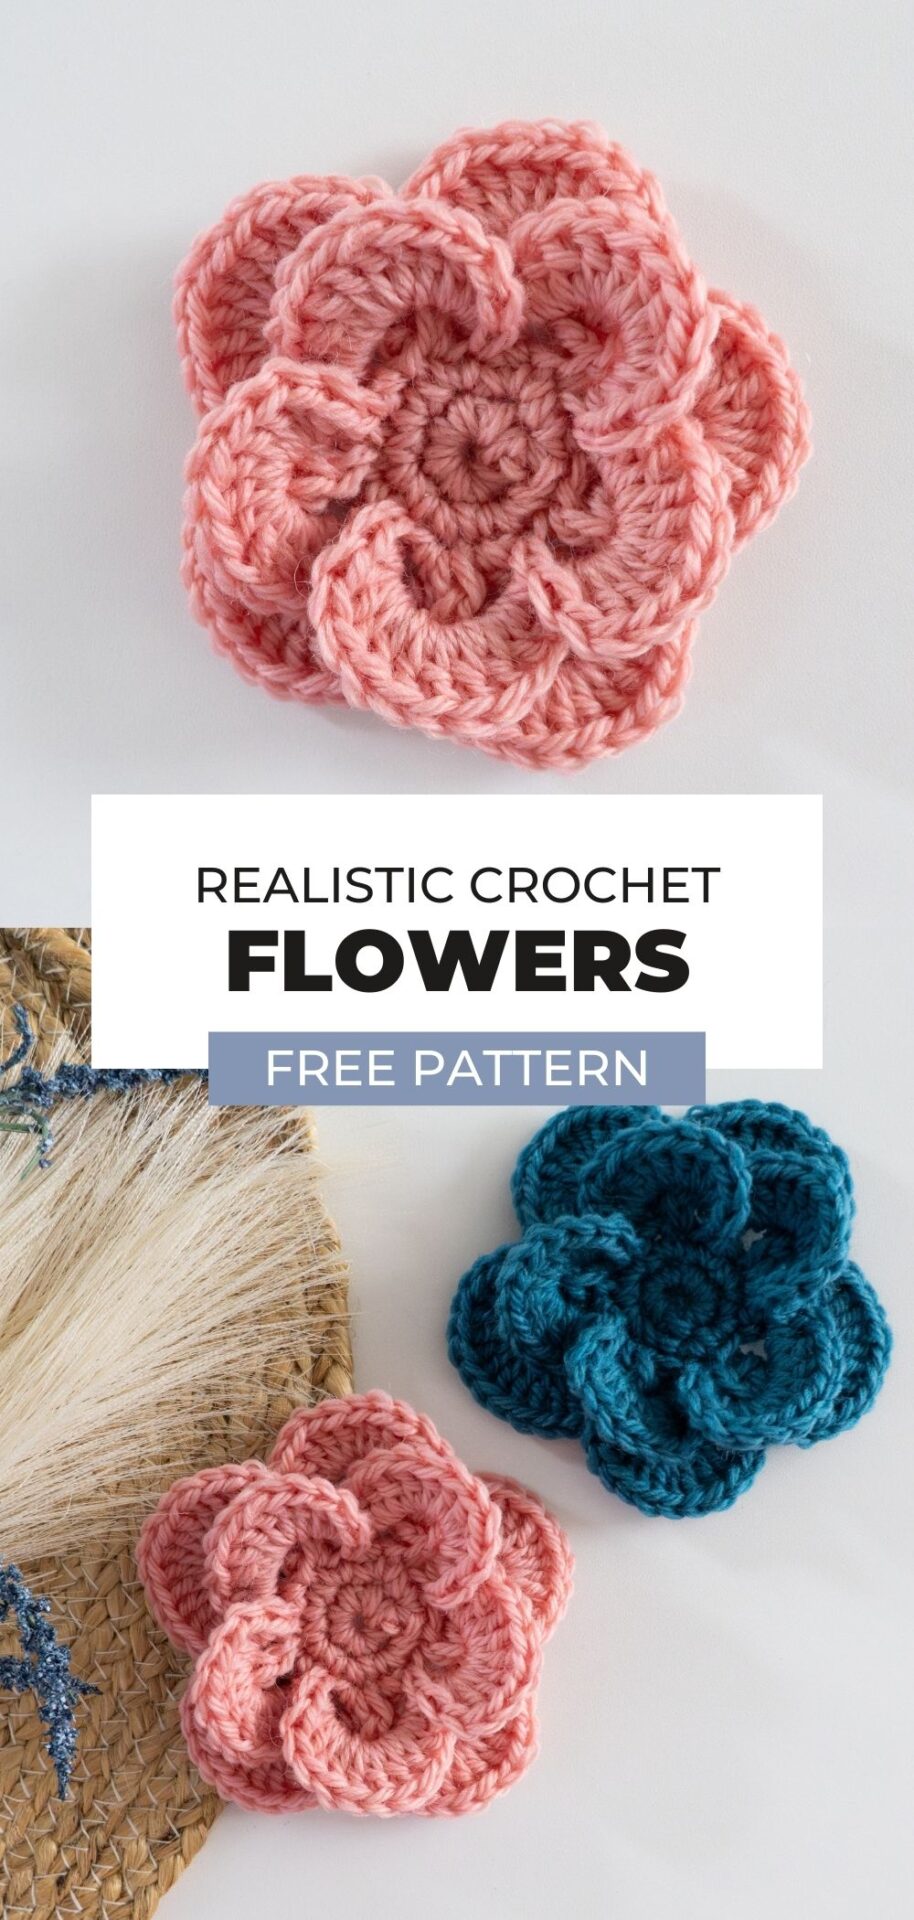
Learn how to make a beautiful and realistic crochet flower with this free pattern and step-by-step tutorial. You can view the pattern completely free on this page, or you can buy the ad-free, printable PDF from our shop.
UPDATED: MARCH 24, 2025 BY BRITTANY
This post may contain affiliate links. See our Disclosure Policy for more information.

Skill Level | Intermediate
Finished Size | 4″ diameter
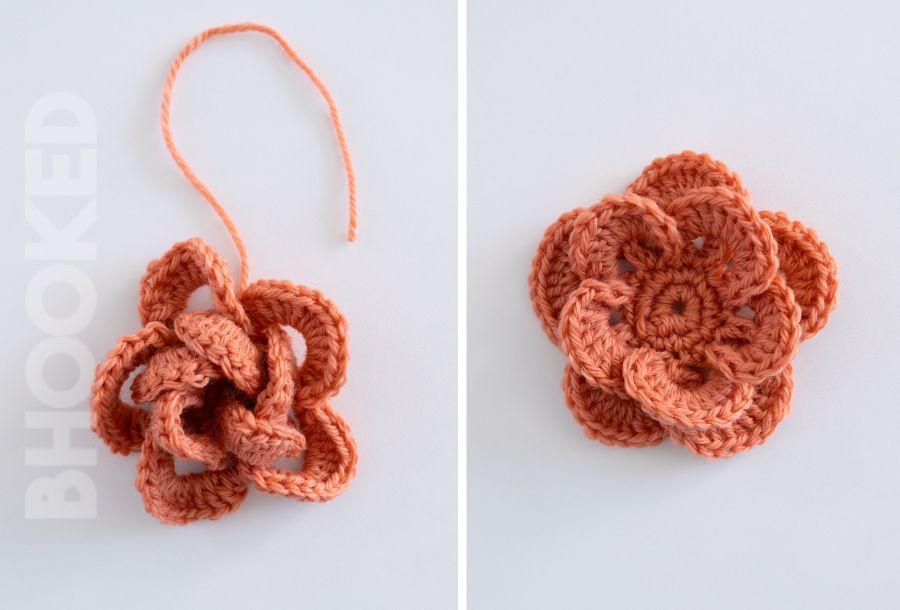
A 3D and realistic crochet flower like this one is a unique finishing touch for a hat, bag, or any project really! This crochet flower pattern is one of my favorites because its shape makes it really life-like, and stand out from whatever you attach it too. They also make adorable wall decorations and are absolutely darling in a shadow box. You can even attach magnets to the back to brighten up your refrigerator!
Each one of these pretty realistic crochet flowers works up in about 15 minutes with any medium-weight scrap yarn you have lying around!
About this Realistic Crochet Flower Pattern
If you want a unique way to finish your project, the Wagon Wheel Crochet Flower is a perfect choice! This three-dimensional flower works up fast and uses very little yarn.
This quick project introduces a fun hook placement technique that lets you crochet in three dimensions. It might look intricate, but don’t let that fool you—hundreds of beginners have successfully made this flower using the step-by-step video tutorial below!
Keep reading for more frequently asked questions, and pattern details, or jump down to the free pattern. Or you can browse my full collection of Free Crochet Flower Patterns for more ideas!
Pattern Overview:
- Buy the ad-free, printable pattern
- About This realistic Crochet Flower Pattern
- Supplies
- Abbreviations
- Realistic Crochet Flower Pattern Notes
- Gauge & Finished Size
- Realistic Crochet Flower Pattern Instructions
- Finishing the Realistic Crochet Flower
- How to Crochet a Realistic Crochet Flower (Tutorial)
- More Quick & Easy Tutorials + Free Patterns

You can view the pattern completely free on this page. But, if you prefer having a digital copy that you can save or print, we’ve got you covered with that option as well.
If you’d like to support our work here at B.Hooked, purchasing the digital pattern is a wonderful way to do so!
Recommended Supplies
- About 15 yards; Any medium-weight yarn
- 5 mm Crochet Hook
- Yarn needle
- Scissors
This realistic crochet flower is so practical—you can use just about any medium-weight yarn! Variegated yarns add a fun pop of color, but my favorite is a smooth solid or semi-solid yarn. It really lets the shape and design of the flower shine!
While this pattern works best with medium-weight yarn, don’t be afraid to experiment with whatever you have on hand—I haven’t found a yarn that didn’t work beautifully for this flower. For an extra fun touch, try hot gluing a bead or button in the center!
Abbreviations
This pattern is written using standard US crochet terminology.
- Ch Chain
- Dc Double Crochet
- Hk Hook
- Prev Previous
- Sc Single Crochet
- Sk Skip
- Sp Space
- Slst Slip Stitch
- St(s) Stich(es)
- YO Yarn Over

Realistic Crochet Flower Pattern Notes
This realistic crochet flower is worked in rounds, just like many of the free flower patterns you’ll find here—but it goes a step beyond a simple design. With clever hook placement, the petals take on a beautifully layered, three-dimensional look.
Just a quick note: In the pattern instructions below, the chain one at the beginning of rounds 1 and 2 does not count as a stitch.
Gauge: Use the finished size to check your gauge, but don’t stress if yours isn’t the same size exactly. They’ll still look beautiful!
Finished Size: About 4″ diameter

If you enjoyed this, try my other free realistic 3D Crochet Flower Pattern for a classic look!
Realistic Crochet Flower Pattern Instructions
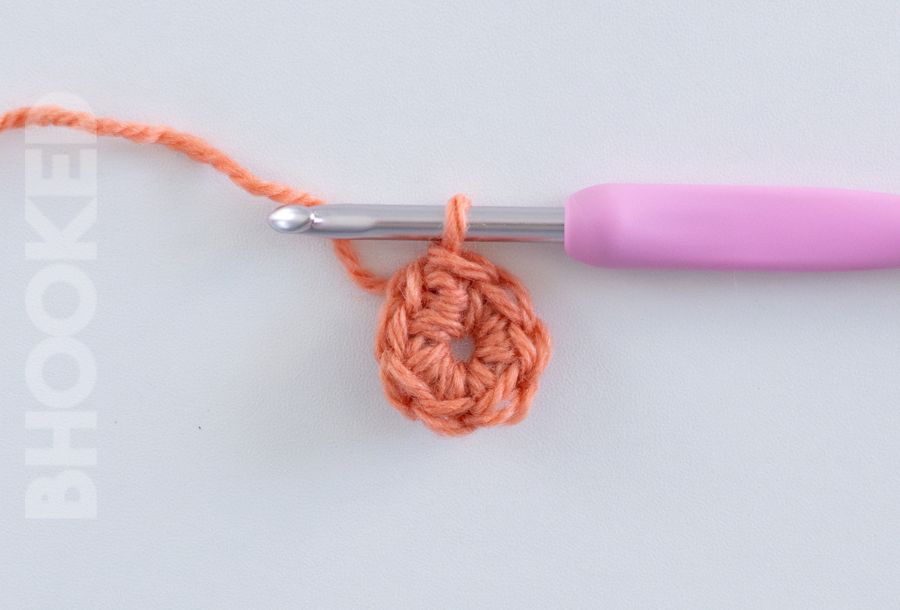
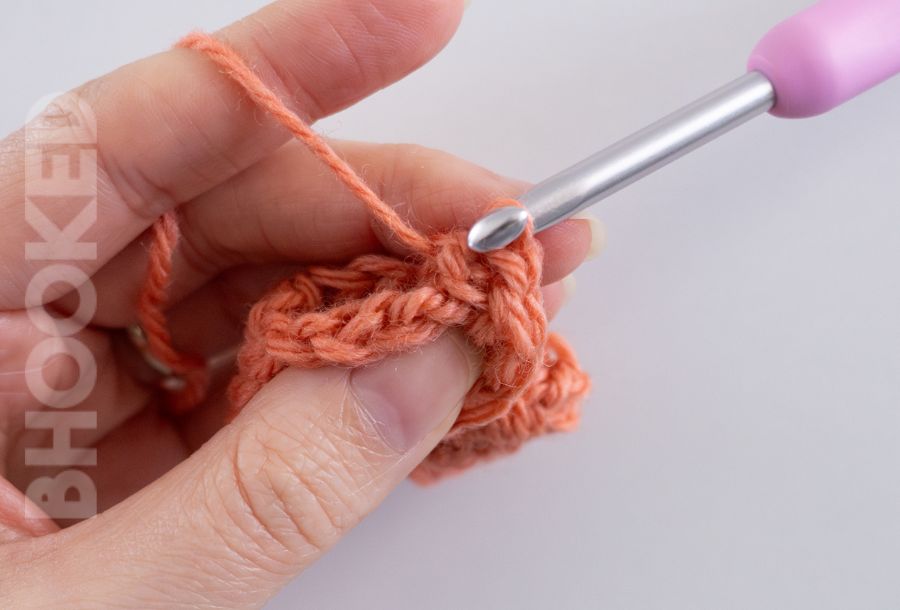
Round 1: Ch 4. Slst to the first ch to join the round. Ch 1 (doesn’t count as a st) and make 7 sc in the center of the ring. Slst to the first sc to join the round. (7 sts)
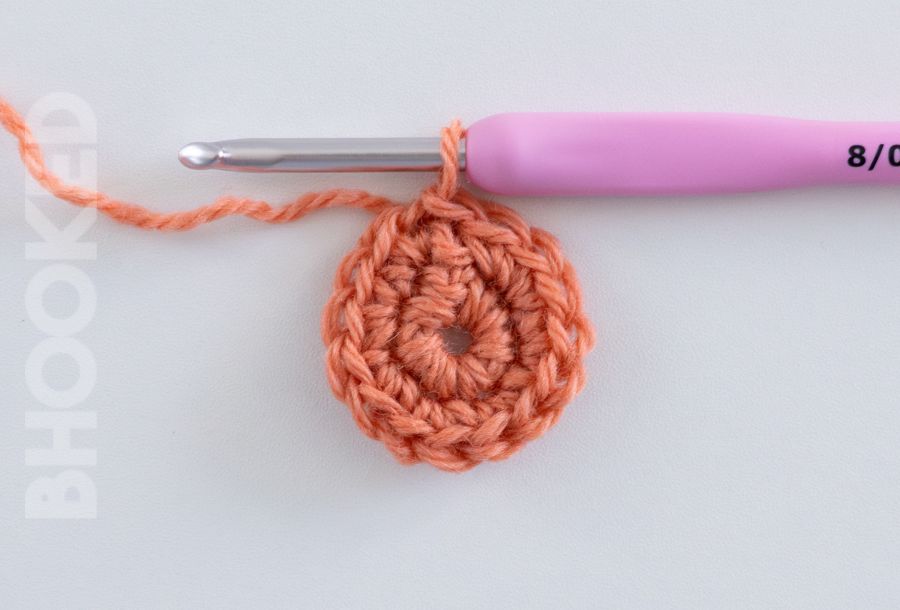
Round 2: Ch 1 (doesn’t count as a st) and make 2 sc in the same st. Then make 2 sc in each st to last. Make 3 sc in the last st. Slst to the first sc to join the round. (15 sts)
Round 3: Ch 7 (counts as a dc and a ch 4-sp). Sk 2 sts, and dc in the next st. *Ch 4, sk 2 sts, and dc in the next st. Rep from * to the last 2 sts. Ch 4, and slst to the third ch to join the round. Remove the hk from the working loop, but continue to hold the loop so you don’t lose any sts.

Round 4: Insert the hk in the sc directly next to the ch 3 of the prev round. Keep the hk in front of the ch, and pick up the working loop. Pull this loop through the st.

Then make 12 dc in the ch 4-sp.
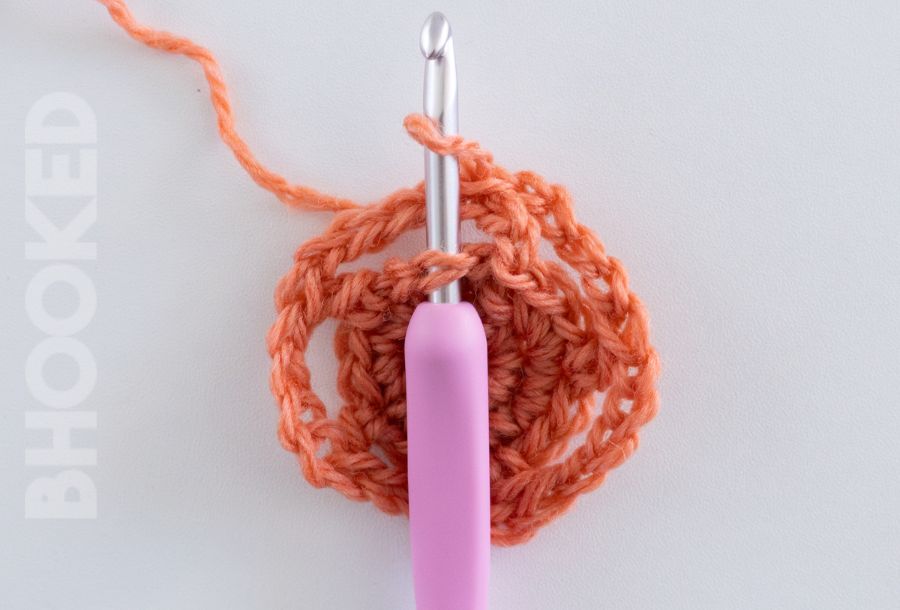
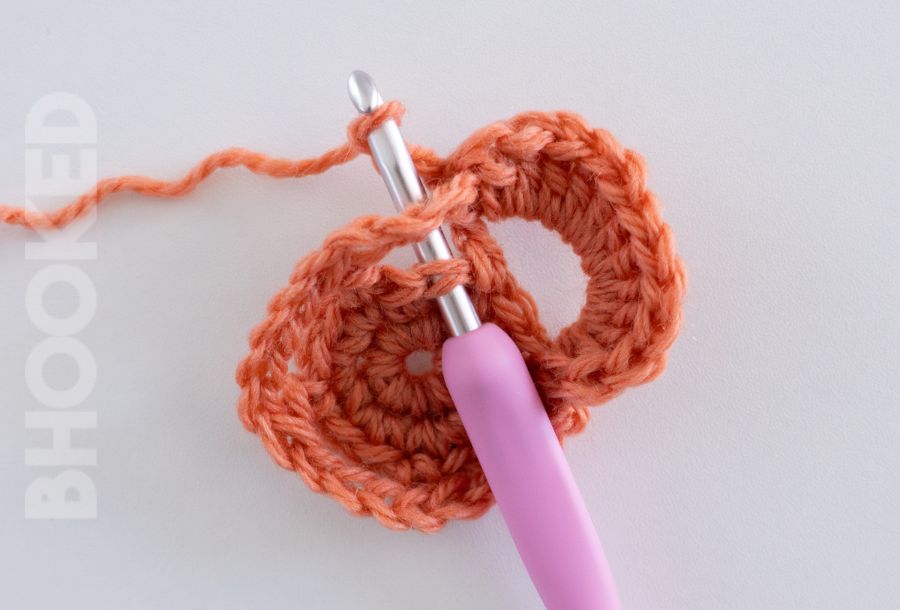
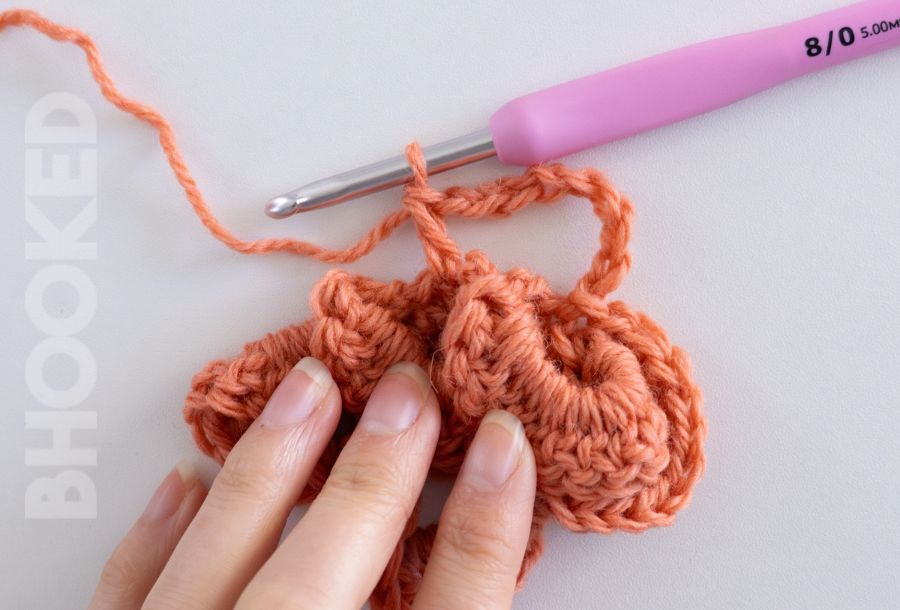
Place the hk in front of the next dc from back to front (similar to a back post double crochet), then YO and pull through the loop on the hk to secure the petal to the back. (Tutorial minute mark: 06:47)
*Ch 3. Then remove the hk from the loop. Then insert the hk in the sc next to the dc (near the join from the previous petal) in the prev round. Keep the hk behind the chain, and pick up the loop. Then pull the loop through the st.
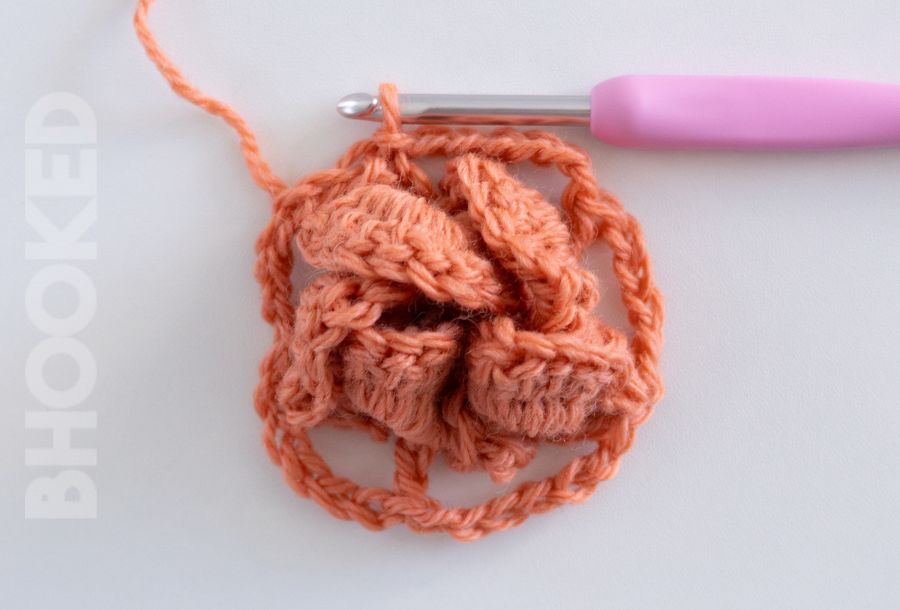
Make 12 dc in the ch 4-sp. Then place the hk in front of the next dc from back to front (similar to a back post double crochet), YO and pull through to secure the petal to the back. Rep from * three more times for a total of 5 petals. (Tutorial minute mark: 09:15)

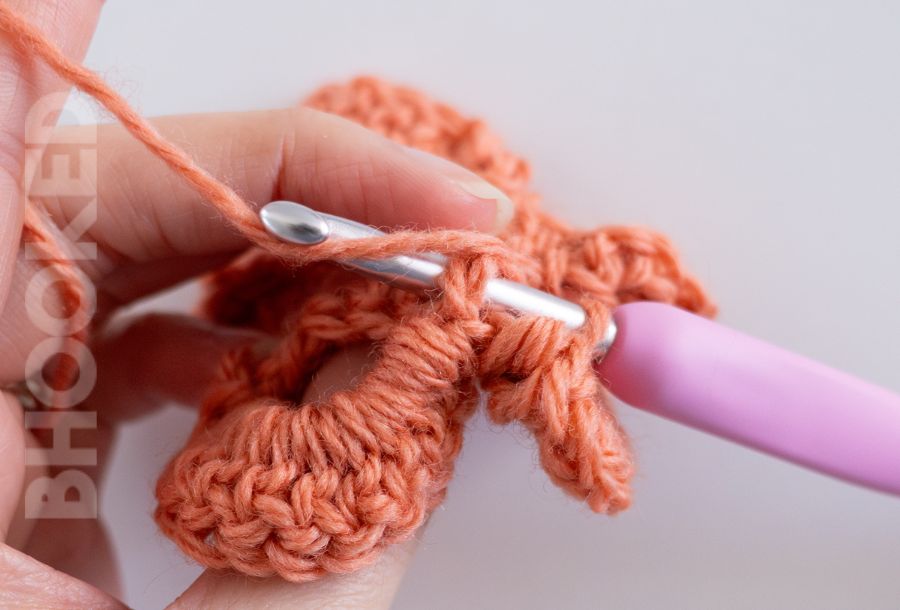
To secure last petal, place the hk in front of the next dc from back to front (similar to a back post double crochet), the YO and pull through to secure the petal to the back. (Tutorial minute mark: 12:13)
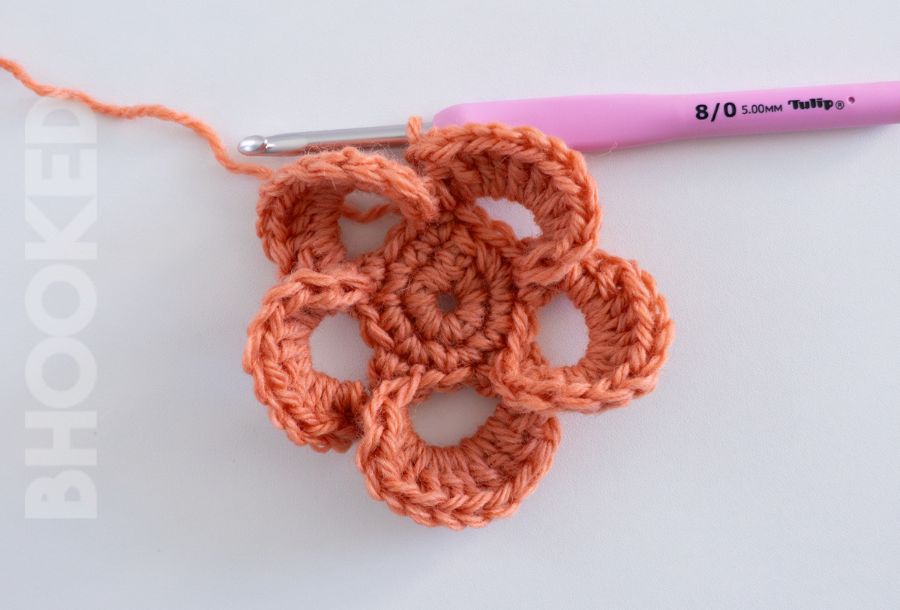
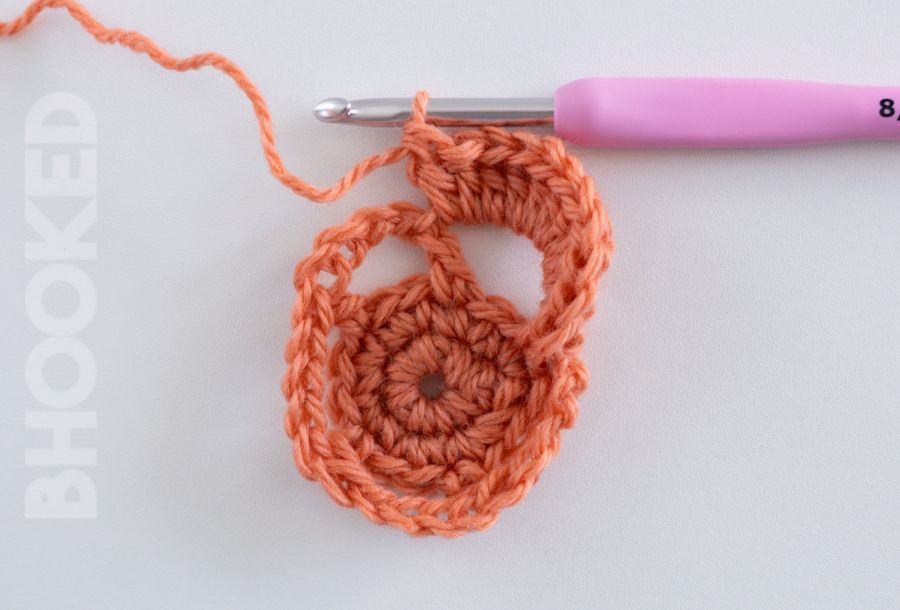
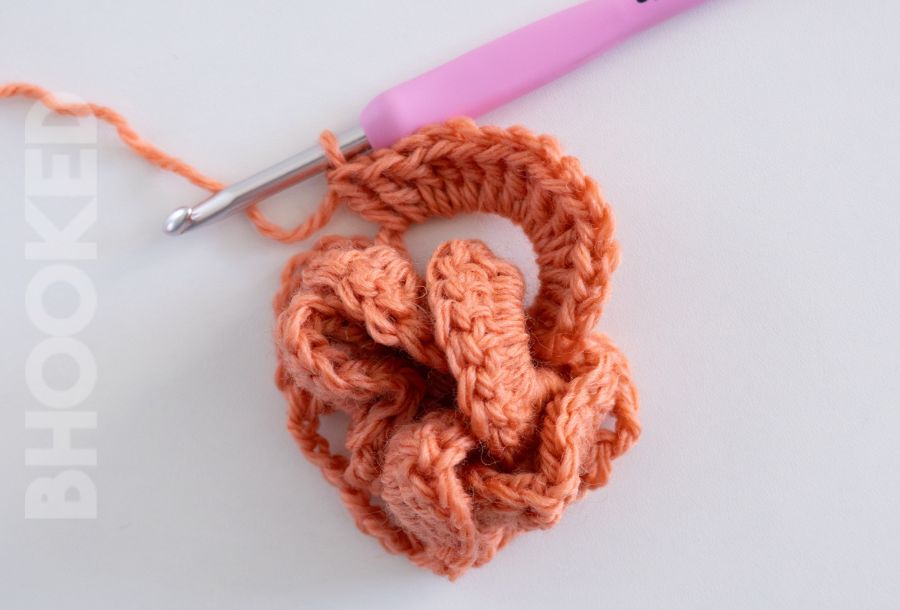
Round 5: Fold the first layer of petals down. The slst in the next sc of round 2. Ch 9 (counts as a dc and a ch 6), and sk to the next petal. Make 1 dc in the next sc from round 2.
*Ch 6, and sk to the next petal. Then make 1 dc in the next sc from round 2. * Rep from * to the last petal. Ch 6, and slst to the third ch to join the round. (Tutorial minute mark: 13:15)
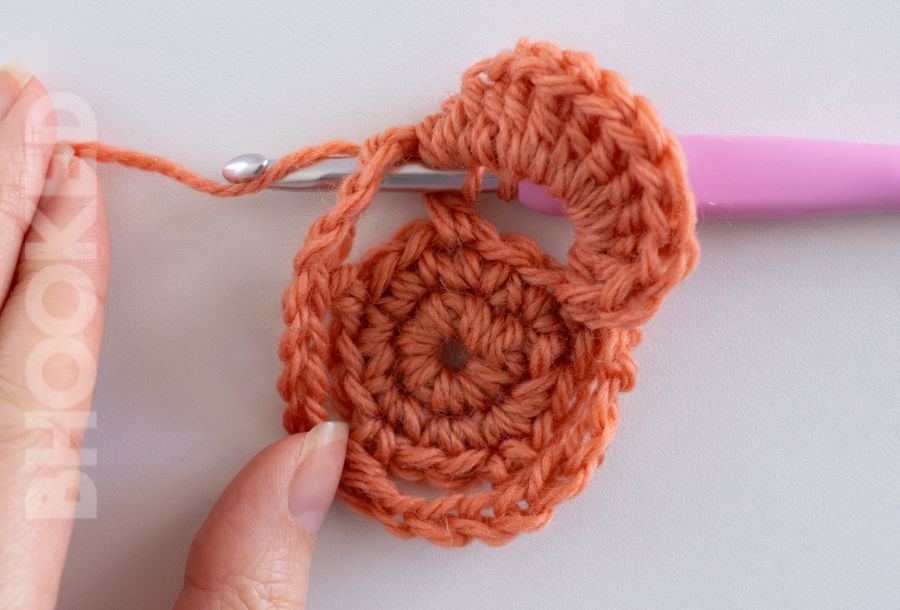
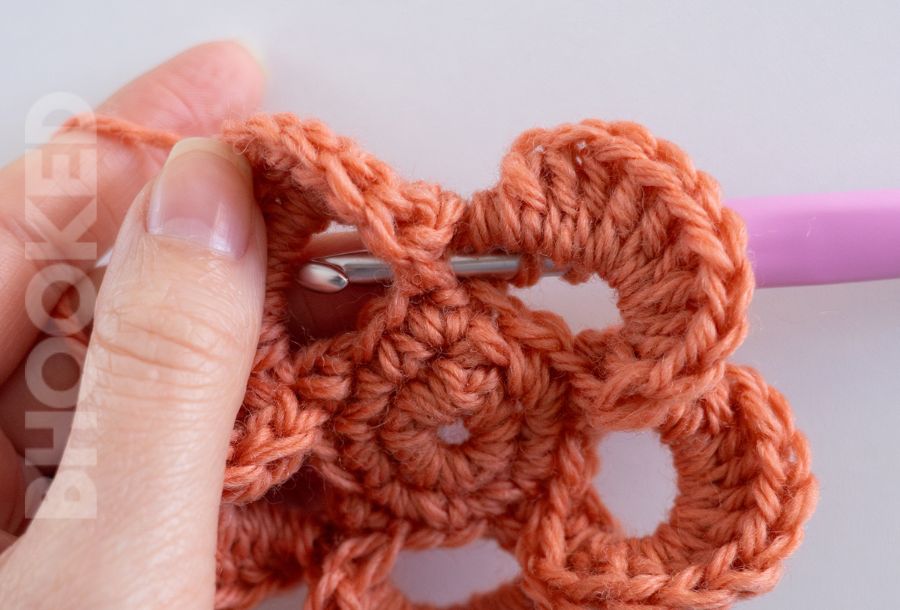
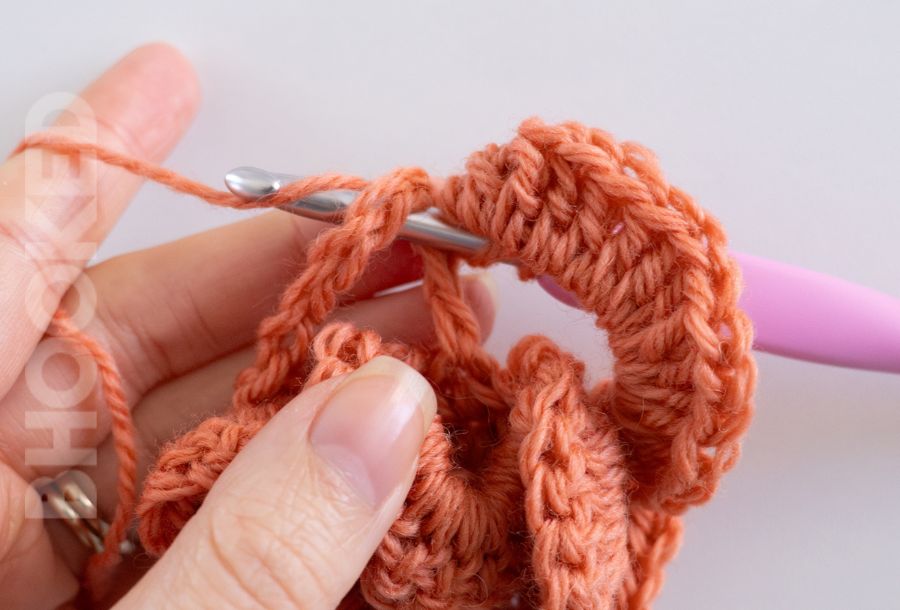
Round 6: Remove the hk from the working loop, and insert the hk in the same sc as the last dc from the previous round. Keep the hk in front of the ch, pick up the working loop, and pull through the st. Then make 16 dc in the ch 6-sp.

Place the hk in front of the next dc (similar to a back post double crochet), YO and pull through the loop on the hk to secure the petal to the back. (Tutorial minute mark: 16:03)

*Ch 3, and remove the hk from the working loop. Then insert the hk in the same sc as the next dc from round 5. Keep the hk in front of the ch, pick up the working loop, and pull it through the st. Then make 16 dc in the ch 6-sp. Then place the hk in front of the next dc from back to front (similar to a back post double crochet), then YO and pull through to secure the petal to the back. Rep from * three more times for a total of 5 petals. (Tutorial minute mark: 17:43)

To secure the last petal, wrap the hk from the back to front (similar to a back post double crochet), YO and pull through to secure the petal to the back. (Tutorial minute mark: 18:24)
Finishing the Realistic Crochet Flower
Once you’re done with round 6, fasten off and weave in those loose ends. If your flower doesn’t seem perfect right off the hook, no worries. It might look a bit scrunched up from being held while you crocheted it. Just use your hands to flatten it out and do some finger blocking.
If it’s still not quite what you want, wet blocking is another option! If you’re not sure about blocking, check out this article I have that explains everything you need to know about it!
To make your flower look even more life-like, try hot gluing a bead or button to the center or adding floral stamens!
TERMS OF USE:
This pattern is for personal use only. You agree not to modify, publish, transmit, sell, create derivative works or in any way exploit any of the content within this page, in whole or in part. If you wish to share this pattern, share a link to this webpage only. You may sell finished items made from this pattern.
Copyright, B.Hooked Crochet, LLC
How to Crochet a Realistic Crochet Flower (Tutorial)
Video not displaying? Watch this tutorial on YouTube instead.
More Quick & Easy Crochet Tutorials + Free Patterns
- Simple Crochet Bag
- Easy Crochet Snowflake
- Crochet Butterfly
- Crochet Rose
- 3D Crochet Flower
- Simple Crochet Mug Cozy
- Simple Round Crochet Placemats
- Small Crochet Heart