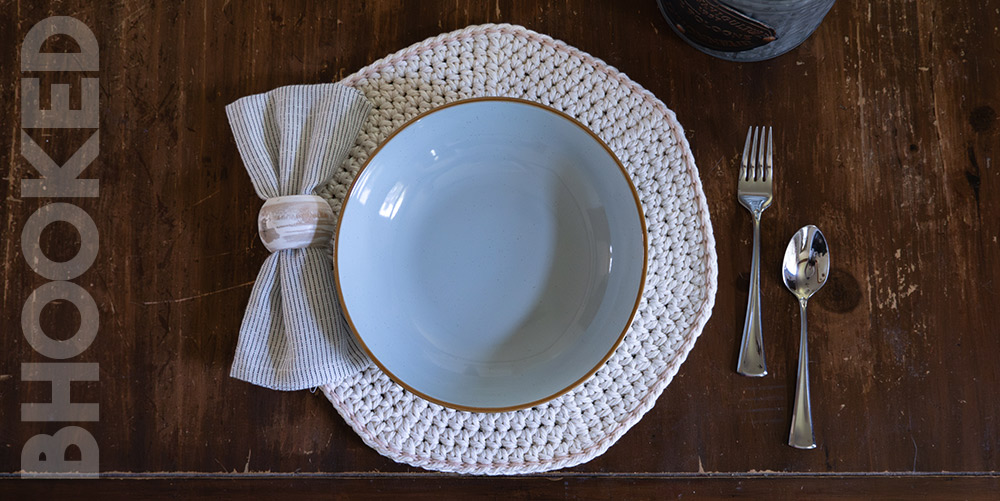
Learn how to make perfect farmhouse-style crochet placemats using macrame cord with this free pattern and step-by-step guide. You can see the pattern for free on this page, or you can buy the ad-free, printable PDF from our shop.
UPDATED: JUNE 4, 2024 BY BRITTANY
This post may contain affiliate links. See our Disclosure Policy for more information.
SAVE TO PINTEREST
Skill Level | Easy
Size | About 13″ Diameter
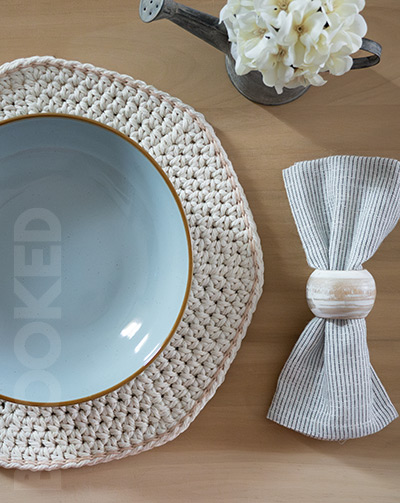
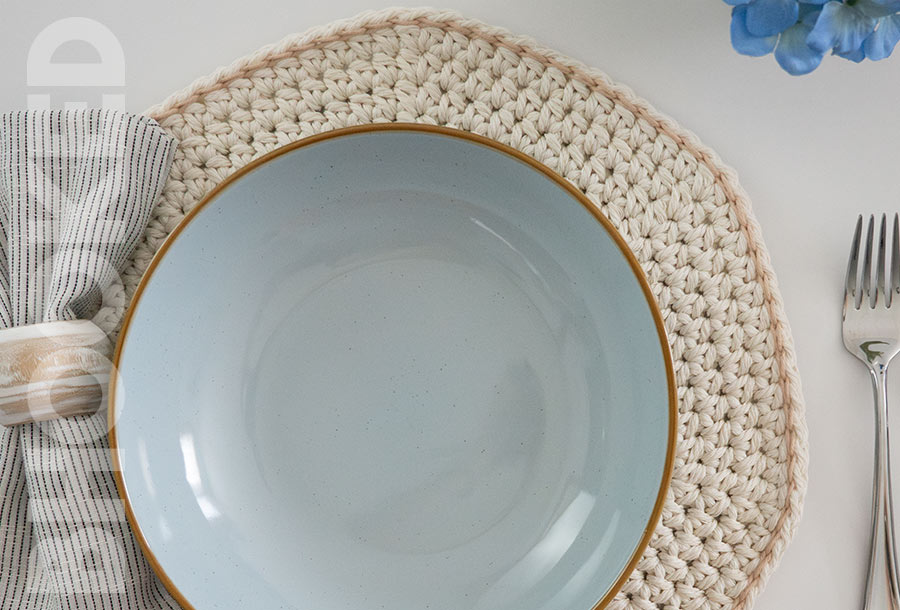
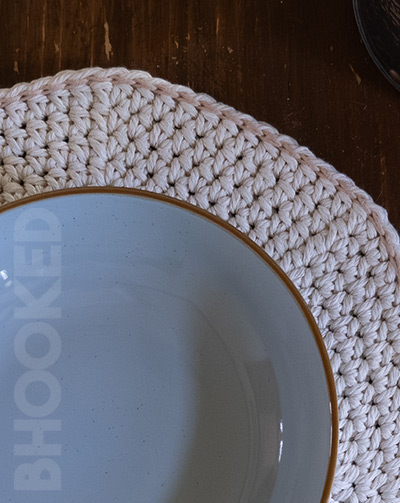
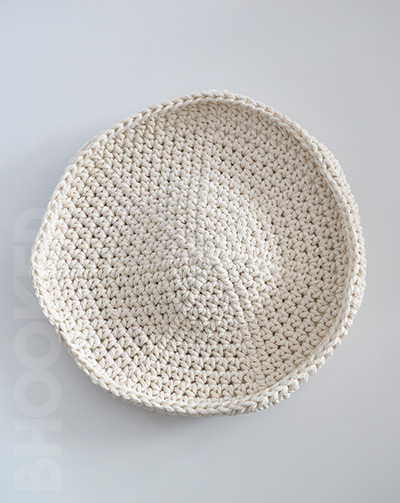
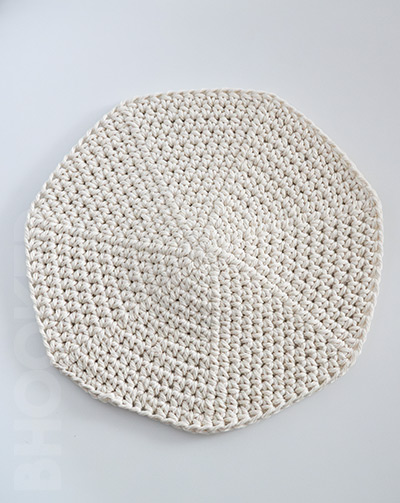
When I don’t have a lot of time to crochet but still want to make something useful, crochet placemats are my go-to. They come together really quickly, so they’re perfect for when your schedule is a little hectic.
My table just wouldn’t be complete without them. They protect the table and add the most adorable handmade charm.
My farmhouse crochet placemats reflect the style throughout my home. If you like boho or farmhouse decorations, this project is perfect! It’s a fun pattern that’s pretty easy to crochet, even if you don’t have a lot of experience yet.
About this Farmhouse Crochet Placemats Pattern
The key to these perfect little crochet placemats is the 3 mm macrame cord used for crocheting them. It’s absorbent, strong, and pretty easy to work with. You might feel a bit of hand fatigue, like when using super bulky yarn, but it’s totally worth the extra effort. I just break them up into two or three short crochet sessions, which usually fits better into my busy schedule anyway. Macrame cord lays flatter than any other material I’ve tried for crocheting placemats!
In the pattern below, you’ll find instructions for how to crochet these pretty and practical crochet placemats. For more details and answers to common questions, keep reading, or jump straight to the free pattern.
Pattern Overview:
- Supplies
- Buy the ad-free, printable pattern
- Abbreviations
- Pattern Notes
- Gauge and Finished Size
- Farmhouse Crochet Placemats Pattern Instructions
- Finishing Your Crochet Placemats
- How to Make Perfect Crochet Placemats Step-by-Step (Video)
- More Quick & Easy Tutorials + Free Patterns
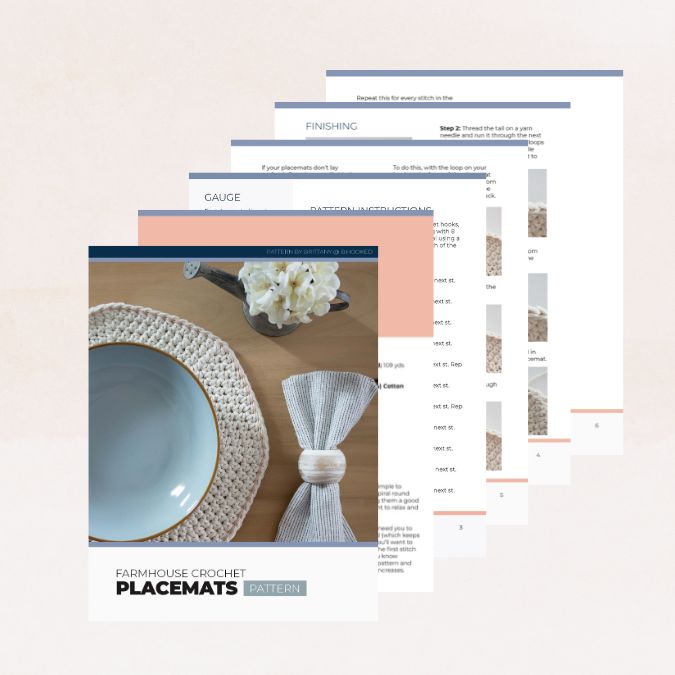
You can view the pattern for free on this page. But, if you prefer having a digital copy that you can save or print, we’ve got you covered with that option as well.
If you’d like to support our work here at B.Hooked, purchasing the digital pattern is a wonderful way to do so!
Recommended Supplies
- About 109 yds each placemat; 3 mm Macramé Cord
- About 5 yds Medium-Weight (#4) Cotton Yarn
- 6 mm Crochet Hook (Placemats)
- 4 mm Crochet Hook (Border)
- Jumbo Yarn Needle
- Stitch Marker
- Scissors
Macrame cord makes these crochet placemats strong and very useful, so it’s worth trying! I think you’ll be happy with the results. I used this 3 mm macrame cord that I bought on Amazon. It comes in a nice range of colors and has enough yardage to make a few placemats. The color in the pictures is called “beige,” which is a classic color for many macrame projects.
If you need to use something else, you can try using two strands of medium-weight (#4) cotton yarn, but it might affect the size. If your gauge doesn’t match, you may need to add another strand of cotton or adjust the hook size to match the gauge. That way, they’ll turn out the right size.
Abbreviations
This pattern is written using standard US crochet terminology.
- Ch Chain
- Hdc Half Double Crochet
- Hk Hook
- Rem Remaining
- Rep Repeat
- Sc Single Crochet
- Sk Skip
- Slst Slip Stitch
- St(s) Stitch(es)
Pattern Notes
These crochet placemats are pretty simple to make. They are worked in a spiral round using only one stitch, making them a good project for when you just want to relax and enjoy crocheting.
Since these placemats don’t need you to join at the end of every round (which keeps them from looking messy), you’ll want to use a stitch marker to mark the first stitch of every round. This helps you know exactly where you are in the pattern and keeps you on track with the increases.
I like using these locking stitch markers, but you can use anything you like. A bobby pin will even work!
You might notice your placemat curling as you crochet it, and it might not want to lay flat at first. But that’s the beauty of macrame cord. With just a little pressure, you can flatten them completely, and they’ll usually stay flat without needing to be blocked.
Gauge & Finished Size: Your placemats will be around 13 inches in diameter, but they might be a little bigger depending on how tight you crochet. If your first four rounds measure about 4 inches in diameter, they should end up about 13 inches when you finish them. Since the exact size isn’t crucial, don’t stress too much if your gauge doesn’t match perfectly.
If you need to adjust your hook size to get your first four rounds to be about 4 inches, you can easily go up or down a hook size and still crochet these placemats without any trouble.
Farmhouse Crochet Placemats Pattern Instructions
Round 1: With the bigger of the two crochet hooks, and the macrame cord, make a magic ring with 8 hdc. Don’t join. Continue working in a spiral using a stitch marker to keep track of the first stitch of the round. (8 sts)
Round 2: Make 2 hdc in every st. (16 sts)
Round 3: *1 hdc in the next st. 2 hdc in the next st. Rep from * to end of round. (24 sts)
Round 4: *1 hdc in the next 2 sts. 2 hdc in the next st. Rep from * to end of round. (32 sts)
Round 5: *1 hdc in the next 3 sts. 2 hdc in the next st. Rep from * to end of round. (40 sts)
Round 6: *1 hdc in the next 4 sts. 2 hdc in the next st. Rep from * to end of round. (48 sts)
A digital pattern is available in our shop so you can print out the pattern
Round 7: 1 hdc in the next 5 sts. 2 hdc in the next st. Rep from * to end of round. (56 sts)
Round 8: 1 hdc in the next 6 sts. 2 hdc in the next st. Rep from *to end of round. (64 sts)
Round 9: 1 hdc in the next 7 sts. 2 hdc in the next st. Rep from * to end of round. (72 sts)
Round 10: *1 hdc in the next 8 sts. 2 hdc in the next st. Rep from * to end of round. (80 sts)
Round 11: *1 hdc in the next 9 sts. 2 hdc in the next st. Rep from * to end of round. (88 sts)
Round 12: *1 hdc in the next 10 sts. 2 hdc in the next st. Rep from * to end of round. (96 sts)
Round 13: *1 hdc in the next 11 sts. 2 hdc in the next st. Rep from * to end of round. (104 sts)
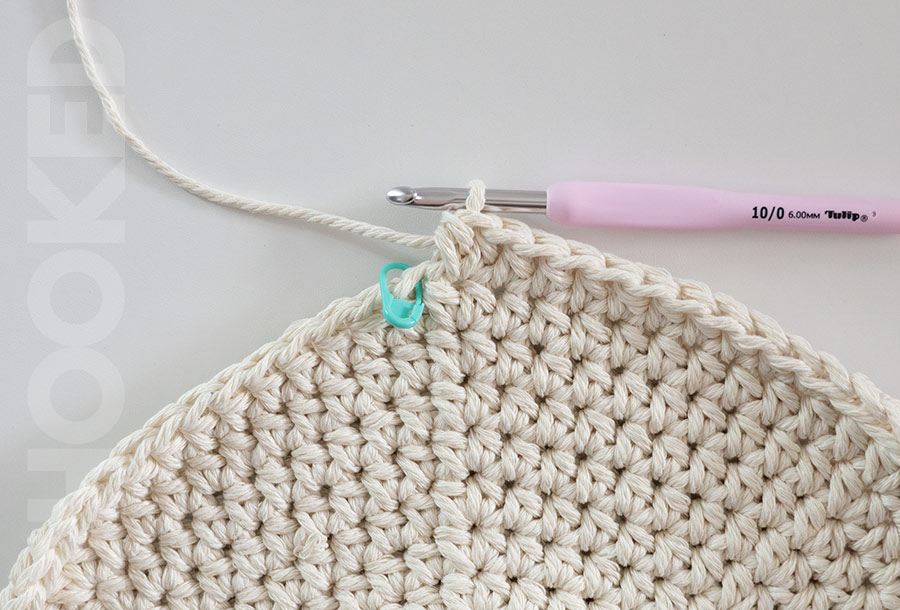
When you finish crocheting the last round, you’ll notice a “jog”, and unevenness since we didn’t join at the end of every round. This is easy to fix!
Just make 1 sc in the next 4 sts. Then slst in the next 2 sts. This will gradually blend in the difference in height from the two rounds.
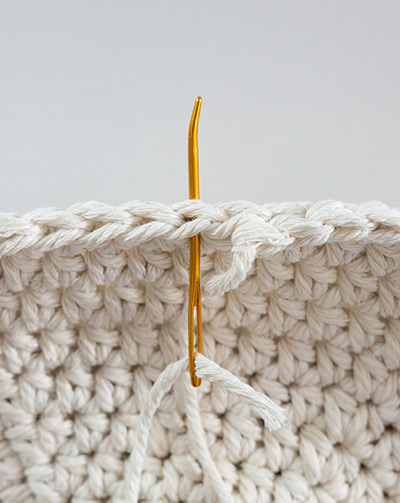
When you fasten off, there’s a neat trick you can do to get a completely seamless finish. That way your placemats look nice and tidy. It’s called the invisible seam. Here’s how to do it:
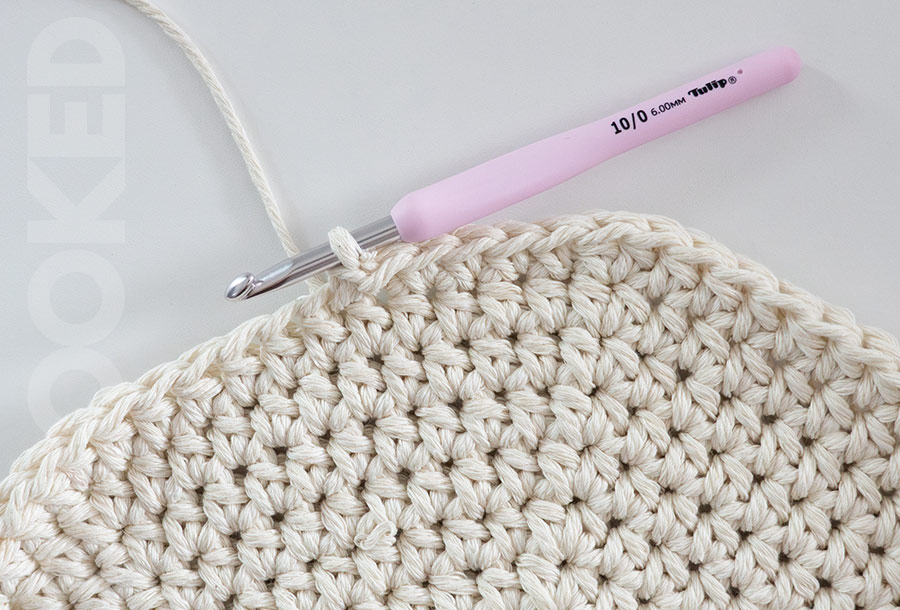
Step 1: Cut the cord leaving about a 6″ tail. Then pull the loop on your hook all the way up, until the tail comes through it.
Step 2: Thread the tail on a yarn needle and run it through the next stitch over, catching both loops of the stitch, and running the needle from the front of the placemat to the back.
Step 3: Run the needle down through the previous stitch, from top to bottom, catching just the inner loop.
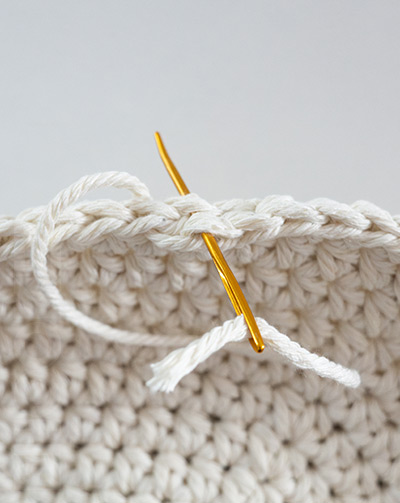
Step 4: Finish weaving the tail in along the back side of the placemat.
If your placemats don’t lay perfectly flat when you finish them, don’t worry! You can usually press them out with your hands and the shape improves a lot.
If you find that the edges are a little stubborn, you can wet the placemat, lay it on a flat surface like your countertop, and place a heavy object on top.
Let them dry fully and they should lay perfectly flat.
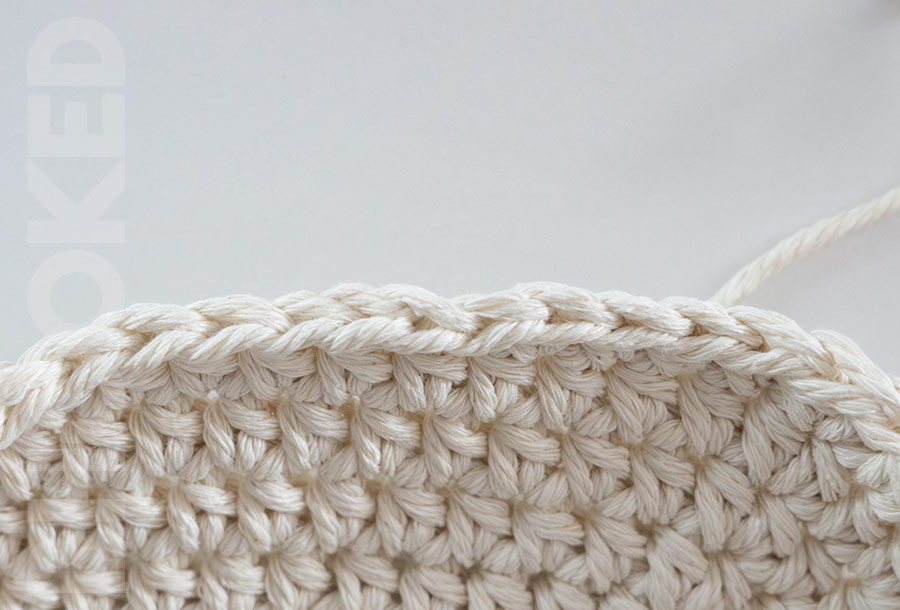
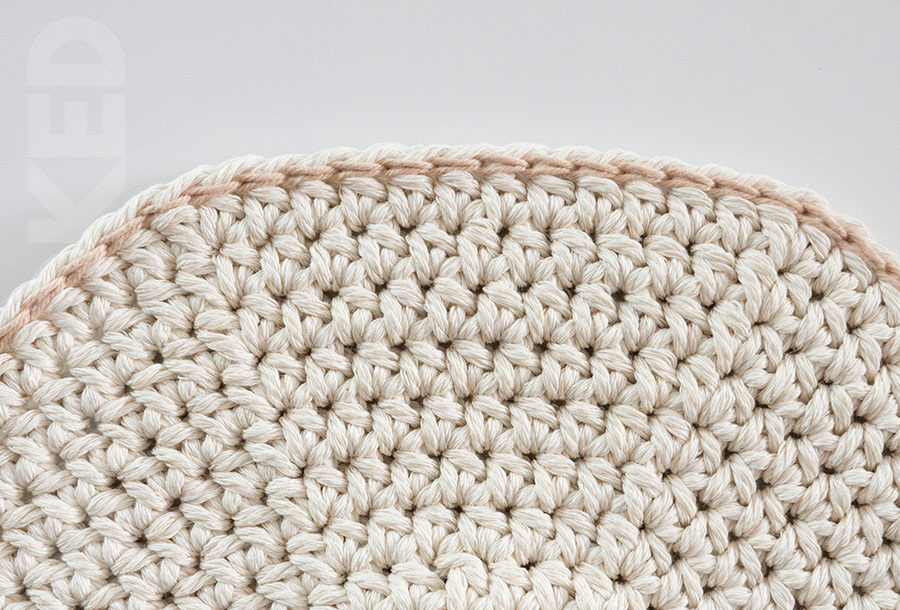
Crocheting the Border
With the smaller of the two crochet hooks and the cotton yarn, join in any of the round 13 stitches using both loops. Instead of crocheting stitches normally, this border uses the surface crochet stitch.
To do this, with the loop on your hook at the front of the placemat and the working yarn coming from the back, insert the hook into the next stitch over, from front to back.

Yarn over, and pull up a loop to the front of the placemat.
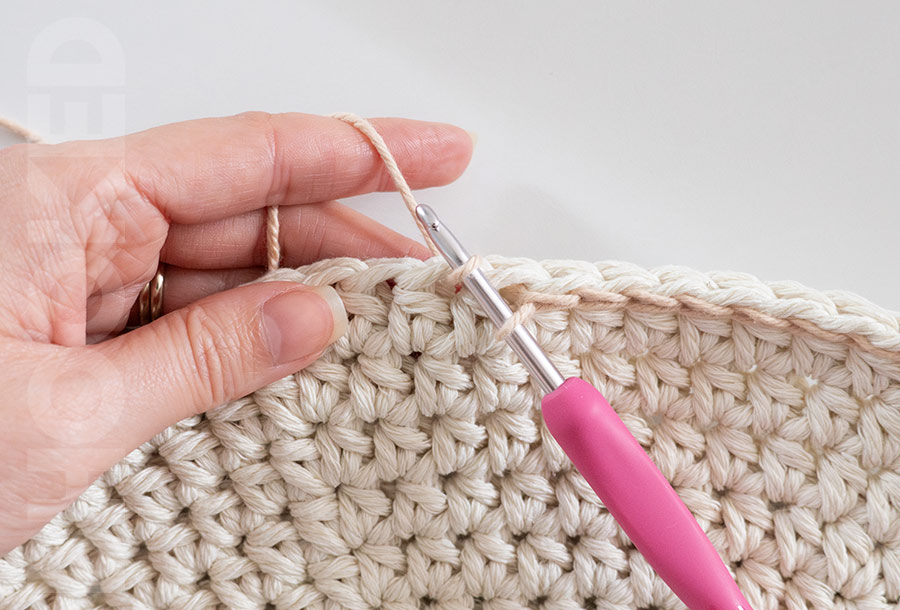
Then loosely pull that loop through the loop on your hook.

Repeat this for every stitch in the last round of the placemat, fasten off, and weave in your ends.
By using this pattern, you agree to our terms of use:
This pattern is for personal use only. You agree not to modify, publish, transmit, sell, create derivative works or in any way exploit any of the content within this page, in whole or in part. If you wish to share this pattern, share a link to this webpage only. You may sell finished items made from this pattern.
Copyright, B.Hooked Crochet, LLC
Making Perfect Crochet Placemats with Macrame Cord
Video not displaying? Watch this tutorial on YouTube instead.
More Crochet Tutorials + Free Patterns for Spring & Summer
- Perfect Crochet Coasters with Macrame Cord
- Easy Crochet Kitchen Towel
- Simple Cotton Yarn Crochet Basket
- Quick Canvas Bag DIY with Granny Squares
- How to Make a Simple Crochet Bag
- Perfect Crochet Placemats with Macrame Cord
- Farmhouse Crochet Table Runner
- One Hour Crochet Bowl with T-Shirt Yarn
- Farmhouse Crochet Placemats