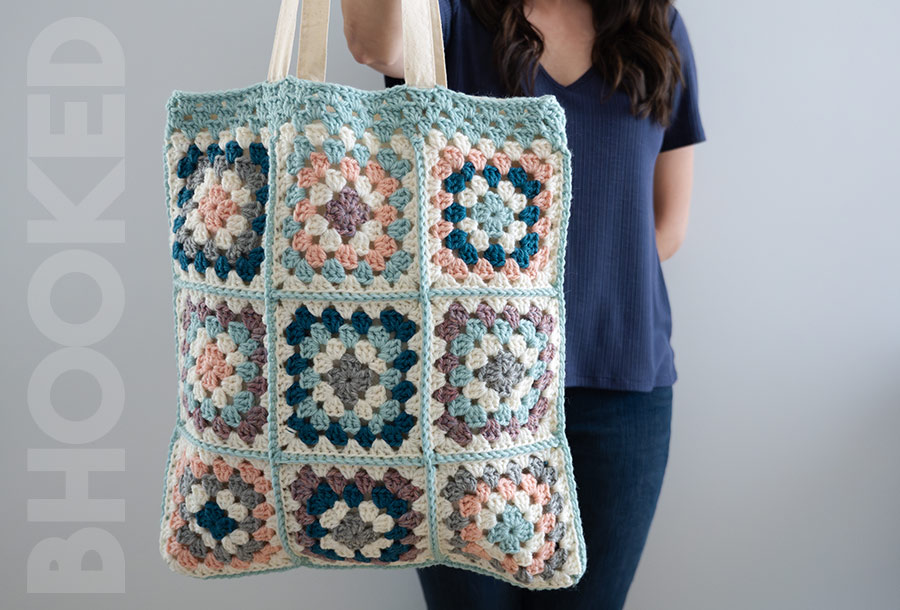
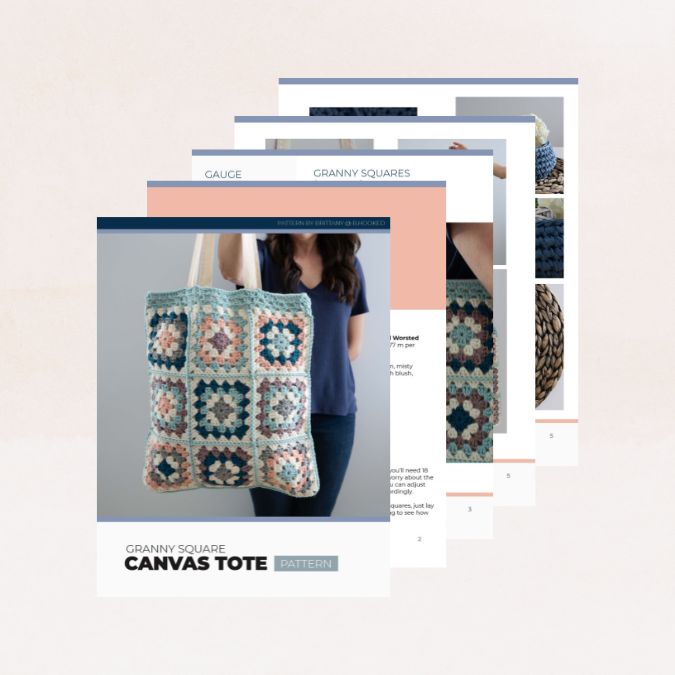
Ever noticed those plain canvas bags at craft stores? They’re cheap and great for lining crochet bags! In this fun canvas bag DIY project, I’ll guide you through creating your own canvas granny square bag! You can find the free pattern on this page or get the ad-free, printable version from our shop.
UPDATED: APRIL 11, 2024 BY BRITTANY
This post may contain affiliate links. See our Disclosure Policy for more information.
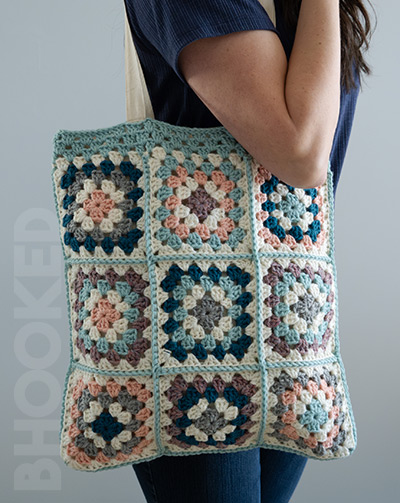
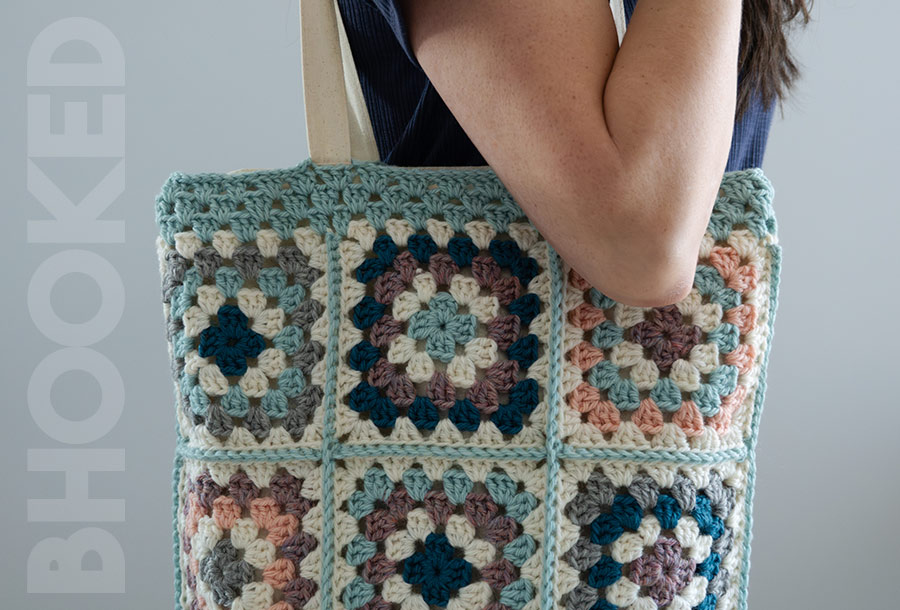
I’ve always found granny squares to be a great grab-and-go project. If you have a bunch of them lying around like I do, you’ll love this bag idea!
Putting a plain canvas tote inside your granny square bag makes it strong enough to carry all your stuff. Once you try it, you won’t want to make a bag any other way.
It’s a lot of fun and you don’t have to have a lot of experience either!
Here is a quick overview of the topics we’ll cover in this article:
- About this Quick Canvas Bag DIY
- Granny Square Canvas Bag DIY Pattern
- Buy the ad-free, printable pattern
- Supplies
- Project Notes
- Granny Square Pattern Instructions
- How Many Squares Do You Need?
- How Big Should Your Squares Be?
- More Squares Options to Use
- How to Join the Squares Together
- Canvas Bag DIY: Attaching the Handles
- Canvas Bag DIY with Granny Squares Video
- More Granny Square Project Ideas
About this Quick Canvas Bag DIY
I had a blast making this project! It’s so much fun to mix and match colors and styles to create a bag that’s uniquely yours.
You don’t have to stick with the classic granny square either. Feel free to use any crochet square pattern you prefer! I’ve included plenty of resources on this page so you can recreate the bag you see here or design one that’s even better suited to your taste.
Granny Square Canvas Bag DIY Pattern
Using a canvas bag inside crochet bags has totally transformed how I see them! There are so many options to play with – different shapes, sizes, and ways to put together your squares. Plus, you can have fun picking out yarn colors!
Supplies
- Yarn: I used medium-weight (#4) yarn for the bag in the pictures, but feel free to try other yarn weights too!
- Crochet Hook: I used a 4 mm hook for the granny squares and joins. Using a slightly smaller hook can make neater squares. If you change yarn weight, go one hook size smaller than recommended.
- Canvas Tote: For the same bag, you’ll need a 15″ x 16″ canvas tote. I ordered this set on Amazon. I’ll also guide you on adjusting for different bag sizes.
If you want to make a bag that looks just like mine, you’ll want to get some Patons Classic Wool Worsted yarn. I love the color options they have available! The colors I used are aran, misty green, rich teal, peach blush, gray mix, and the pink color you see is sadly no longer available, but you could use scarlet or rose for a similar look!
Granny Square Pattern Notes
- Each double crochet cluster is worked in the space between two clusters of the previous round. So you won’t be crocheting directly into stitches for this pattern.
- The side facing you as you crochet is considered the right side of the granny square.
- This crochet pattern is written in US terms.
Three Ways to Start a Granny Square
There are three ways to start the first round: starting in a single chain, starting in a center ring, or using the magic loop. While each option is perfectly acceptable, we prefer to start our granny squares with a center ring. The ring provides enough space to fit all the stitches of the first round, and it’s much more approachable for a beginner than a magic ring.
Stitch Abbreviations
Before you start crocheting, get familiar with the abbreviations below. These are the abbreviations you’ll see in the pattern. For reference, this pattern is written in US terms.
- Bet | Between
- Ch | Chain
- Dc | Double Crochet
- Rem | Remaining
- Slst | Slip Stitch
- Sp | Space
- St(s) | Stitch(es)
Granny Square Pattern Instructions
Round 1: Ch 3. Join with a slst to the first ch. Ch 5 (counts as dc and ch 2 throughout). In the center of the ring [3 dc, ch 2] 3 times. 2 more dc in the center of the ring and join with a slst in ch-5 sp. Optional: break color A and join color B in the opposite corner.
Round 2: Ch 5. In ch-2 sp, 3 dc. [In next ch-2 sp (3 dc, ch 2, 3 dc)] 3 times. In the first ch-2 sp make 2 dc. Join with a slst in ch-5 sp. Optional: break color B and join color C in the adjacent corner.
Round 3: Ch 5. In ch-2 sp, 3 dc. *In sp bet next 2 dc clusters, 3 dc. In next ch-2 sp (3 dc, ch 2, 3 dc). Rep from * two more times. In sp bet next 2 dc clusters, 3 dc. In the first ch-2 sp make 2 dc. Join with a slst in ch-5 sp. Optional: break color C and join color D in the opposite corner.
A digital pattern is available in our shop so you can print out the pattern
Round 4: Ch 5. In ch-2 sp, 3 dc. *[In sp bet next 2 dc clusters, 3 dc] twice. In next ch-2 sp (3 dc, ch 2, 3 dc). Rep from * two more times. [In sp bet next 2 dc clusters, 3 dc] twice. In the first ch-2 sp make 2 dc. Join with a slst in ch-5 sp.
Round 5: Ch 5. In ch-2 sp, 3 dc. *[In sp bet next 2 dc clusters, 3 dc] three times. In next ch-2 sp (3 dc, ch 2, 3 dc). Rep from * two more times. [In sp bet next 2 dc clusters, 3 dc] three times. In the first ch-2 sp make 2 dc. Join with a slst in ch-5 sp.
Finishing the Granny Square
After finishing the last round, cut the working yarn (leaving a long enough tail to weave in). Pull the tail through the last stitch to secure it. Then use a yarn needle to weave in the loose ends along the back side of the granny square.
If your granny squares look less than perfect, no worries! It’s pretty common for the corners to be a little rounded and the sides to be a little wavy. That’s why we recommend blocking them before you start joining them together.
This process will “set” the stitches into a perfectly square position so your bag will look more polished and professional.

If you have more questions about crocheting granny squares, check out my complete granny square guide here!
How Many Granny Squares Do You Need?
For a bag like mine, you’ll need 18 granny squares. But don’t worry about the size of your canvas bag – you can adjust the number of squares accordingly.
If you prefer planning ahead, the next section will be helpful. Otherwise, if you already have granny squares, just lay them out on your canvas bag to see how many you’ll need.
How Big Should Your Granny Squares Be?
To fit your bag like mine, each of your granny squares should be between 4.75 and 5 inches wide. If your bag is 15 inches wide, you’ll need three granny squares to cover it side to side.
For a bag that’s 16 inches long, like mine, it’s best to use three granny squares from top to bottom. This way, there’s some space left at the top for a little border.
If your bag is a different size, don’t worry! Just find a number that divides evenly into both the width and length of your bag. For instance, if your bag is 12 inches by 12 inches, you can use granny squares that are 2, 3, 4, or 6 inches wide, because these numbers fit nicely into both sides of the bag.
And if your bag isn’t exactly square, like mine, which is 15 inches wide and 16 inches long, you’ll have a bit of extra space at the top. That’s where a border comes in handy!
More Squares to Use In Your Bag
If the classic granny square isn’t quite your style, no worries! You can use any crochet square you like. Here are a few options that I think will work well:
- Solid Granny Square
- Flower Granny Square
- Sunburst Granny Square
- Corner to Corner Square
You can even experiment with other shapes, like this classic hexagon granny square!
How to Join the Squares
Changing how you join your squares can totally transform your bag’s appearance. One method I really liked for its texture is the classic single crochet join.

Step 1: Lay out your granny squares in the order you want them, with the right side facing up.
Step 2: Join the new yarn (I used a contrast color for my bag), in the corner of two granny squares.
Step 3: Using only the front loops of each stitch on both squares, single crochet across, including the corner spaces.
I found it easiest to connect all squares into one big piece first, then fold it into a tube shape and join the ends and bottom.
If the single crochet join isn’t your thing, here are a few other easy joining methods to try. And if you prefer a completely flat seam, give this one a try!
Canvas Bag DIY: Attaching the Handles
Slide your canvas bag into the granny square bag you just made. If there’s some empty space at the top, you might want to crochet a few border rounds to make it easier to attach to the handles.
For my bag, I crocheted three rounds of a simple granny stitch border.
Here’s how: start by joining the new yarn at the side of the bag, in the corner space. Chain three and make two more double crochets in the corner space.
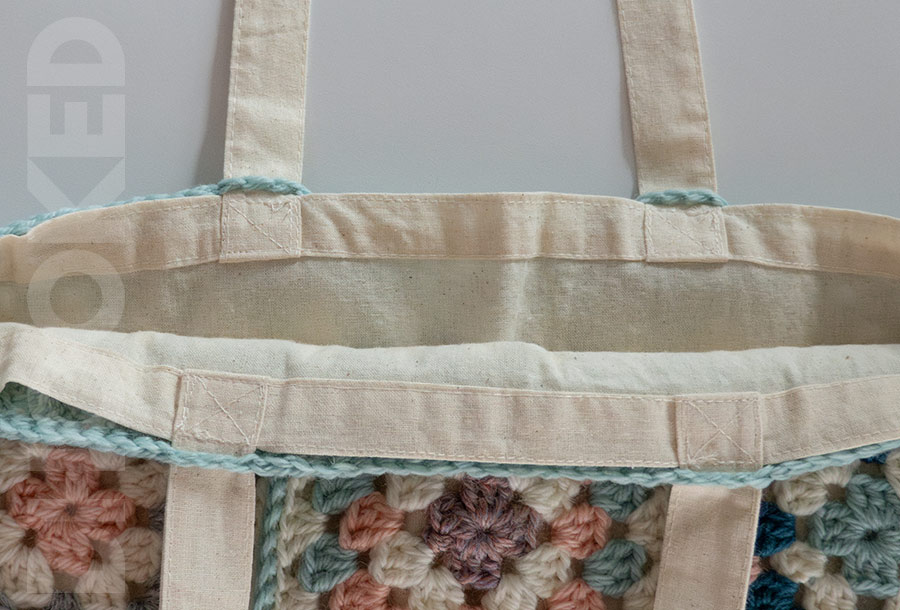
Then, make three double crochets in the space between double crochet clusters. When you reach where two squares are joined, I found it worked best to crochet two double crochets in each corner space instead of three.
To finish the round, join with a slip stitch to the third chain in your first cluster. Add as many rounds as needed to reach the handles of your canvas bag.
For a permanent attachment, I worked one final round where I made slip stitches into every stitch. When I got to a handle of the canvas bag, I made three chains, looped the yarn through the handle, and continued slip stitching along.
It can be a bit tricky to explain all this with just words, so watch the canvas bag DIY video below to see these steps in action!
Canvas Bag DIY with Granny Squares Video
Video not displaying? Watch this tutorial on YouTube instead.
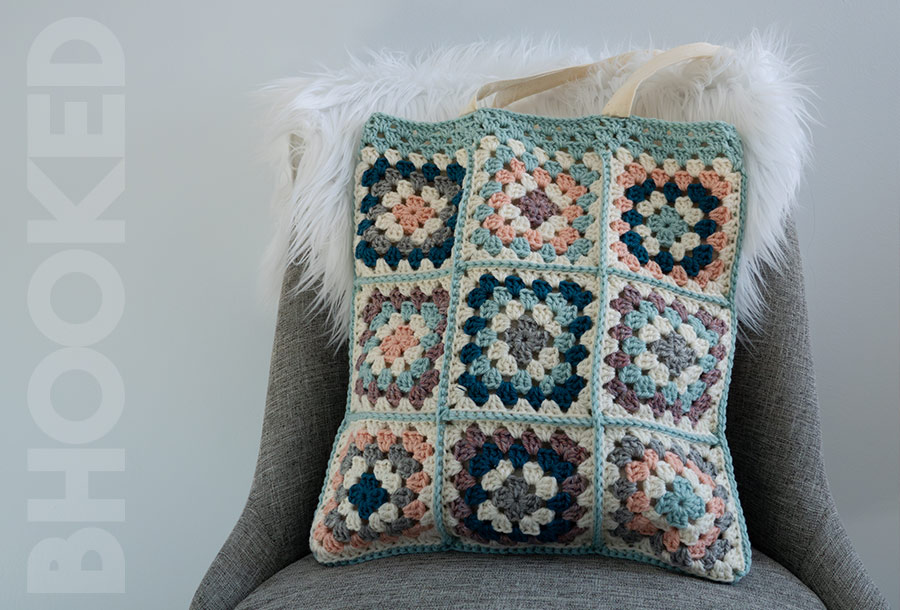
More Granny Square Project Ideas
- Granny Square Pillow
- Simple Granny Square Bag
- Fun Flower Granny Square Tutorial
- Granny Square Plant Cover
)


