How to join granny squares is a skill every crocheter eventually needs, whether you’re making a blanket, bag, or garment. If you’re looking for a join that looks neat, lays flat, and fits your project style, this guide walks you through several simple granny square joining methods. From subtle seams to more decorative joins, you’ll be able to choose the best way to join granny squares based on the look you want and the yarn you’re using.
UPDATED: JANUARY 27, 2026 BY BRITTANY
This post may contain affiliate links. See our Disclosure Policy for more information.
You’ll learn how each method performs — whether you want a flat seam that lies smooth against your work, the best joining method for blankets and bags, or other beginner-friendly joining techniques that make connecting squares easy and satisfying.
Don’t know how to crochet a granny square yet? No worries! I have a beginner-friendly How to Crochet a Granny Square guide that’ll walk you through it step-by-step.
- 1. Join Granny Squares: Single Crochet Method
- 2. Join Granny Squares: Slip Stitch Method
- 3. Join Granny Squares: Invisible Seam Method
- 4. Join Granny Squares: Reverse Single Crochet Method
- 5. Join Granny Squares: Zig Zag Braid Method
- 6: The Join as You Go (Jay-Go) Method
- Five Simple Ways to Join Granny Squares Tutorial Video
- How to Choose the Best Joining Method
- Troubleshooting Common Granny Square Joins
- Frequently Asked Questions About How to Connect Granny Squares
- Not Sure Which Border to Add to Your Granny Square Blanket?
- More Granny Square Tutorials
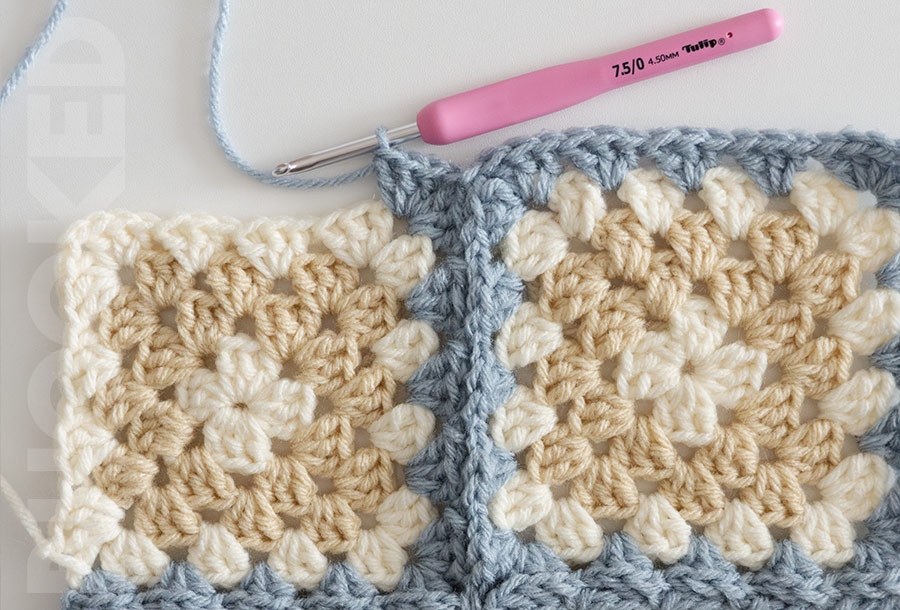
1. Join Granny Squares: Single Crochet Method
In addition to being one of the easiest ways to connect granny squares, the single crochet join creates a bit of extra texture and a secure join that looks great on structured pieces. Connecting granny squares with a single crochet join method is a classic choice. It’s quick, easy, and creates a little texture in your project. Use the same hook that you used to crochet the granny squares for the best results.
To join granny squares with a single crochet:
- Lay the granny squares flat with the right side facing up.
- Join the new yarn in the corner of two granny squares.
- Make a single crochet using the front loops of each stitch on both granny squares, including the spaces between clusters and in the corner space.

Joining squares with a single crochet won’t lay completely flat, so it’s a great choice when you want to add some texture and dimension to your project.
Experiment with using the same color yarn or a contrasting color to see what you like best!
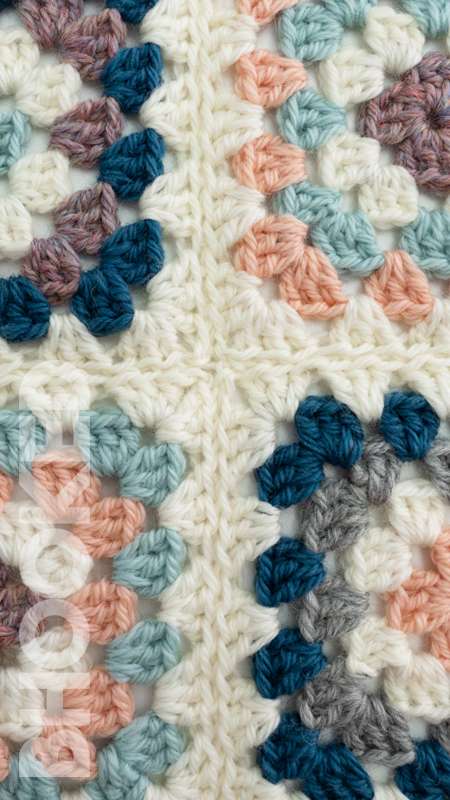
2. Join Granny Squares: Slip Stitch Method
Connecting granny squares with a slip stitch is another classic choice. It will give your join a “braided” appearance. Use the same hook that you used to crochet the granny squares. The slip stitch join gives you a fast granny square join with a subtle braid-like edge and can act as a simple flat join variation when contrasted with your main color.
To join granny squares with a slip stitch:
- Lay the squares flat with the right side facing up.
- Join the new yarn in the corner of two granny squares.
- Make a slip stitch using both loops of each stitch on both granny squares, including the spaces between clusters and in the corner space.

The slip stitch join method is a great choice if you don’t want to sew your squares together with a yarn needle, but still want a simple and elegant join that has a little texture.
Using the same color as the outer round of the granny squares is a classic choice, but using a contrasting color can really make the braid stand out in an interesting way!
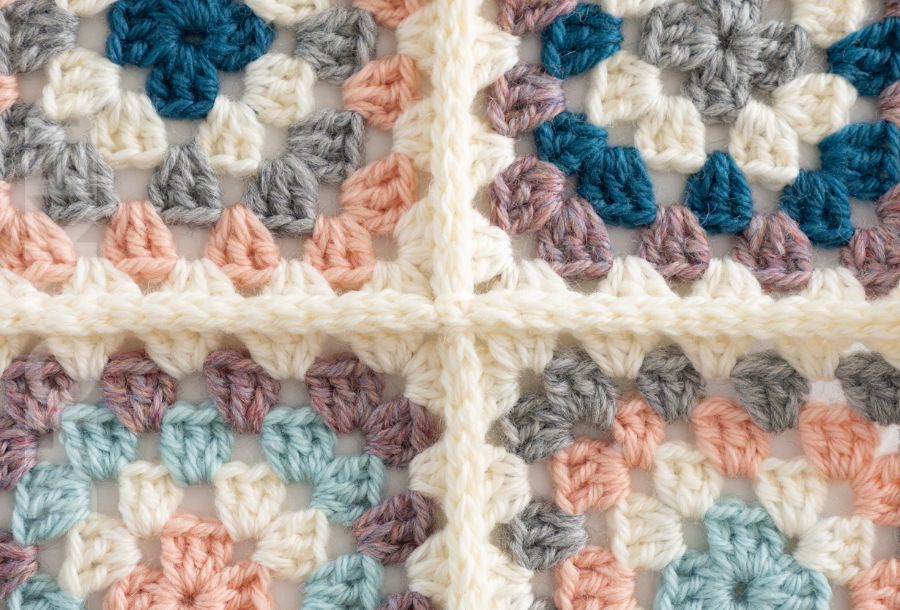
3. Join Granny Squares: Invisible Seam Method
For a truly flat invisible seam and a seamless join that looks like your granny squares are part of one continuous piece, the invisible seam is hard to beat. The invisible seam is the best way to connect squares when you want a completely flat seam. It provides a “fused at the edges” appearance. It’s quick and easy to do and no crochet hooks are required.
To join granny squares with the invisible seam:
- Thread a yarn needle with a long piece of yarn.
- Arrange the squares to be joined on top of one another, with the right sides facing each other
- Catch the back loops of each granny square with the yarn and needle, working in a “back-and-forth” fashion instead of a “whip stitch” fashion.
The invisible seam blends into the last round stitches of the granny square. So for the seam, it’s best to choose a color on one or both of the granny squares you want to join.
For more detailed instructions on how to connect granny squares with the invisible seam, check out my step-by-step guide here.
4. Join Granny Squares: Reverse Single Crochet Method
The reverse single crochet join creates a decorative border option between squares, perfect when the seam is meant to stand out as part of your design. The reverse single crochet join method is the best way to connect granny squares when you want your join to stand out. It leaves a raised and textured line between the squares. Use the same hook that you used to crochet the granny squares.
To join granny squares with the reverse single crochet:
- Lay the squares flat with the right side facing up.
- Join the new yarn in the corner of two granny squares, at the opposite end that you normally would.
- Make a reverse single crochet using the front loops of each stitch on both granny squares, including the spaces between clusters and in the corner space.

It takes some time to get used to making the reverse single crochet. Since you work this stitch in the opposite direction of a regular single crochet, the stitch twists giving it a bumpy texture. This twisting though is what makes it feel awkward to work.
For more detailed instructions on how to crochet the reverse single crochet, check out my step-by-step tutorial here.
5. Join Granny Squares: Zig Zag Braid Method
The zig zag braid method is an openwork join with a lacey join effect that works beautifully on shawls and lightweight blankets. The zig-zag braid joining method is one of the most decorative ways to connect granny squares. It provides a lacey appearance that’s incredibly fast to crochet.
To join squares with the zig zag braid:
- Lay the squares flat with the right side facing up.
- Join the new yarn in the corner of two granny squares.
- Make 3 chains and slip stitch in the space between the next two clusters. Repeat to the opposite corner.

While the zig zag braid is a beautiful way of connecting granny squares, its lacey qualities make it not appropriate for every project type. For example, the extra holes this join creates can catch small fingers and toes if used in a baby blanket.
6: The Join as You Go (Jay-Go) Method
Join as you go lets you join while crocheting, creating a continuous join that eliminates lots of loose ends and feels almost like crocheting one big piece instead of separate squares. If you’re tired of the tedious chore of joining squares one by one, join as you go might become your new favorite method. With join as you go granny squares, you connect them while you’re still crocheting the last round of each square. It feels like you’re simply crocheting without the extra step of joining.
I really like this method because not only does it make the process more enjoyable, but it’s also super versatile. You can use it for all sorts of projects, like blankets, placemats, bags, and cardigans. Basically, join as you go is one of the most flexible techniques out there, and it’s definitely worth learning. Check out my step-by-step guide to give this join a try!
Five Simple Ways to Join Granny Squares Tutorial Video
Video not displaying? Watch this tutorial on YouTube instead.
How to Choose the Best Joining Method
Not all joins work the same for every project! Here’s how to pick the best one based on what you’re making, the yarn you’re using, and the final look you want:
1. Consider the Type of Project: When choosing the best way to join granny squares, it helps to think about whether you want a flat seam, a decorative join, or a sturdier option for projects like blankets, bags, or garments.
- Blankets & Wearables – If you want flexibility and softness, go for a seamless method like the invisible seam which makes it a great flat join for granny squares, especially for blankets.
- Bags & Home Decor – A sturdier, more structured join, like the single crochet join, adds durability and structure, which is great for projects that need more support.
- Openwork Designs – If your squares have lacy edges, a join-as-you-go method or zig zag braid blends best without adding bulk.
2. Match the Yarn Weight
- Lightweight Yarns (Fine/Sport) – Stick to invisible joins to avoid disrupting delicate stitches.
- Medium-Weight Yarns (Worsted/Aran) – Most joining methods work well, but slip stitch and single crochet joins add a nice defined border.
- Bulky Yarns – Choose an invisible seam to prevent excess bulk in the seams.
3. Pick the Right Aesthetic
- Seamless Look – Invisible seam makes the join nearly invisible.
- Decorative Join – Single crochet, reverse single crochet, or slip stitch joins add texture and definition.
- Lacy & Open – Join-as-you-go, and zig zag braid methods help maintain an airy look without extra bulk.
- Color Play – Using a contrasting yarn for the join makes it stand out, while matching yarn blends it in.
There isn’t one single best joining method for every project, but choosing the right join can make a big difference in how your finished granny square project looks and feels.
Troubleshooting Common Granny Square Joins
- My seam is too tight and making my squares curl.
If your seams are making your squares pucker or curl, try using a larger crochet hook for the join, or keeping your tension looser as you work. If you’re using a slip stitch or single crochet join, make sure you’re not pulling too tightly. - My seam is too loose and looks messy.
If your join looks too open, try a tighter joining method like the slip stitch join. A smaller crochet hook size can also help tighten up the stitches. - My squares aren’t lining up properly.
Double check that each square has the same stitch count on all sides. If needed, block your squares before joining to make sure they’re the same size. I have a really helpful article here that will show you how to do it! - My join is too bulky.
Some methods, like single crochet joins, add extra texture. If you want a flatter finish, try a flat invisible seam instead. - My join looks uneven.
Make sure you’re working into the same stitches on both squares. If you’re off by even one stitch, it’ll shift the entire join and make it noticeably uneven. - My granny squares keep twisting.
If your squares are spiraling, leaning or otherwise not staying square, the issue may have started when crocheting them. This article on avoiding twisted granny squares walks you through what causes twisting and how to prevent it.
When it comes to granny squares, it’s not uncommon for them to lack the perfectly square look right off the hook. You may notice rounded corners, wavy edges, or even a spiraling effect. But this isn’t a reflection of your skills! I tested the most popular tricks to see which ones make the neatest granny square. You’ll want to see the results before you start your next granny square project!
Frequently Asked Questions About How to Connect Granny Squares
Not Sure Which Border to Add to Your Granny Square Blanket?
Finding the right border for the granny square blanket you just spent a lot of time on can be really tough! I’m a big fan of simple borders that let the gorgeous granny squares be the star of the show. Any of these five simple yet beautiful borders would be perfect for your granny square blanket!


