This guide shares the best ways to block granny squares and covers everything you need to know about how to block a granny square including why it matters, how to do it, and what tools you’ll need.
UPDATED: JULY 27, 2023 BY BRITTANY
This post may contain affiliate links. See our Disclosure Policy for more information.
You’re not alone if your granny square won’t lay flat or you’re frustrated with the rounded corners. And you might be wondering “Should I block granny squares?” No matter how skilled you are, a granny square rarely emerges perfectly square right off the hook.
Luckily, there’s a straightforward solution that doesn’t require unraveling a single stitch.
Yes, you should block your granny squares. Blocking granny squares will give them a more professional appearance and help achieve a perfectly square shape.
Blocking is a technique used in the world of crochet (and knitting) to shape and refine finished projects. By manipulating the fibers and gently stretching the fabric, you can encourage the yarn to relax and settle into its intended form. This process is particularly effective for granny squares, as it helps give it a perfectly square shape no matter the fiber yarn; acrylic, cotton, blends, etc.
Don’t know how to crochet a granny square yet? No worries! We have a beginner-friendly How to Crochet a Granny Square guide that’ll walk you through it step-by-step.
Here is a quick overview of the topics we will cover in this article:
- What do you use to block granny squares?
- How to Block Granny Squares Without Steam
- Block Granny Squares Step-by-Step Tutorial
- Can you use steam to block a granny square?
- How to block a granny square without a board, mat or pins
- Is blocking a granny square permanent?
- Do you have to block a granny square?
- Can you use an iron to steam block?
- Can you use spray starch?
- What happens if you don’t block?
- Can blocking make squares bigger or smaller?
- Can you block more than once?
- Can you use a hairdryer to speed up the process?
- More Granny Square Resources We Think You’ll Love
What Do You Use To Block Granny Squares?
You only need a couple of supplies to block your granny squares, and the good news is you’ll be able to use these tools for blocking other projects too as most blocking mats fit together like puzzle pieces to make all shapes and sizes. If you’re interested, we have a separate in-depth guide on blocking various projects that you might find helpful.
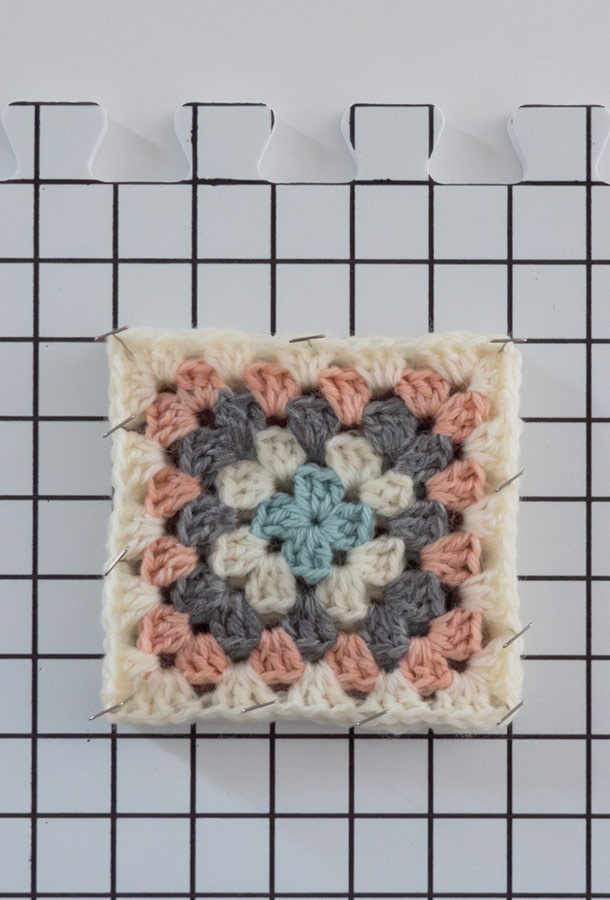
You first need a surface to pin your granny squares to during the blocking process. In the past, I used inexpensive athletic flooring tiles from a local hardware store, which served the purpose just fine. However, I later discovered these fantastic blocking mats available on Amazon. What sets them apart is the conveniently printed grid lines that allow for precise blocking, making them my go-to granny square blocking boards. With the grid, you can easily block every square to the exact same size.

The other thing you need is rust-free pins. This usually means you need to look for stainless steel. T-pins are highly recommended, especially if you anticipate blocking numerous granny squares, as they are easier on your fingers. However, the choice of pins ultimately depends on your personal preference.

How to Block Granny Squares (Without Steam)
Now, you may be wondering how to go about blocking your granny squares. The good news is that it’s a straightforward process, and you don’t need any fancy equipment. Here’s a simple, preferred method to get you started:
- Prepare Your Granny Squares: Give them a gentle wash by filling a sink with lukewarm water. (You can use a wool wash like this one if you’d like, but it’s not necessary). Swish the squares around gently, making sure they’re fully saturated. Alternatively, you can spray them with a spray bottle until they are fully saturated.
- Drain and Press: Carefully lift the squares out of the water, and gently wring out the excess water. (If you’re working with wool yarns, take extra care here so you don’t agitate the fibers, and cause it to pill or fuzz).
- Shape and Pin: Lay each square on a flat, clean surface, such as a blocking mat or a clean towel. Using your fingers, gently coax the square into its desired shape, ensuring the corners are straight and the edges are even. Be sure to stretch the square a bit in the process, and use as many pins as you need. More is better!
- Let it Dry: Allow the squares to air dry completely. This process may take several hours, or even overnight, depending on the moisture, humidity and fiber types in your yarn.

How to Block Granny Squares Step-by-Step Tutorial
Video not displaying? Watch this tutorial on YouTube instead.
Can You Use Steam To Block Granny Squares?
While the wet blocking method mentioned earlier is our preferred recommendation for blocking granny squares, an alternative approach involves using a garment steamer. If you opt for this method, begin by pinning the square into a perfectly square position, ensuring that you slightly stretch it to facilitate the blocking process.
Hold the steamer in close proximity to the work (remember to always keep the steamer upright, which may require strategic placement of your blocking mats), and maintain the position until the square becomes damp. Subsequently, allow the square to dry completely before removing the pins.
While many crocheters use this method, we don’t always recommend it because some fibers are sensitive to the high heat of a laundry steamer. You may want to use it on a scrap piece to make sure it won’t hurt the yarn.
How to Block A Granny Square Without a Board, Mat, or Pins
If you don’t yet own a set of blocking mats or have a few spare pins lying around, there’s no need to fret. You can still effectively block your granny squares using common household items you may already have at your disposal. Resourcefulness is key!
Consider the following alternatives for blocking your granny squares:
- Thick Towels or Blankets and even Carpet/Rug: Lay your granny squares on a towel or blanket. Smooth out any wrinkles and gently shape the squares into their desired form. Although these materials may not offer the precision of a grid, they can still aid in blocking and help the squares retain their shape while drying. Try using a tape measure to evenly block your squares without a grid.
- Sewing/Crafting Pins: If you don’t have T-pins or stainless steel blocking pins, don’t worry! Everyday sewing pins can serve as a substitute. While they may not be as sturdy or rust-free as specialized blocking pins, they can still be used to secure the squares in place during the blocking process.
- Foam Boards or Cardboard: If you have foam boards or cardboard pieces lying around, they can serve as a makeshift surface for pinning your granny squares. Place the squares on top of the boards or cardboard, making sure they are flat and aligned. While these alternatives lack the printed grid for precise measurements, you can still manually adjust and shape the squares to achieve the desired outcome.
Remember, the goal is to improvise with what you have available. These household items can provide a viable solution for blocking your granny squares temporarily, but as you make more granny square projects you may want to invest in some blocking mats.
Frequently Asked Questions About Blocking Granny Squares
Is blocking a granny square permanent?
Natural fibers will hold the block until they get wet again. Acrylic fibers, however, will only hold the block for a length of time. Eventually, you’ll notice them start to creep back to their softer shapes.
Do you have to block granny squares?
While you don’t have to block your granny squares if you don’t want to, it’s typically best if you do. Blocking can greatly improve the look of your project so we think it’s worth investing a little time in.
Can you use an iron on your project or use the steam from the iron to steam block granny squares?
We never recommend touching a hot iron to a finished project made with yarn, especially acrylic yarn. The iron can irreversibly ruin your project in a matter of seconds. If you wish to block with steam, we pick up a cheap laundry steamer from Amazon.
Can you use spray starch to block granny squares?
Avoid spray starches that need heat to activate. Products like wrinkle releasers can be useful at times, but not usually for granny squares.
What happens if you don’t block granny squares?
Generally speaking, if you choose not to block your granny squares nothing bad will happen. Your project may just look less “polished” if it isn’t blocked. Joining the squares will improve their shape somewhat, but it won’t look quite as polished as a blocked square project.
Can blocking make your squares bigger or smaller?
The short answer is yes and no. Wet blocking stretches the square to allow the stitches to settle into a better position. This will make it slightly bigger. Blocking will never make your granny squares smaller.
Can you block more than once?
Absolutely. You can block as many times as you want. For natural fiber granny squares, you can expect the second blocking to reverse the effects of the first blocking and “reset” the stitches to the newly blocked position. For projects made with acrylic yarns, you can expect the blocking will eventually soften, and you may have to block again.
Can you use a hair dryer to speed up the drying process?
Technically yes, but it’s best to let the project air dry so the square has enough time in the fixed position.
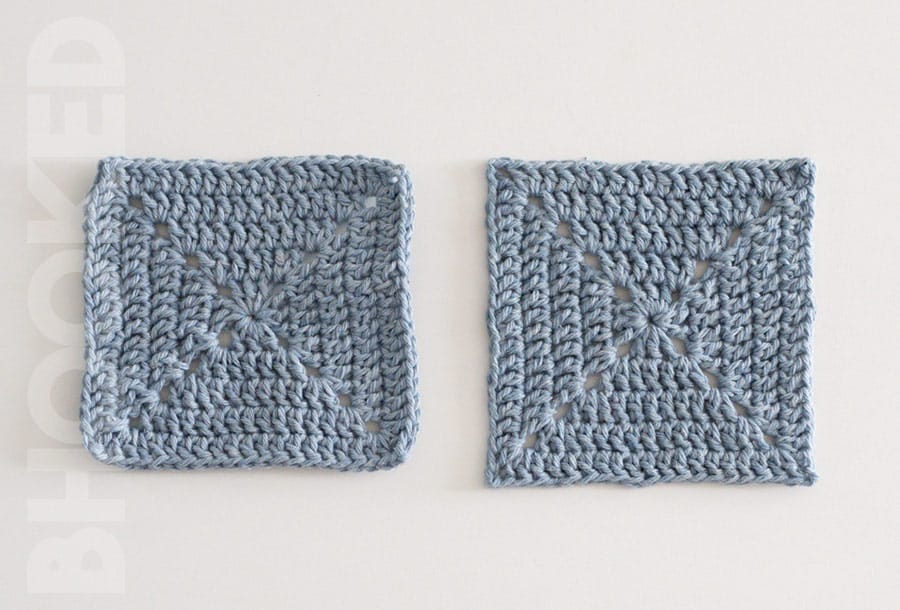
Are there other ways to make granny squares neat?
There are several things you can do to make sure your granny squares look their best. We tested all the popular tips for crocheting neater granny squares and shared our findings in this article.
Should you block granny squares before joining them?
Yes, you should always block your granny squares before joining them together. Doing so will make the joining process a little easier, and the finished project will look a lot neater too! Here are 5 simple joins for granny squares to get you started.
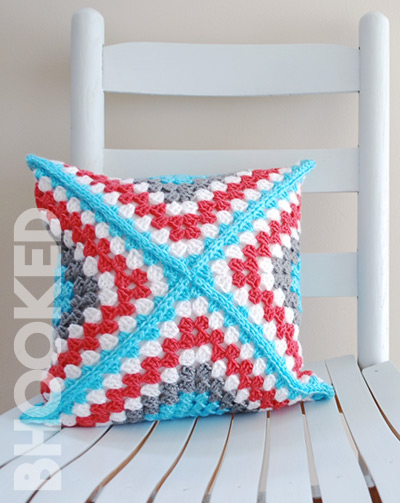
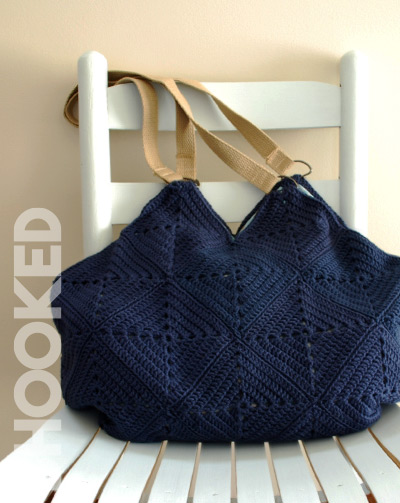
Free Granny Square Projects and Patterns
Here are a few free patterns that we have available using the classic granny square and some familiar variants. We’re always adding to this list so bookmark this page and check back when you need some more granny square inspiration.

Crochet Flower Granny Square
*Disclosure: Some of the links in this post are affiliate links, which means as an Amazon Associate, I earn from qualifying purchases made through these links. Please note that prices and availability of products are subject to change. This comes at no additional cost to you and helps support the content on this site. I only recommend products that I have personally used and genuinely believe in. Thank you for your support!


