If you’ve ever finished a granny square and noticed that it was leaning or twisting in one direction, you’re not alone! I’ve struggled with twisting granny squares for years, but this simple solution will make sure your granny squares never twist again.
UPDATED: JUNE 7, 2024 BY BRITTANY
This post may contain affiliate links. See our Disclosure Policy for more information.
See how this granny square is twisting in one direction? This is called “granny lean,” and it’s the most annoying part of crocheting granny squares. Luckily, there’s an easy fix.
In this guide, I’ll show you the easiest way to stop your granny squares from leaning. It’s a simple trick, and I wish I had taken it more seriously when I first learned about it.
A few years back I tested all the popular tips for crocheting neater granny squares. I wrote an entire article about it and included the simple tip I’m about to share with you. You can check out that post here if you want!
It was really helpful to see and understand which granny square tips were worth using and which didn’t make much of a difference.
Here’s a quick overview of the topics we’ll cover in this article:
- Why Do Granny Squares Twist and Lean in One Direction?
- How to Crochet a Granny Square That Doesn’t Twist
- Can You Fix a Twisting Granny Square After it’s Finished?
- Does Joining Hide a Leaning Granny Square?
- The Simple Solution for Your Twising Granny Squares (Video)
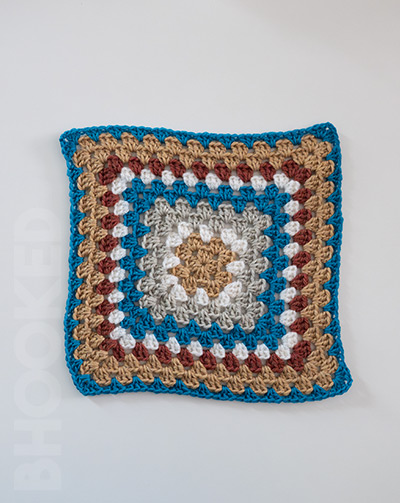
With the simple fix I’m about to show you, crocheting perfectly square granny squares like this is not just possible, but really easy too!

Why Do Granny Squares Twist and Lean in One Direction?
You may not have noticed it before, but crochet stitches have a slight lean to them. They typically lean in the opposite direction of your crochet hand. So, if you’re right-handed, your stitches will lean a little to the left.
Granny squares are crocheted in rounds from the center outward, and you never turn them. This means with every round you crochet, you’re leaning a little more and more. While you might not notice your granny squares twisting for the first four or five rounds, if you crochet them bigger than that, you’ll start to see the twisting.
Granny squares twist and lean because you never flip them. The lean is gradual but becomes more noticeable as your square gets bigger.
It has nothing to do with your skill, and you shouldn’t feel bad if your granny squares are twisting.
This means the solution to getting rid of the granny lean is simple: turn the granny square like you’re crocheting a flat piece. This way, the subtle lean doesn’t go in the same direction every round.
How to Crochet a Granny Square That Doesn’t Twist
So you’re now in on what has been the best-kept trick for crocheting neater granny squares: turning them every round. But how do you do this? What does that look like in the pattern?
There are a handful of different ways to crochet granny squares, but you can easily use this trick for any of them.
To crochet a granny square that doesn’t twist or lean, finish the round, and flip the granny square so you’re looking at the backside. Then continue with the next round as usual. Here’s how that looks in pattern form:
Round 1: Make a magic ring with the following: [3 dc, ch 2] four times. Close the magic ring and join with a slst to the first dc. Flip the square to the opposite side.
Round 2: Slst in the same ch 2-sp, ch 3 (counts as a dc) then make 2 dc in the same ch 2-sp. *In the next ch 2-sp, make 3 dc, ch 2, 3 dc. Rep from *2 more times.In the first ch 2-sp, make 3 more dc, ch 1, and join with a slst to the 3rd ch. Flip the square to the opposite side.
Round 3: Slst in the same ch 2-sp, ch 3 (counts as a dc) then make 2 dc in the same ch 2-sp. * In the sp bet the next 2 dc clusters, make 3 dc. In the next ch-2 sp (3 dc, ch 2, 3 dc). Rep from * two more times. In sp bet next 2 dc clusters, 3 dc. In the first ch 2-sp, make 3 more dc, ch 1, and join with a slst to the 3rd ch. Flip the square to the opposite side.
Round 4: Slst in the same ch 2-sp, ch 3 (counts as a dc) then make 2 dc in the same ch 2-sp. *[In sp bet next 2 dc clusters, 3 dc] twice. In the next ch-2 sp (3 dc, ch 2, 3 dc). Rep from * two more times. [In sp bet next 2 dc clusters, 3 dc] twice. In the first ch 2-sp, make 3 more dc, ch 1, and join with a slst to the 3rd ch. Flip the square to the opposite side.

Round 5: Slst in the same ch 2-sp, ch 3 (counts as a dc) then make 2 dc in the same ch 2-sp. *[In sp bet next 2 dc clusters, 3 dc] three times. In the next ch-2 sp (3 dc, ch 2, 3 dc). Rep from * two more times. [In sp bet next 2 dc clusters, 3 dc] three times. In the first ch 2-sp, make 3 more dc, ch 1, and join with a slst to the 3rd ch. Flip the square to the opposite side.
Round 6: Slst in the same ch 2-sp, ch 3 (counts as a dc) then make 2 dc in the same ch 2-sp. *[In sp bet next 2 dc clusters, 3 dc] four times. In the next ch-2 sp (3 dc, ch 2, 3 dc). Rep from * two more times. [In sp bet next 2 dc clusters, 3 dc] four times. In the first ch 2-sp, make 3 more dc, ch 1, and join with a slst to the 3rd ch. Flip the square to the opposite side.
To make your granny square bigger, the number of double crochet clusters between each corner increases by one with each round.
You can find the pattern for a 12-round granny square in my modern crochet granny square pillow here. It’s totally free and a great project to practice this new trick!
If you look closely, you’ll notice that double crochet stitches don’t look exactly the same from front to back. That’s why I dismissed this trick for a while. But the small difference in the look of the stitches on a flipped granny square is much less noticeable than the twisting when you don’t flip it.
The left square was flipped every round using the same pattern as above, and the right granny square was not.

For me, there’s no question at all. Crocheting these two granny squares side by side with the same crochet hook was all the proof I needed. There is a better way to crochet granny squares, and I’ll never go back to my old ways.
Simply turning the granny square every round makes your granny squares perfectly square right off the hook, without needing to block it.
Can You Fix Twisting Granny Squares After it’s Finished?
While it might not be the answer you want to hear, I have to be honest. You can improve the twisting a little bit with blocking after you’ve finished crocheting the square, but there’s no way to completely fix a twisting granny square so it’s perfectly straight.
The smaller your squares, the better you can correct the twisting with wet blocking. So if your granny squares are four or five rounds, try blocking them. It’ll help.

But for squares larger than that, blocking only helps a little. Here’s a granny square with eight rounds that was blocked not once, but twice. The lean is subtle, but still there.

Does Joining Fix Twisting Granny Squares?
In my experience, joining doesn’t hide or fix the twisting of a granny square, and in some cases, it makes it more obvious. Here’s another look at those eight round granny squares that were crocheted without flipping them every round, and blocked twice to help with the lean. I used the join-as-you-go technique, and you can still see the lean.
You Have Twising Granny Squares. Now What?
If you’re looking at a stack of granny squares you’ve been crocheting for the last several months, and they’re leaning a little, don’t give up on them, and don’t get rid of them!
Finish the project you had in mind for them, love it and the little lean it may have, and try flipping your granny squares for the next project.
The lean really isn’t a big deal. It will still be a beautiful project. Plus, remember, every handmade piece has its unique charm, and a slight twist or lean can add character to your creation.
Embrace the imperfections, enjoy the journey of making something with your own hands, and learn little tricks like flipping your granny squares along the way. After all, it’s the love and effort you put into your work that truly makes it special. So, keep crocheting, keep creating, and cherish every wonky twist in your granny squares this time around.
The Simple Solution for Your Twising Granny Squares (Video)
If you prefer learning by watching, I recommend checking out this video. In it, I’ll guide you through how to flip your granny squares as you crochet them.
Video not displaying? Watch this video on YouTube instead.


