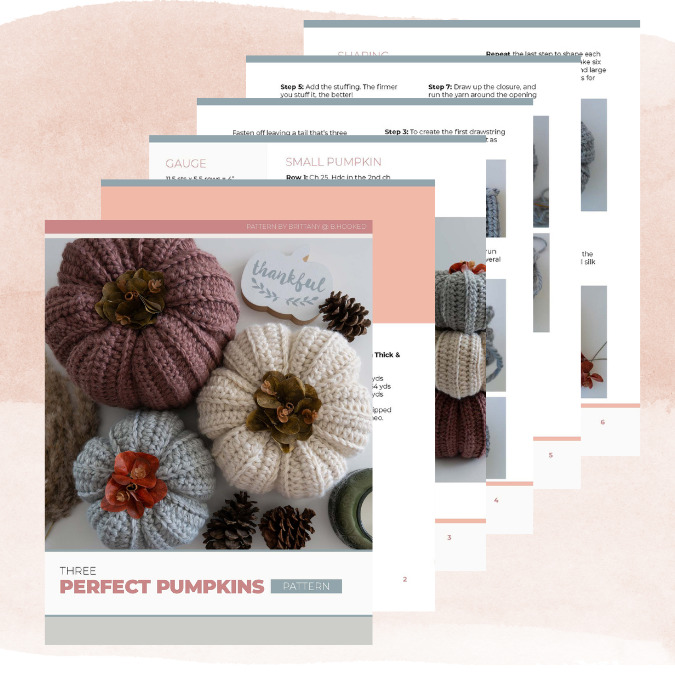
Crochet pumpkins are the perfect way to add a little handmade charm to your home. Learn how to make three perfect crochet pumpkins with this free pattern and step-by-step tutorial. You can view the pattern completely free on this page, or you can buy the ad-free, printable PDF from our shop.
UPDATED: OCTOBER 25, 2023 BY BRITTANY
This post may contain affiliate links. See our Disclosure Policy for more information.

Skill Level | Easy
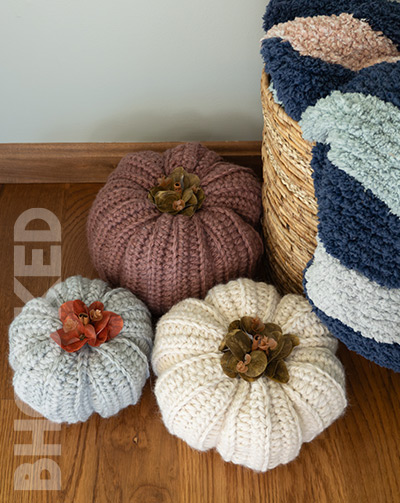
Finished Size | 7.5″, 10″, and 10.5″
Are you ready to add a touch of autumn charm to your home decor? Crochet pumpkins are the perfect choice! Plus, they won’t break the bank like store-bought ones.
This awesome set comes in three different sizes, so you won’t need to look for another crochet pumpkin pattern ever again! You can make them unique by simply switching up the yarn color and adding different foliage.
In this easy-to-follow guide, I’ll help you create your very own cozy crochet pumpkins.
About Our Crochet Pumpkins
These crochet pumpkins are made with super bulky weight yarn, which means they’ll come together super quick. You’ll have all three in just a few days!
Plus, you’ll pick up a nifty skill – we’ll show you how to do a cool rib stitch that gives your pumpkins an awesome texture.
If you want to learn more about this project, have questions, or need pattern details, keep reading. Or, if you’re eager to get started, just jump right down to the free pattern. Happy crocheting!
Pattern Overview:
- Supplies
- Buy the ad-free, printable pattern
- Abbreviations
- Pattern Notes
- Gauge & Finished Size
- Crochet Pumpkins Written Pattern
- How to Assemble Your Crochet Pumpkins
- How to Shape Your Crochet Pumpkins
- Decorating Your Pumpkins
- More Fall Crochet Projects + Free Patterns
- What Yarn is Best for Crochet Pumpkins?
- Can I Adjust the Pumpkin Size Easily?
- How Long Does It Take to Crochet a Pumpkin?
- How Can I Add Details to My Pumpkins?
You can view the pattern completely free on this page. But, if you prefer having a digital copy that you can save or print, we’ve got you covered with that option as well.
If you’d like to support our work here at B.Hooked, purchasing the digital pattern is a wonderful way to do so!
Recommended Supplies
- Super Bulky Weight Yarn (#6); Lion Brand Re-Spun Thick & Quick (Colors shown: Whipped Cream, Fog, and Cameo)
- 8 mm Crochet Hook
- Fiber Fill Stuffing
- Cinnamon Sticks
- Fall Silk Foliage
- Yarn Needle
- Scissors
Abbreviations
This pattern is written using standard US crochet terminology.
- BLO Back Loop Only
- Ch Chain
- Cont Continue
- Hdc Half Double Crochet
- Hk Hook
- Rem Remaining
- Rep Repeat
- Sk Skip
- Slst Slip Stitch
- St(s) Stitch(es)
Pattern Notes
Each pumpkin is crocheted in a flat piece, then seamed and shaped. You can easily substitute for any super bulky weight yarn you like. Wool Ease Thick & Quick is another good one that comes to mind!
Additionally, you should know that the chain one at the beginning of the row doesn’t count as a stitch.
Gauge: 11.5 sts and 5.5 rows = 4″ worked in stitch pattern
Not sure what gauge is? Check out our comprehensive guide to learn all about it here.
Finished Sizes
Small Pumpkin: 7.5″ diameter; 4.5″ tall
Medium Pumpkin: 10″ diameter; 5.5″ tall
Large Pumpkin: 10.5″ diameter; 7″ tall
Remember that the height of your pumpkin might vary slightly from these measurements. The way you assemble it and how tightly you shape it can influence the final size.
Looking for smaller pumpkins? Check out our mini crochet pumpkin tutorial here.
Perfect Crochet Pumpkins Written Pattern
Small Crochet Pumpkins
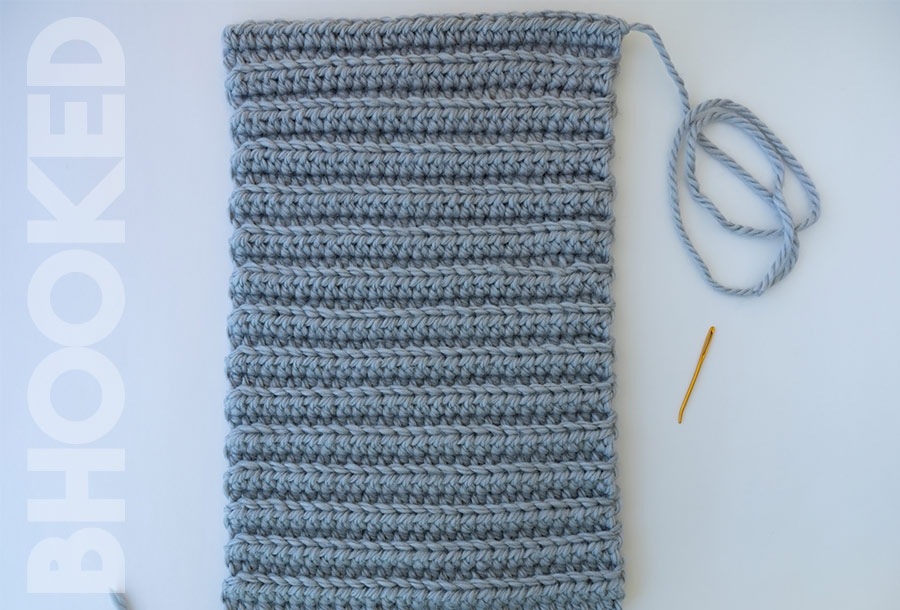
Row 1: Ch 25. Hdc in the 2nd ch from the hk, and in each rem ch. Ch 1 and turn.
Rows 2-30: Hdc in the BLO of each st. Ch 1 and turn.
Fasten off leaving a tail that’s three times as long as the piece is wide., and continue to the assembly instructions.
A digital pattern is available in our shop so you can print out the pattern
Medium Crochet Pumpkins
Row 1: Ch 31. Hdc in the 2nd ch from the hk, and in each rem ch. Ch 1 and turn.
Rows 2-36: Hdc in the BLO of each st. Ch 1 and turn.
Fasten off leaving a tail that’s three times as long as the piece is wide, and continue to the assembly instructions.
Large Crochet Pumpkins
Row 1: Ch 38. Hdc in the 2nd ch from the hk, and in each rem ch. Ch 1 and turn.
Rows 2-40: Hdc in the BLO of each st. Ch 1 and turn.
Fasten off leaving a tail that’s three times as long as the piece is wide, and continue to the assembly instructions.
How to Assemble Your Crochet Pumpkins
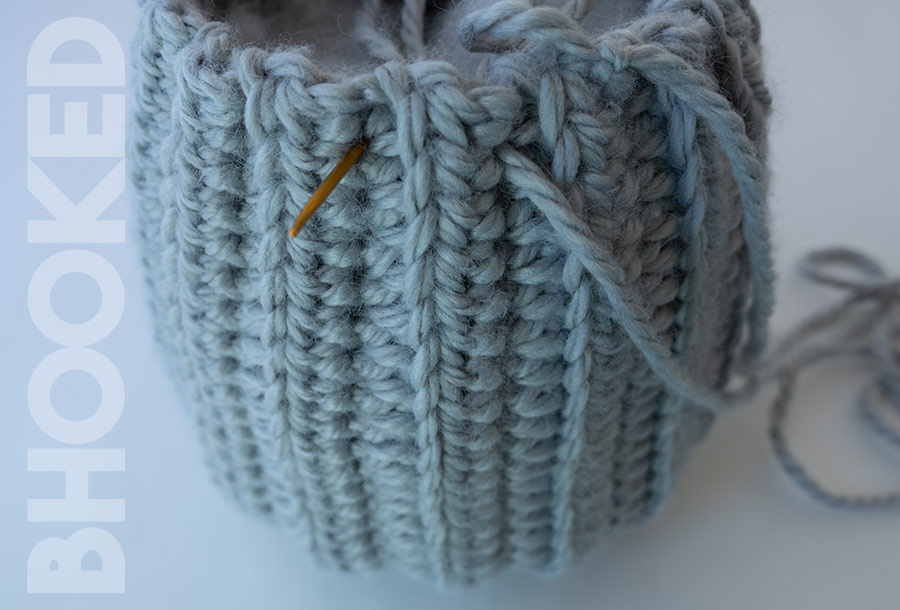
Step 1: With the pumpkin piece lying flat in front of you, fold the two edges toward the center.
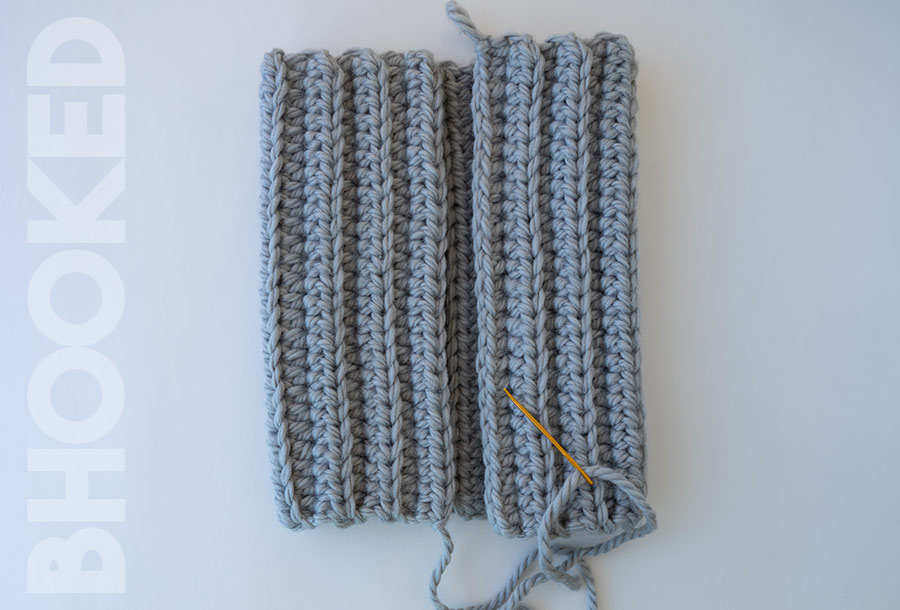
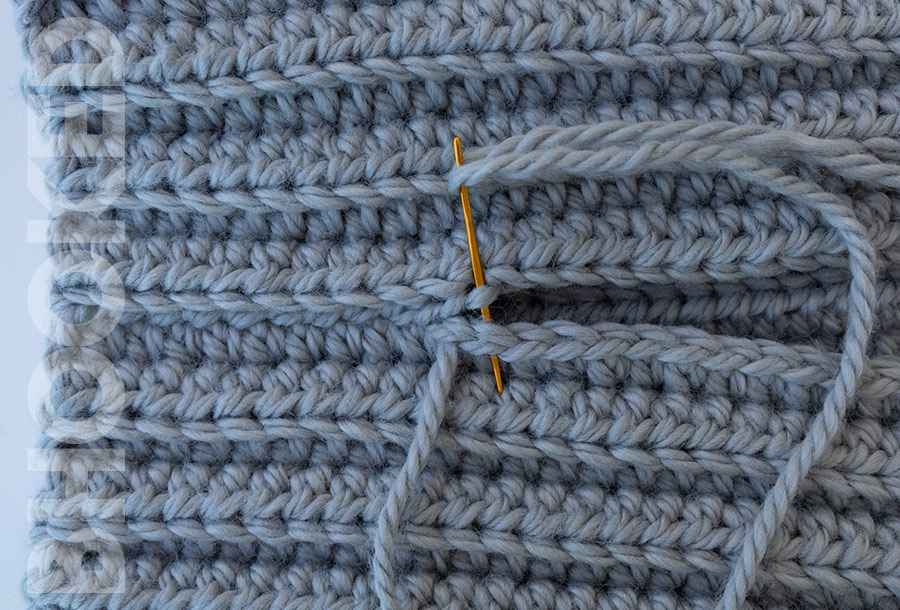
Step 2: With a yarn needle, seam the two edges together catching the innermost loop on one side and two loops on the other.
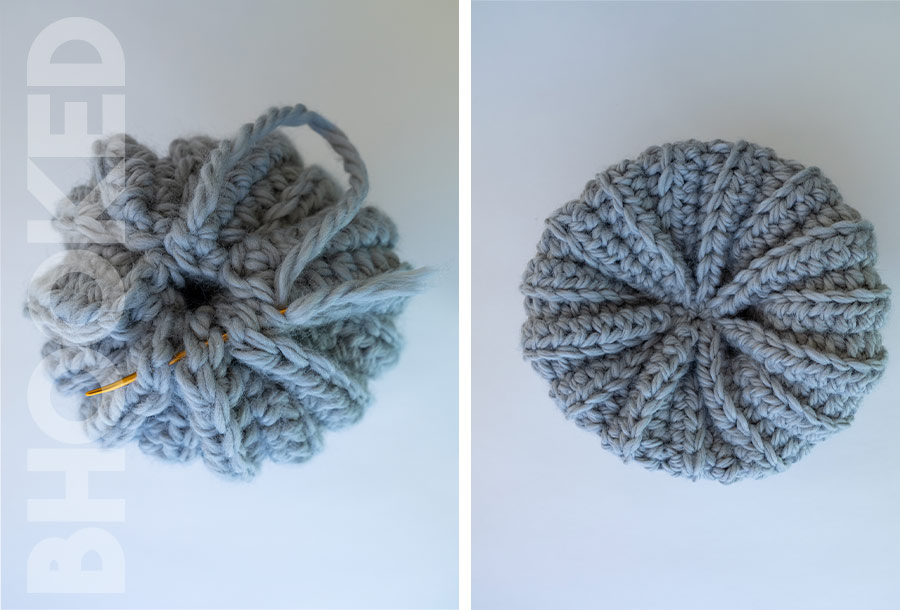
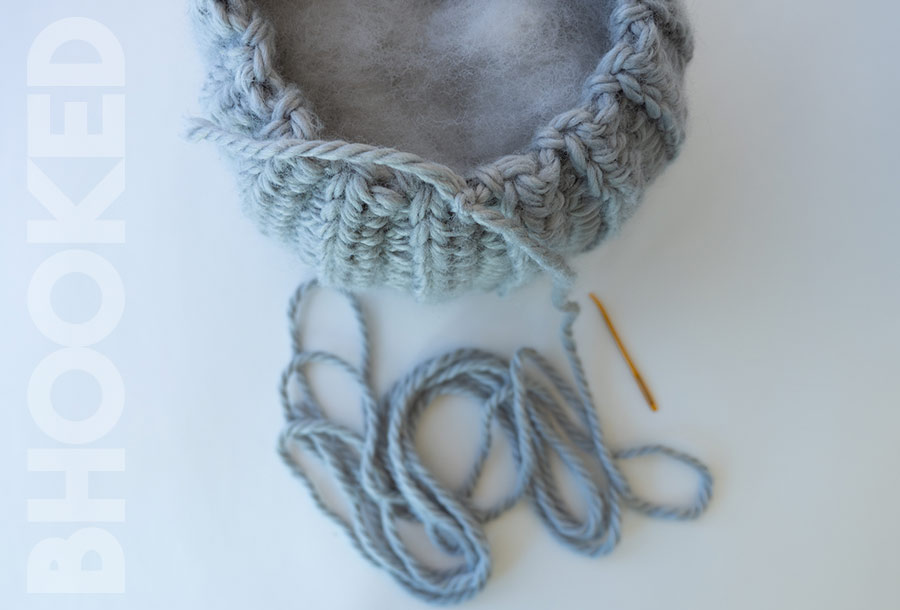
Step 3: To create the first drawstring closure, run the yarn in and out as seen in the photo.

Step 4: Pull to draw it up, and run the tail around the opening several times to tighten it even more.
Step 5: Add the stuffing. The firmer you stuff it, the better!
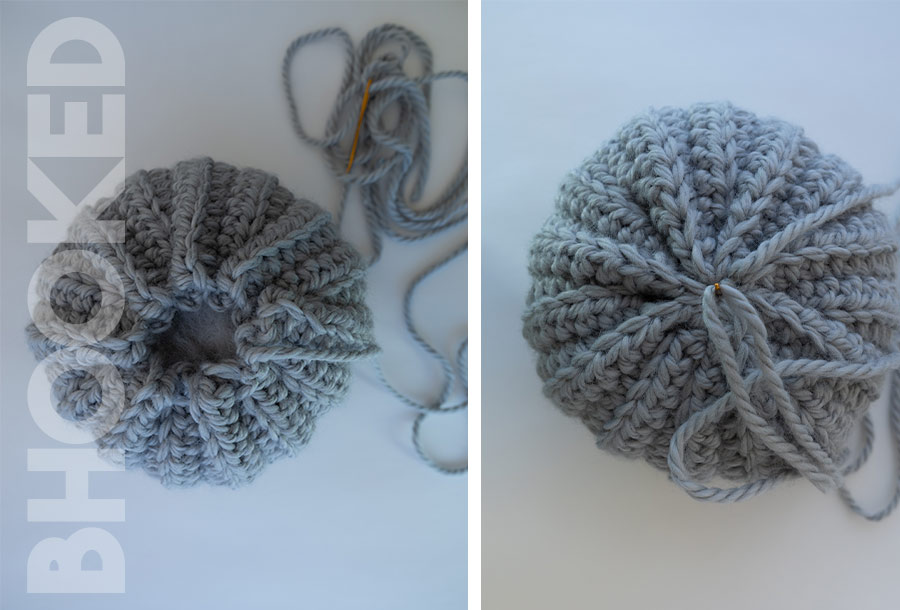
Step 6: Cut a new piece of yarn that’s 6 times longer than the pumpkin is tall. Tie it to the top edge, and make a drawstring
closure as you did in step three.
Step 7: Draw up the closure, and run the yarn around the opening to secure it.
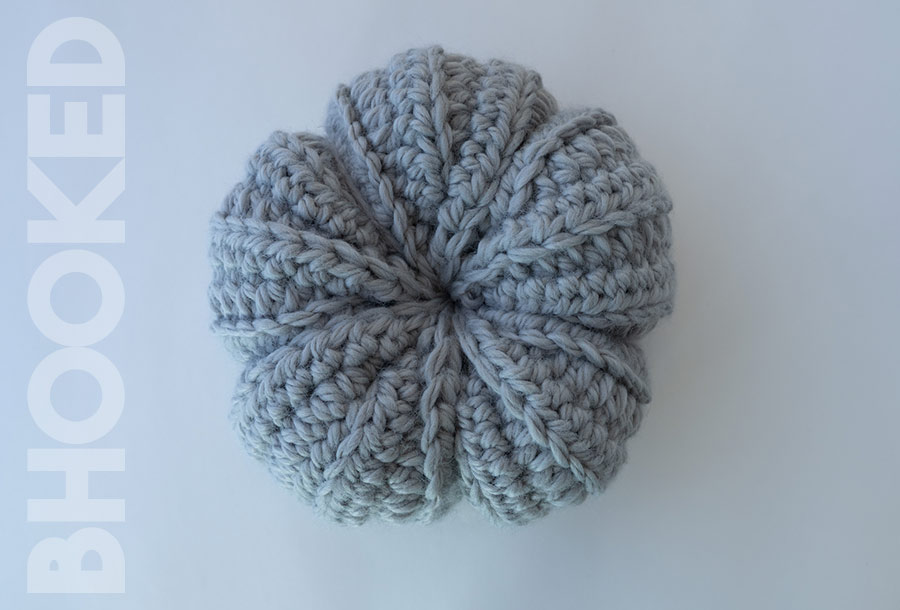
How to Shape Your Crochet Pumpkins
Step 1: Run the needle through the center and out the opposite side. You’ll need to squash the pumpkin down to be able to grab your needle.
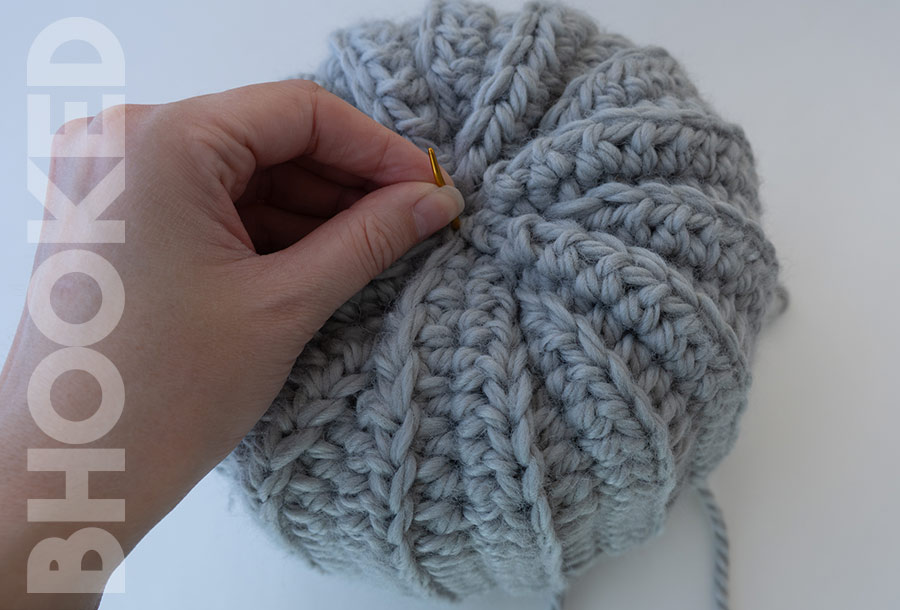
Step 2: Working in the same direction as before, run the needle through the center again (think of it like a big whip stitch). Pull tight to shape.
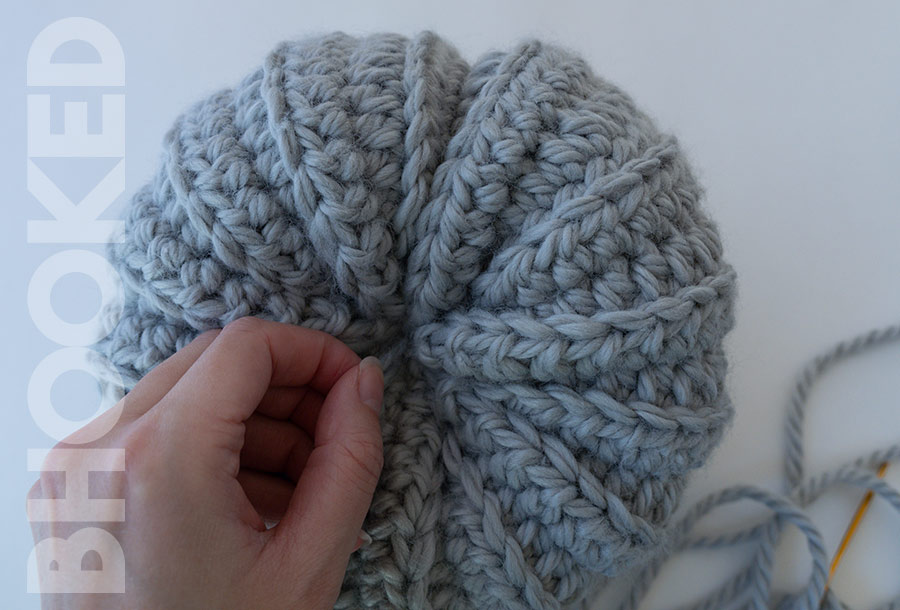
Repeat the last step to shape each segment of the pumpkin. Make six segments for the medium and large pumpkins, and five segments for the small pumpkin.
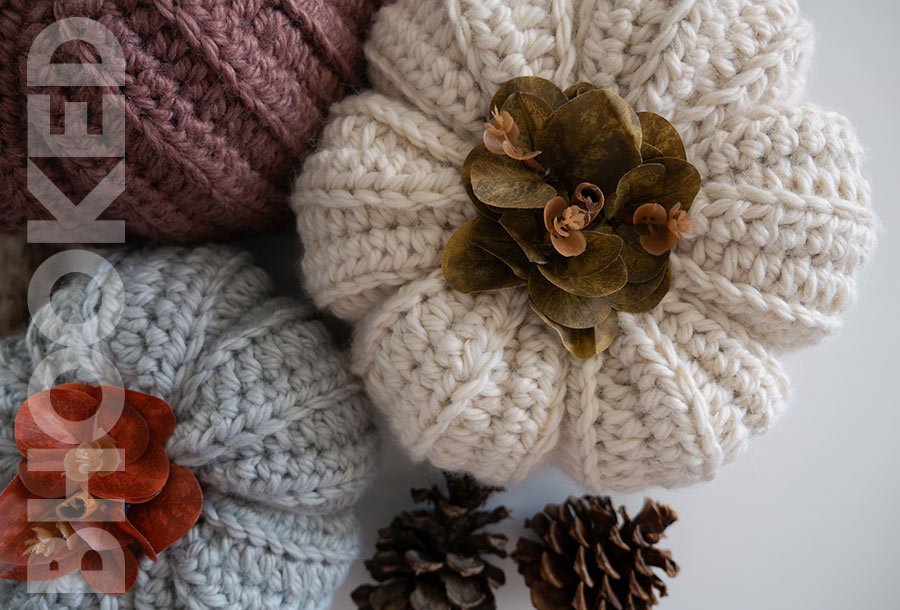
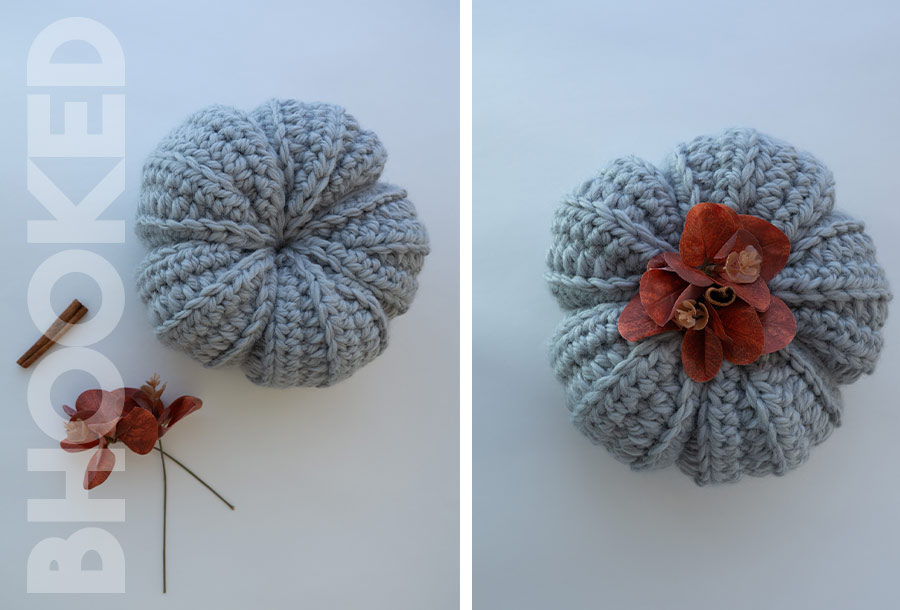
Decorating Your Pumpkins
This is where you can get really creative! Use a hot glue gun to attach the cinnamon stick stem, and fall silk foliage.
By using this pattern, you agree to our terms of use:
This pattern is for personal use only. You agree not to modify, publish, transmit, sell, create derivative works or in any way exploit any of the content within this page, in whole or in part. If you wish to share this pattern, share a link to this webpage only. You may sell finished items made from this pattern.
Copyright, B.Hooked Crochet, LLC
More Fall Crochet Projects + Free Patterns
Making free patterns for fall projects is kind of our thing. Check out some of our other tutorials with free crochet patterns specifically for the fall season:
Frequently Asked Questions About Crochet Pumpkins
What type of yarn should I use for crochet pumpkins?
Super bulky yarn is great for quick, chunky pumpkins, but you can choose different weights for varied textures.
Can I adjust the crochet pumpkin size easily?
Yes, you can make them larger or smaller by changing the number of stitches and rows.
How long does it take to crochet a pumpkin?
It depends on your skill level, but you can complete one in a few hours or less.
How can I add lifelike details to my crochet pumpkins?
You can sew on felt leaves, create a curly stem, or even add decorative embroidery for a realistic touch.