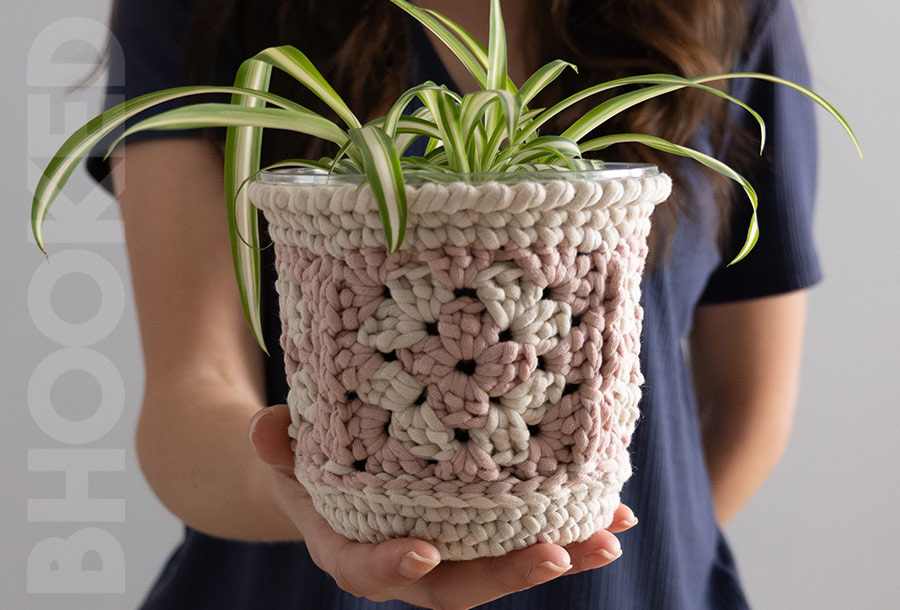
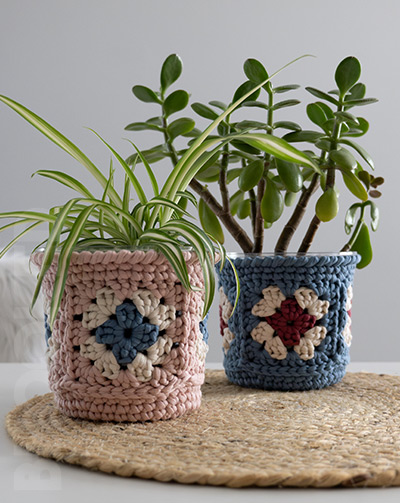
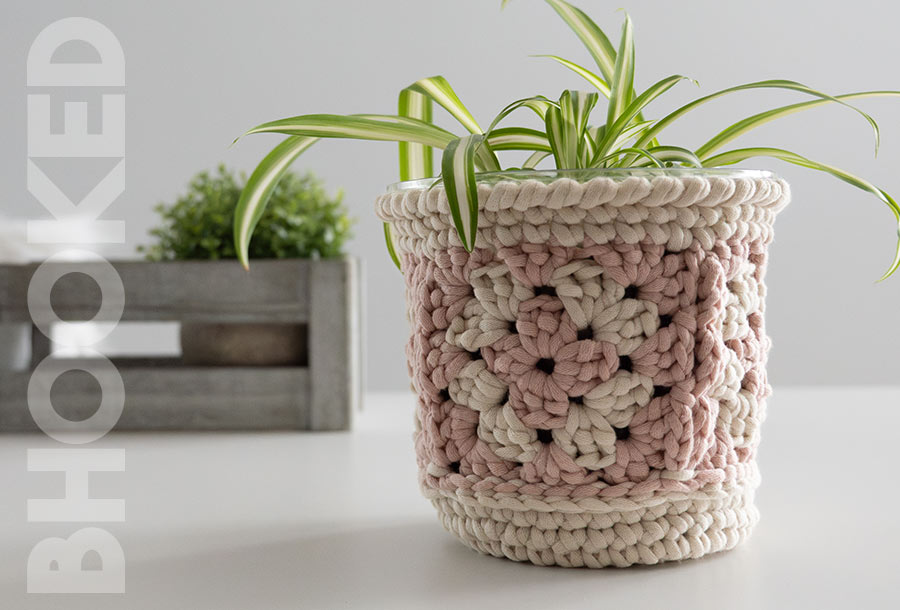
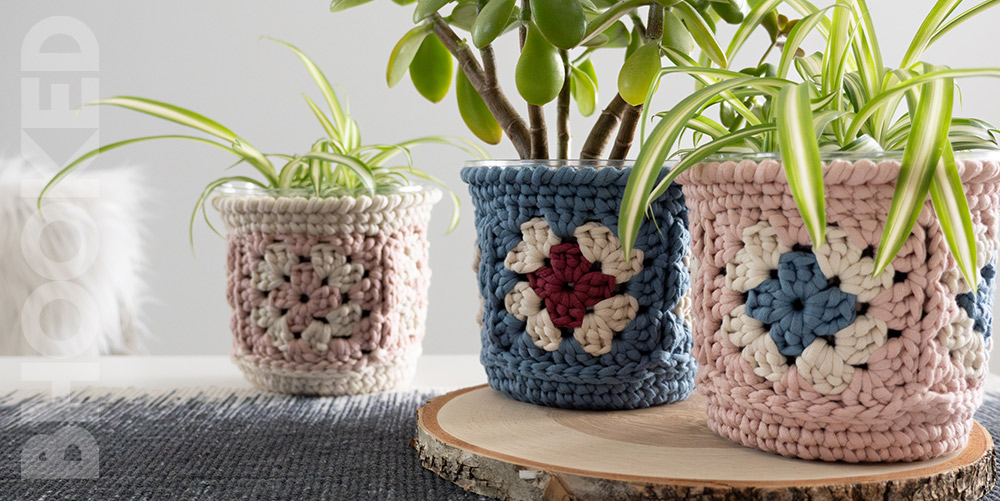
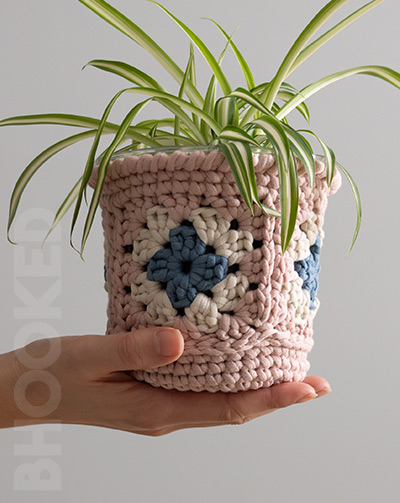
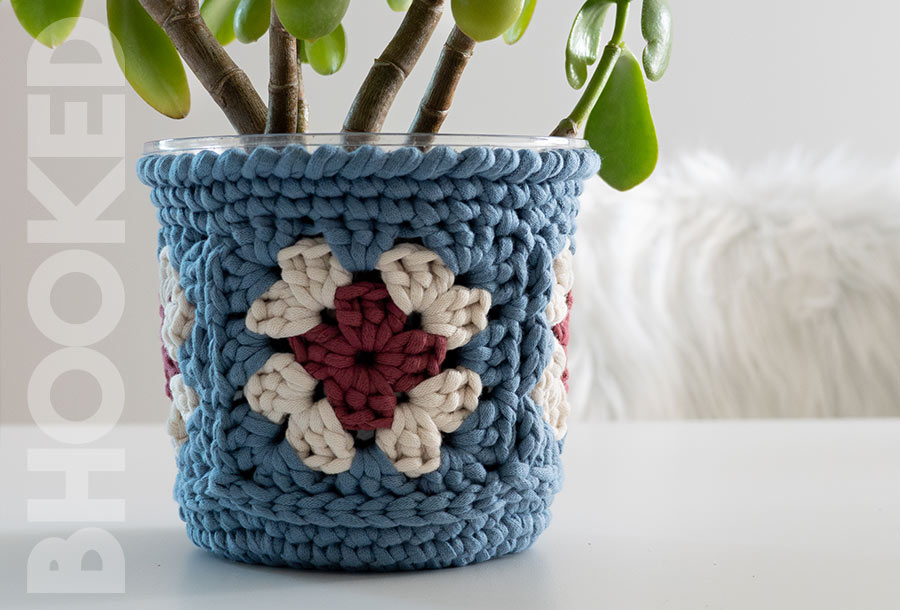
Making an adorable crochet plant pot cover for your potted plants is a fun project you can do in just a few hours! This project uses classic granny squares and fits perfectly on 5-6″ pots. You can find the free pattern on this page or get the ad-free, printable version from our shop.
UPDATED: MAY 15, 2024 BY BRITTANY
This post may contain affiliate links. See our Disclosure Policy for more information.
SAVE TO PINTEREST
Skill Level | Intermediate
Size | Fits most 5-6″ pots
I absolutely love plants. I have one in almost every room of my house, and seeing them grow makes me so happy. The more the merrier!
This year, instead of buying covers for my plain nursery pots, I decided to make charming crochet plant pot covers for them!
The pattern is easy and only takes a couple of hours to complete. Plus, it’s a good way to practice joining granny squares as you go, and they’re perfect for gifting to the plant-lovers in your life!
About This Crochet Plant Pot Cover Pattern
To make these covers, you’ll use skills you likely already have. Even if you’re new to crochet, this project is a great way to learn. You’ll start by crocheting four small granny squares and join them as you crochet the third round. No need for complicated joins!
After that, you’ll add a pretty textured border and a simple base to cover the bottom of the pot. Below, you’ll find instructions for making these adorable covers. Keep reading for more details and answers to common questions, or go straight to the free pattern.
Pattern Overview:
- Supplies
- Buy the ad-free, printable pattern
- Abbreviations
- Pattern Notes
- Gauge and Finished Size
- Easy Crochet Plant Pot Cover Pattern Instructions
- Finishing Your Crochet Coasters
- Making Crochet Plant Pot Covers with Granny Squares (Video)
- More Quick & Easy Tutorials + Free Patterns
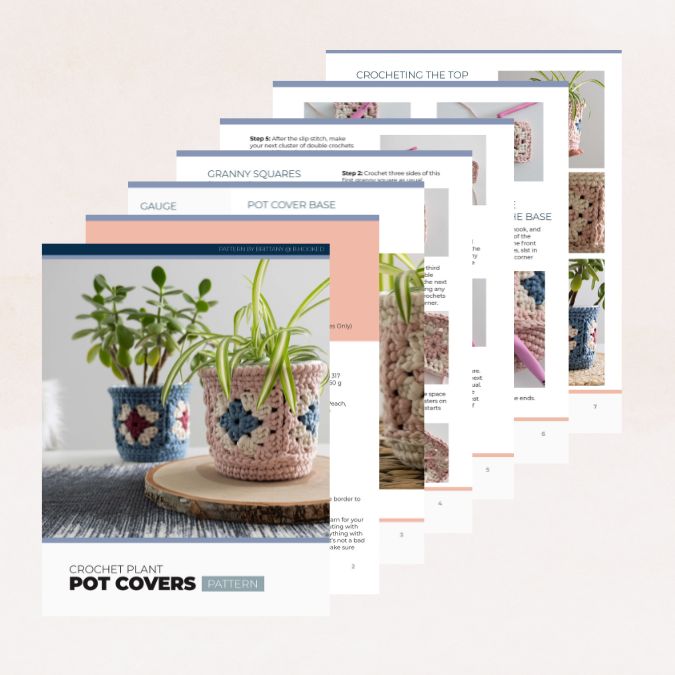
You can view the pattern completely free on this page. But, if you prefer having a digital copy that you can save or print, we’ve got you covered with that option as well.
If you’d like to support our work here at B.Hooked, purchasing the digital pattern is a wonderful way to do so!
Recommended Supplies
- About 80 yds each plant pot; Bernat Maker Yarn (#5 Bulky)
- 5 mm Crochet Hook
- 4.5 mm Crochet Hook (Granny squares only)
- Yarn Needle
- Scissors
Bernat Maker Yarn is a cotton/nylon blend, bulky weight (#5) yarn that’s just perfect for projects like these crochet plant pot covers. The thickness makes it quick to crochet, but it’s also sturdy enough that the cover has a nice shape to it. It comes in a nice range of colors, and each skein has enough yardage to make a few of these. The colors you see in the pictures are steel blue, cream, soft peach, and jam.
If you can’t get Bernat Maker yarn for your pot covers, you can try substituting with another bulky weight yarn. Anything with a #5 weight should work, but it’s not a bad idea to check your gauge to make sure they fit as expected.
Abbreviations
This pattern is written using standard US crochet terminology.
- Ch Chain
- Dc Double Crochet
- Hk Hook
- Rem Remaining
- Rsc Reverse Single Crochet
- Sc Single Crochet
- Slst Slip Stitch
Pattern Notes
These little crochet plant pot covers are made in three main steps: crocheting the base, crocheting and joining the granny squares, and crocheting the top border.
First, you crochet the base in simple rounds. If you know how to do that, it should be easy. Then, you make the granny squares and join them as you crochet the last round. This method is great because it joins the squares without extra seams. If you haven’t tried join-as-you-go granny squares before, this is a great project to start with! For more details on this technique, check out my article here.
Then finally, you’ll add a simple border to finish it off.
Gauge and Finished Size: Your finished plant pot cover will fit most 5-6 inch nursery plant pots. To check your gauge, crochet the first six rounds of the base and measure the diameter. It should be about 3.5 inches.
While this pattern is easy to follow, a lot of work went into making it fit just right for a 5-6 inch pot. You can make small changes to the size by using a bigger or smaller hook than recommended. But if your pot is much bigger, the pattern would need to change a lot. For now, this pattern fits the most common size of plant nursery pots you can find in stores, and if you want to see how I designed this pattern, be sure to watch the video below!
Crochet Plant Pot Cover Pattern Instructions
Pot Cover Base
Round 1: Using the bigger crochet hook, make a magic ring with 6 sc. Don’t join. Continue working in a spiral using a stitch marker to keep track of the first stitch of the round. (6 sts)
Round 2: Make 2 sc in every stitch. (12 sts)
Round 3: 1 *Sc in the next st. 2 sc in the next st. Rep from * to the end of the round. (18 sts)
Round 4: *1 sc in the next 2 sts. 2 sc in the next st. Rep from * the end of the round. (24 sts)
Round 5: *1 sc in the next 3 sts. 2 sc in the next st. Rep from * to the end of the round. (30 sts)
Round 6: *1 sc in the next 4 sts. 2 sc in the next st. Rep from * to the end of the round. (36 sts)
Rounds 7: Make 1 sc in every st. (36 sts)
A digital pattern is available in our shop so you can print out the pattern
Round 8: *1 sc in the next 8 sts. 2 sc in the next st. Rep from to end of round. (40 sts)
Round 9: *1 sc in the next 9 sts. 2 sc in the next st. Rep from to end of round. (44 sts)
When you finish the last round, slst in the next 2 stitches to correct the jog. Don’t fasten off. Set aside to pick up after you finish crocheting and joining the granny squares.
Granny Squares (Make 4)
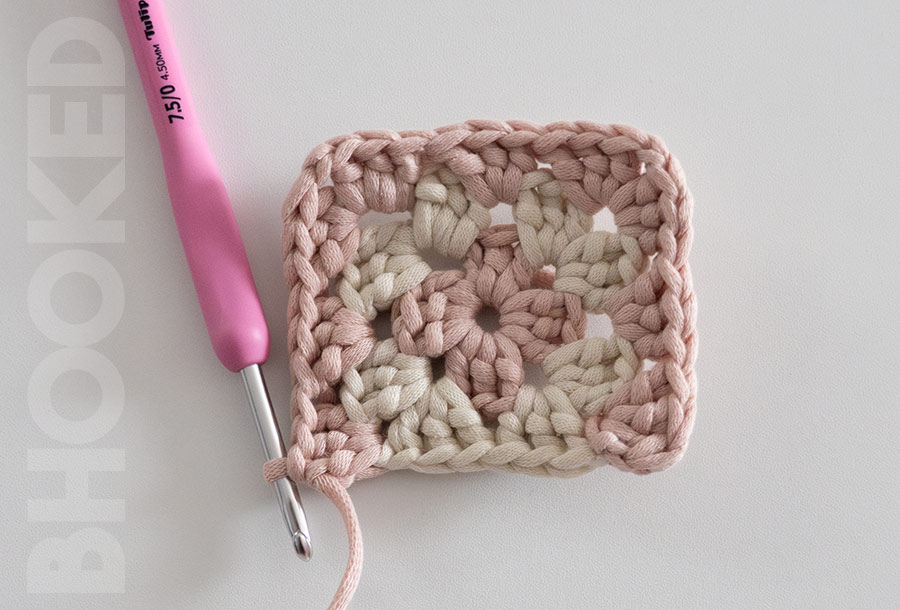
Round 1: Using the smaller crochet hook, Ch 3. Join with a slst to the first ch. Ch 4 (counts as dc and ch 1 throughout). In the center of the ring [3 dc, ch 1] 3 times. 2 more dc in the center of the ring and join with a slst in ch-4 sp. Optional: break color A and join color B.
Round 2: Ch 4. In the ch1-sp, make 3 dc. [In next ch 1-sp (3 dc, ch 1, 3 dc)] 3 times. In the first ch 1-sp make 2 dc. Join with a slst in ch 4-sp. Fasten off.
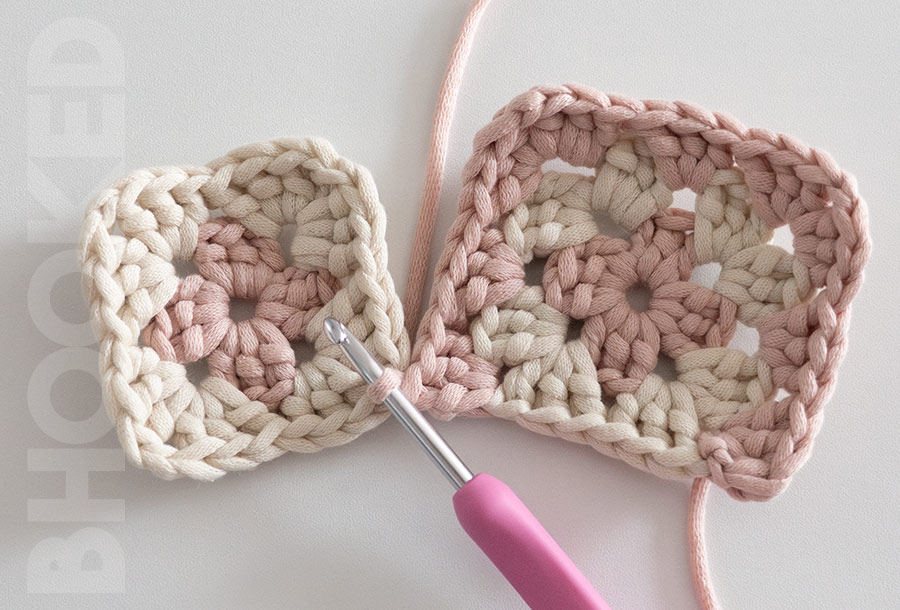
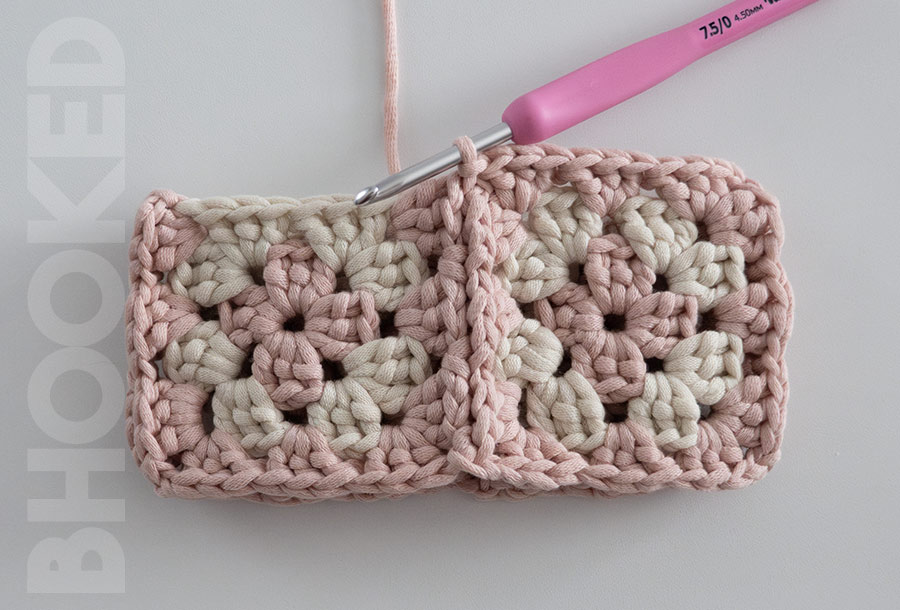
Joining the Granny Squares
Step 1: Attach the yarn in any corner of the first granny square using the smaller crochet hook. Instead of chaining three after you join, just make one to attach the new yarn. Then make three double crochets in the same corner.
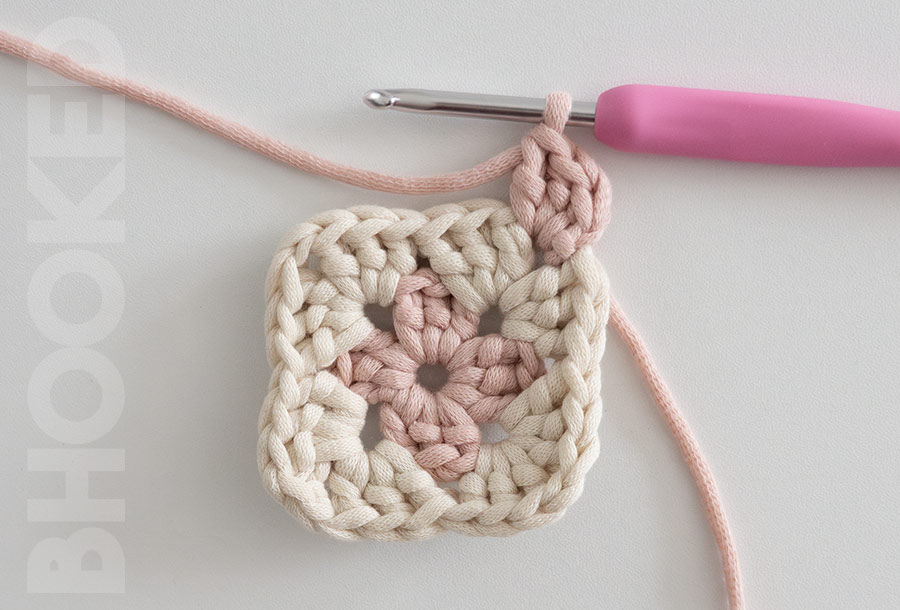
Step 2: Crochet three sides of this first granny square as usual.
Step 3: When you get to the third corner, make only three double crochets. Then slip stitch to the next granny square without making any chains. Make three double crochets in the new granny square corner.
Step 4: Next, slip stitch in the space between double crochet clusters on the first granny square. This starts the first join row.
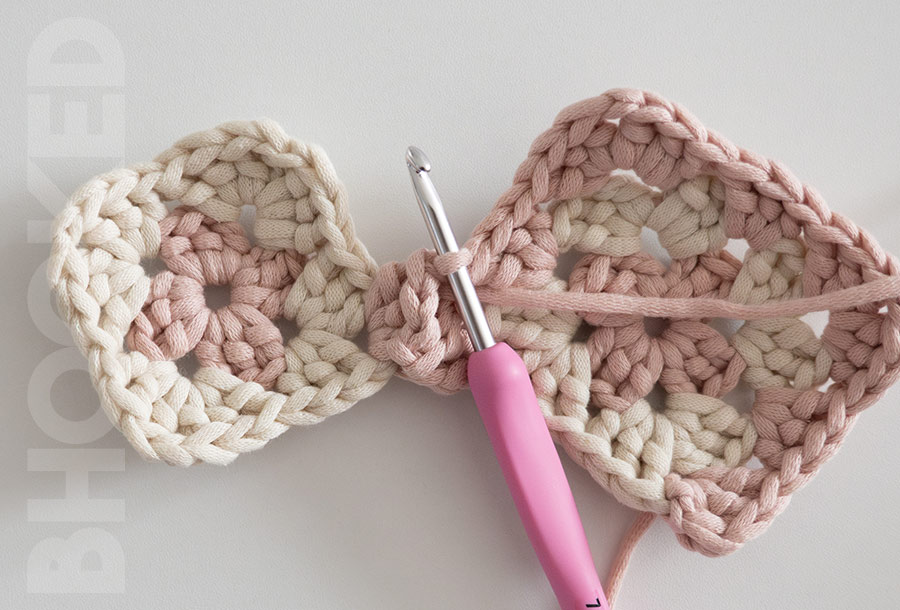
Step 5: After the slip stitch, make your next cluster of double crochets as usual. Then slip stitch in the next space on the first granny square. Repeat this until you reach the corner of the second granny square.
To work the corner, make 3 double crochets in the corner of the new granny square, then join with a slst to the first granny square corner. Ch 1 and make 3 double crochets in the second granny square to finish that corner.
Step 6: Crochet along the top edge and down the side of the second square as you normally would.
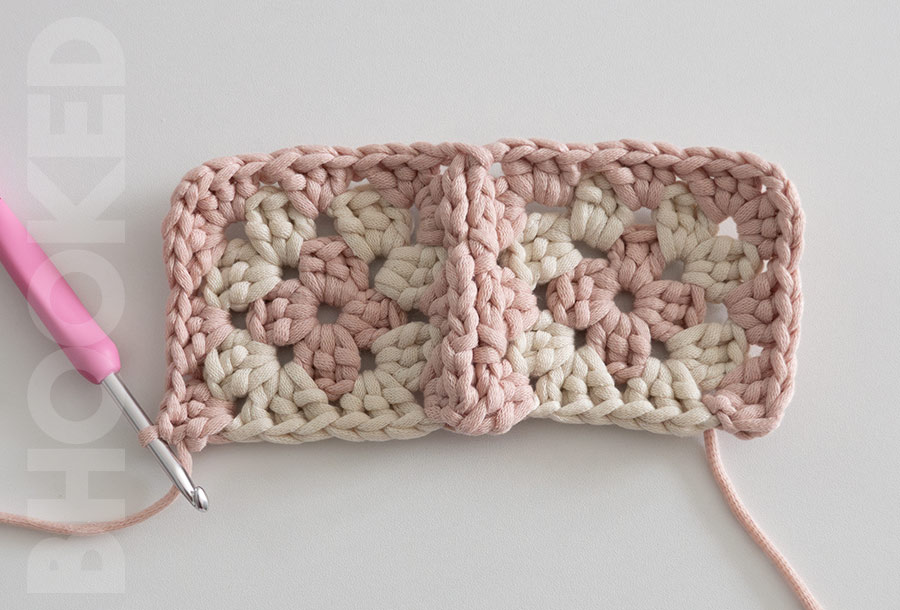
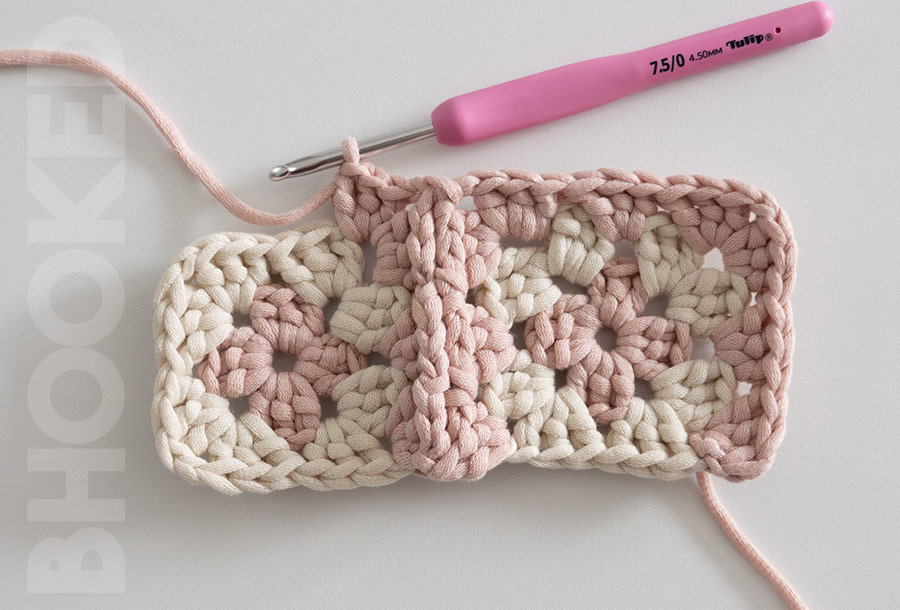
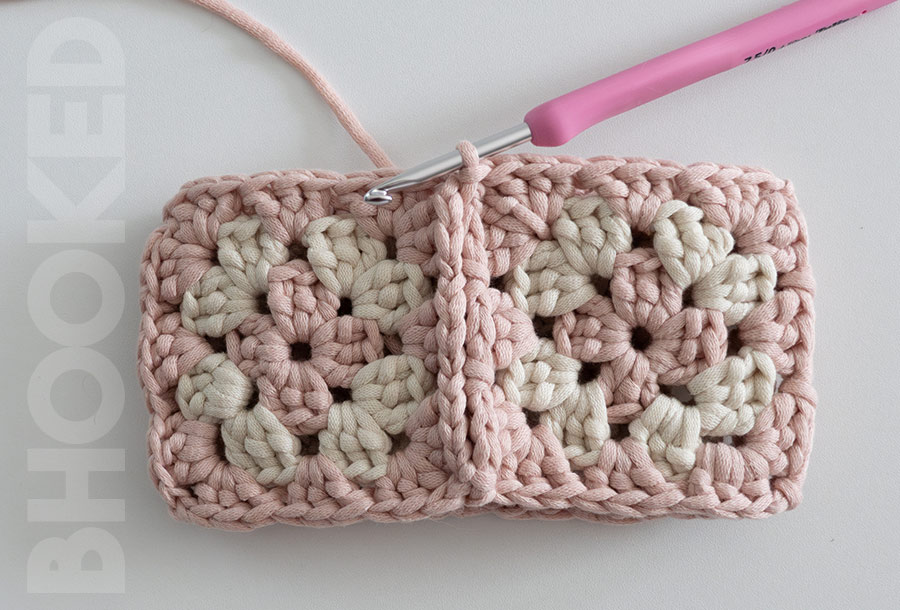
Step 7: Repeat steps 3 through 5 to add the remaining granny squares. On the last square, crochet the join side and along the top, but don’t crochet down the side.
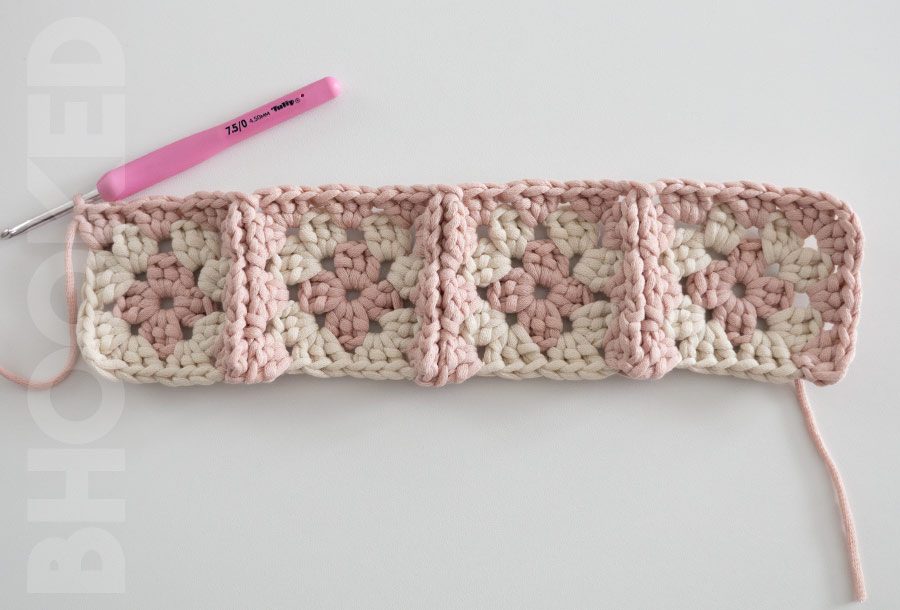
Step 8: Fold the strip of joined granny squares in half with the right side facing outward. Slst in the corner of the first granny square to start the join. Ch 1 and make three double crochets in the corner space of the fourth granny square (the one that needs to be joined).
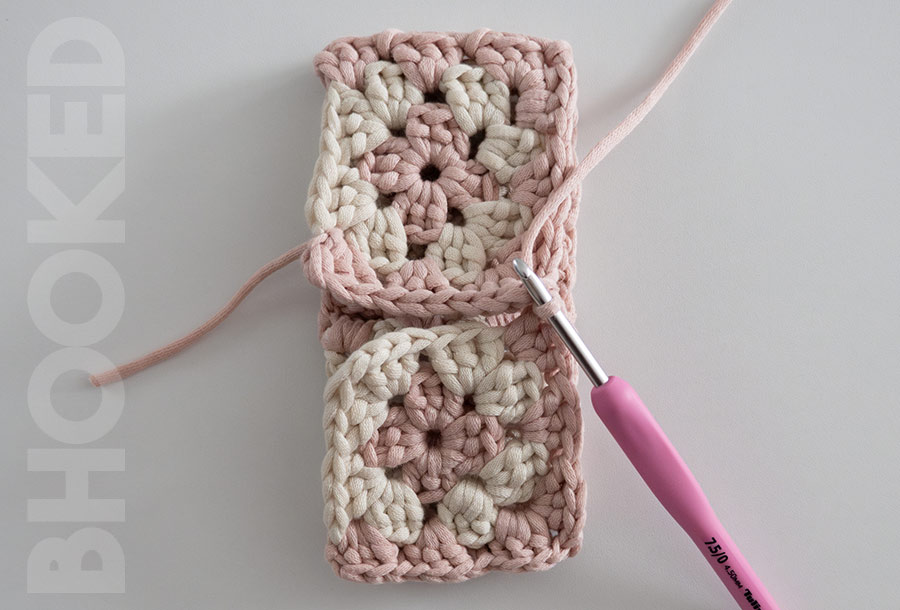
Step 9: Next, slip stitch in the space between double crochet clusters on the first granny square. After the slip stitch, make your next cluster of double crochets as usual. Then slip stitch in the next space on the first granny square. Repeat this until you reach the corner of the granny square.
Step 10: Rotate the work so you can crochet along the top edge of the work (the side that still needs a final row to complete).
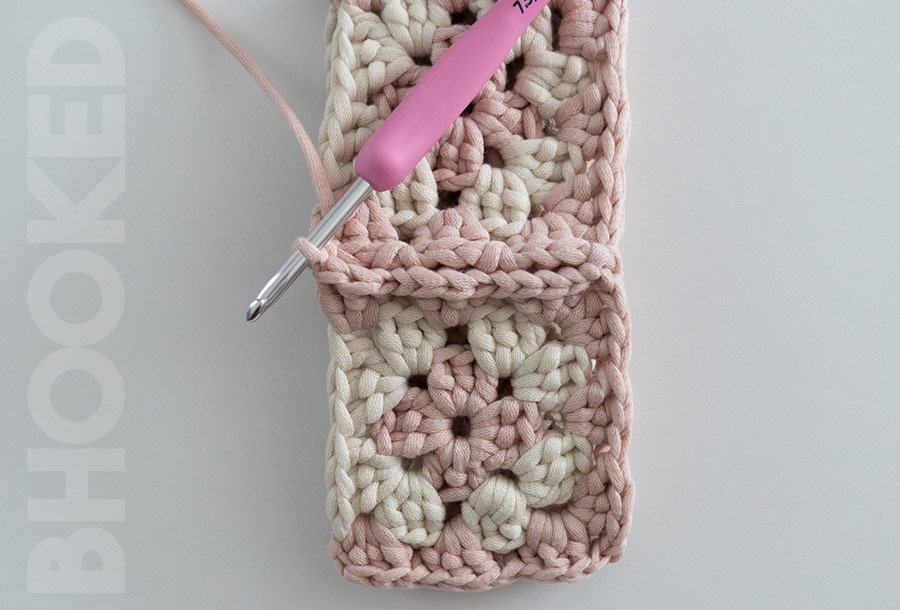
Ch 1 and make 3 double crochets in the same corner space as the last three double crochets you made.
Step 11: Make 3 double crochets between the next two clusters as usual, and make 3 double crochets in the next corner space. Then slst in the space between the join, ch 1 and make 3 double crochets in the next corner space. Repeat this around, and join with a slst to the space between the first and last granny square corners.
Attaching Granny Squares to the Base
Using the bigger crochet hook, and using the front loops only of the round base stitches, and the front loops of the granny squares, slst in every st and once in every corner space. (44 slst)
Fasten off and weave in the ends.
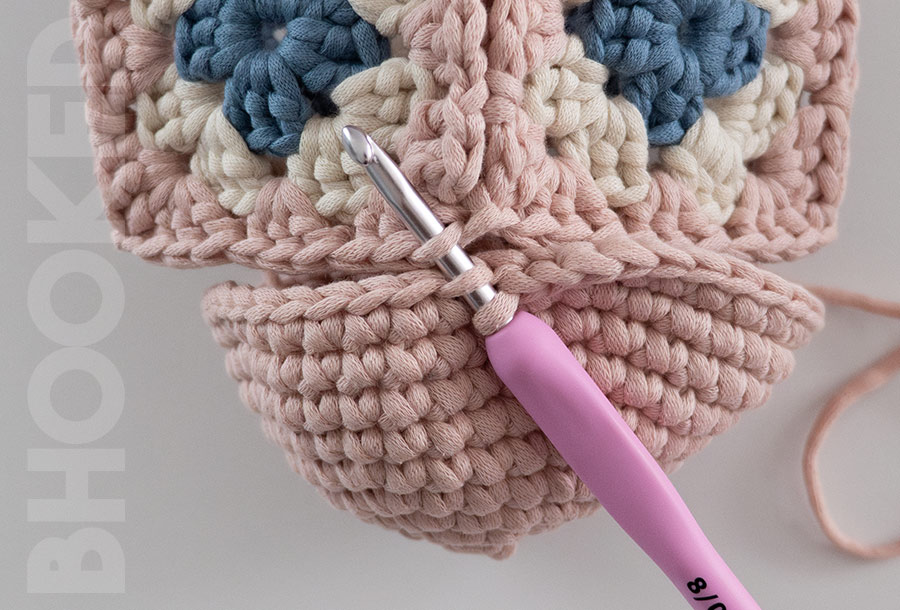
Crocheting the Top Border
Round 1: With the bigger crochet hook, fasten on in any dc. Ch 1 (doesn’t count as a st) and sc in same st. Make a sc in every dc, and ch 1-sp, and between the granny squares. Don’t join. Continue working in a spiral. (48 sts)
Round 2: Make 2 sc in every stitch. Join with a slst to the first sc. (48 sts)
Round 3: Rsc in every stitch. Join with a slst to the first rsc. Fasten off and weave in all the ends.

By using this pattern, you agree to our terms of use:
This pattern is for personal use only. You agree not to modify, publish, transmit, sell, create derivative works, or in any way exploit any of the content within this page, in whole or in part. If you wish to share this pattern, share a link to this webpage only. You may sell finished items made from this pattern.
Copyright, B.Hooked Crochet, LLC
Transforming Boring Plant Pots with Granny Squares
Video not displaying? Watch this tutorial on YouTube instead.