If you’re just getting started with knitting, rib stitch knitting is one of the best techniques to learn early on. Not only is it simple and satisfying to stitch, but it also creates a stretchy, textured fabric that’s perfect for cuffs, edges, hats, and more.
UPDATED: MAY 22, 2025 BY BRITTANY
This post may contain affiliate links. See our Disclosure Policy for more information.

In this tutorial, I’ll walk you through how to knit a 2×2 rib stitch—one of the most common and beginner-friendly ribbing styles.
You’ll also find helpful tips for understanding how other rib stitch variations work, so you can confidently use them in your future projects. Whether you’re adding texture to a scarf or finishing off the edge of a sweater, rib stitch knitting is a skill that will serve you well.
Here’s a quick overview of the topics we’ll cover in this article:
- What is Rib Stitch in Knitting?
- Why Rib Stitch is Great for Beginners
- Types of Rib Stitch Knitting
- How to Knit 2×2 Rib Stitch (pattern instructions)
- What is the Multiple for Rib Stitch Knitting Patterns
- How to Read Rib Stitch Knitting
- Common Rib Stitch Mistakes (and How to Avoid Them)
- Rib Stitch Knitting FAQ
- Rib Stitch Knitting Project Ideas
- More Beginner-Friendly Stitches to Try Next
What is Rib Stitch in Knitting?
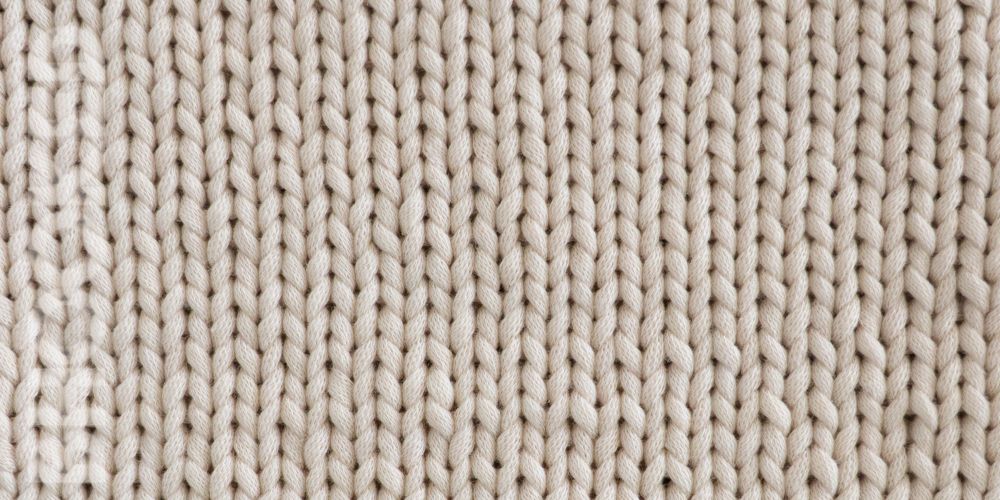
Rib stitch in knitting is a simple pattern made by alternating knit and purl stitches across a row. This creates vertical columns of stitches that look like little ridges—these are what give rib stitch its signature texture and stretch.
Because of the way the stitches pull together, ribbing is naturally elastic. That’s why it’s so commonly used in places where you want a snug fit, like the cuffs of sleeves, the edge of a hat, or the waistband of a sweater. Rib stitch knitting isn’t just practical—it also adds a clean, polished look to your project.
No matter which type of rib you choose, the basic idea is the same: repeat a set number of knit stitches and purl stitches across each row. Once you understand that rhythm, you can easily adjust it to suit your project.

Why Rib Stitch is Great for Beginners
Rib stitch knitting is one of those techniques that looks impressive but is actually very beginner-friendly. If you already know how to knit and purl, you’ll have no trouble knitting your first ribbing pattern. It’s just a combination of knit and purl!
Here’s why it’s a great stitch to learn early on:
- It builds confidence. Rib stitch helps you practice switching between knit and purl stitches, which is a skill you’ll use in tons of future projects.
- It teaches pattern awareness. Following a simple repeat like knit 2, purl 2 helps train your eye to recognize stitch patterns and pay attention to what’s happening on your needles.
- It creates useful fabric. Ribbing isn’t just for practice—it’s functional. You can use it in scarves, headbands, cuffs, and more.
- It’s easy to fix mistakes. As you learn to “read” your stitches, it becomes easier to spot and fix common slip-ups.
Learning rib stitch early sets a solid foundation for all kinds of textured knitting down the road—so it’s well worth the time to practice!
Types of Rib Stitch Knitting Patterns
Once you get the hang of rib stitch knitting, you’ll notice there are several variations—each with its own look and stretchiness. The basic idea is the same across all of them: alternate knit and purl stitches in a repeating pattern.
Here are some common types of rib stitch:
- 1×1 Rib Stitch
Knit 1 stitch, then purl 1 stitch—repeat across the row.
This creates a very stretchy fabric that looks the same on both sides. - 2×2 Rib Stitch
Knit 2 stitches, then purl 2 stitches—repeat across.
This rib is slightly wider and less stretchy than 1×1 but still holds its shape well. - 3×1 Rib Stitch
Knit 3 stitches, then purl 1 stitch—repeat.
This creates more visual interest and a unique texture with less stretch. - Custom Ribbing
You can create your own rib stitch combinations (like 4×2 or 5×1) to suit your design. Just remember: The total number of stitches in your repeat should divide evenly into your cast-on number.
For example, if you’re doing a 2×2 rib (K2, P2), cast on a multiple of 4 stitches. This keeps your pattern consistent all the way across the row.
How to Knit 2×2 Rib Knitting Tutorial
Now that you understand the basics, let’s knit a 2×2 rib stitch—one of the most common ribbing styles used in knitting. It’s one of my favorite rib stitches to use in projects, and it’s also a great first ribbing pattern for a beginner to try.
Supplies
- Yarn: For practice, use medium-weight yarn. You’ll only need a small amount to make a practice swatch.
- 5 mm Knitting Needles
Stitch Multiple
The 2×2 rib stitch knitting pattern multiple is 4.
This means that to start a swatch or a project with this stitch, you’ll need to cast on any number that 4 will divide evenly into (like 20, 28, 32, etc.)
Stitch Abbreviations
- St(s) Stitch(es)
- CO Cast On
- K Knit
- P Purl
- Rep Repeat
Cast on any odd number of sts that 4 will divide evenly into.
Row 1: *K2, P2. Rep from * to the end of the row. Flip the work.
Row 2: Knit each stitch as it presents (in other words, knit the knits and purl the purls)
Repeat: Rep the last 2 rows until your project measures the length you want.
Bind Off: You can start the bind off at any point in the project. Knit the first two stitches, then pass the first loop as the last. Purl the next stitch. Then pass the first loop over the last. Continue in this manner, knitting the knits and purling the purls one stitch at a time and passing the first loop over to bind it off.
How to Choose the Right Stitch Multiple for Ribbing
When knitting a rib stitch pattern, getting the stitch multiple right is key to making the pattern line up evenly across your row.
Each ribbing pattern has a repeat—like knit 2, purl 2—and your cast-on number needs to match that repeat.
Here’s a quick reference:
- 1×1 Rib: Cast on an even number of stitches (like 20, 22, 24, etc.)
- 2×2 Rib: Cast on a multiple of 4 (like 24, 28, 32, etc.)
- 3×1 Rib: Cast on a multiple of 4 (3 knit + 1 purl = 4 stitches per repeat)
- 4×2 Rib: Cast on a multiple of 6 (4 knit + 2 purl = 6 stitches per repeat)
Helpful Tip: If you want the edges of your ribbing to look symmetrical or match in a certain way, you can add a few extra stitches to the beginning or end. For example, you might cast on 26 stitches for a 2×2 rib (24 for the pattern + 2 edge stitches). If you do this, you’ll start and end with two knit stitches so each edge looks the same.
This makes it easier to center your ribbing or add a border when knitting garments or accessories.
How to Read Your Stitches in Ribbing
Once you’ve worked a few rows of rib stitch knitting, you don’t always need to count—you can read your stitches instead. This is a skill that makes knitting faster and helps you catch mistakes early. All it means to “read your knitting” is to be able to look at a stitch, and identify if it’s a knit or a purl.
Here’s how to identify a knit a purl stitch:
- Knit stitches look like little Vs on your needle.
- Purl stitches look like small bumps or horizontal bars.

So when you turn your work for the next row, you’ll just knit the Vs and purl the bumps. This is what people mean when they say to “knit the knits and purl the purls.”
So if the stitch below your working yarn looks like a V, knit it. Or if it looks like a little bump, purl it. This keeps the rib pattern consistent without needing to look back at the pattern every row.
Common Rib Stitch Knitting Mistakes (and How to Fix Them)
Even though rib stitch knitting is beginner-friendly, a few common mistakes can sneak in—especially while switching between knits and purls. Here’s what to watch for and how to fix it:
The Ribbing Looks Off:
You may have accidentally purled a knit stitch (or vice versa), breaking the pattern. Look back at your previous row and “read” your stitches (knits look like Vs, purls look like bumps). Tink (unknit) a few stitches and redo that section. Or use a crochet hook to drop and fix the wrong stitch if you’ve already knit several rows.
You Ended the Row with the Wrong Stitch:
If you notice that your stitch pattern doesn’t work out evenly at the end of the row, you may not have cast on the correct number of stitches for the ribbing repeat. Double-check that your cast-on number is a multiple of your ribbing pattern. For example, for 2×2 ribbing, your stitch count should be a multiple of 4. If not, you can adjust next time by casting on more or fewer stitches.
Loose or Gappy Stitches Between Knits and Purls:
This is really common! Switching between knit and purl stitches can cause the yarn tension to loosen, especially for new knitters. Try giving your working yarn a gentle tug after each stitch change (from knit to purl or purl to knit) to keep tension even. This gets easier with practice!
Edges Look Uneven:
Ribbing pulls in, so the edges can easily look pulled in, curled or messy, and you may not have done anything wrong. Double check your stitch count, and if everything looks okay, it’s probably just the stitch. Sometimes adding edge stitches in garter, or slip the first stitch of each row can clean up the look of the edges. Blocking your finished piece also helps smooth and shape ribbed fabric.
Frequently Asked Rib Stitch Knitting Questions
What is rib stitch in knitting?
Rib stitch is a textured knitting pattern created by alternating knit and purl stitches in the same row. It creates vertical columns that look like ribs and gives your fabric stretch and structure—perfect for edges like cuffs, brims, and hems.
Is rib stitch stretchy?
Yes! Rib stitch is naturally stretchy, especially 1×1 and 2×2 ribbing. That’s why it’s commonly used for areas that need a snug fit, like hat brims and sweater cuffs.
What’s the difference between 1×1 and 2×2 rib stitch?
They both create a stretchy fabric, but 2×2 has slightly wider “ribs” and a more defined look. 1×1 rib: Knit 1, Purl 1. 2×2 rib: Knit 2, Purl 2;
Can I knit rib stitch in the round?
Yes! You can absolutely knit ribbing in the round. Just follow the same repeat around your circular needles (e.g., K2, P2 around for 2×2 rib). The key is to keep track of your stitch pattern since you won’t be turning your work.
Why does my ribbing look wrong?
It’s likely that a stitch got swapped—like knitting where you should’ve purled. Check your work by reading your stitches: knit stitches look like Vs, and purl stitches look like bumps. Don’t worry—this gets easier with practice!
Can I use rib stitch knitting for a whole project?
Definitely! While ribbing is often used for borders, it can also be the main fabric. A scarf, headband, or stretchy cowl worked entirely in rib stitch has great texture and bounce.
Rib Stitch Knitting Project Ideas
Once you’ve practiced the basics, rib stitch is such a fun and useful technique to have in your toolkit. It adds texture, stretch, and a neat finish to almost anything—and it’s especially great for beginner projects!
If you’re looking for ideas, here are a few patterns that use rib stitch in different ways:


More Beginner-Friendly Stitch Tutorials + Free Patterns
When you’ve mastered the two basic stitches: knits and purls, the next step is to use these stitches together to make up more interesting stitch patterns. Here are some more stitches for you to try next:
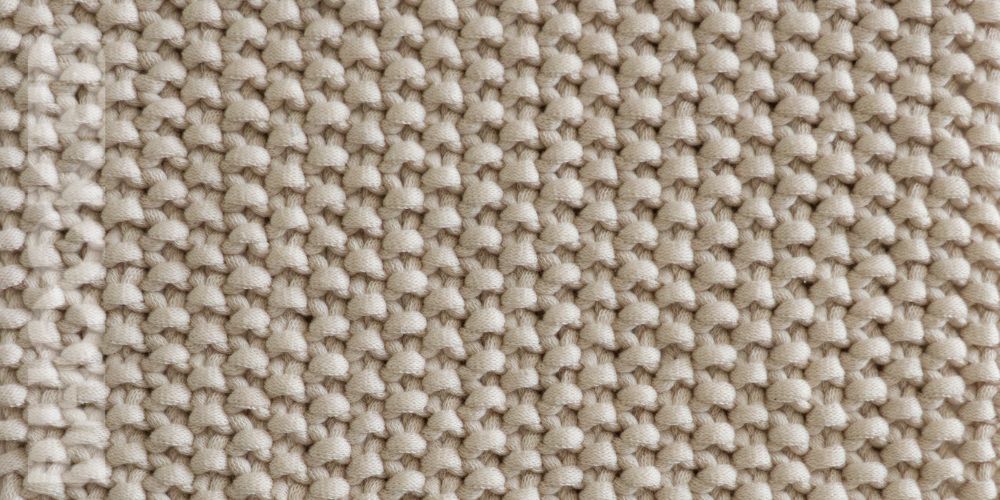
- Knit Basket Weave Stitch
- Double Moss Stitch
- Stockinette Stitch
- Garter Stitch
- Knit Seed Stitch
- Fisherman’s Rib Stitch


