If you’ve just learned how to knit and purl, you’re ready to try the knit stockinette stitch—one of the most popular and classic knitting patterns. In this step-by-step tutorial, I’ll show you exactly how to knit stockinette stitch, even if you’re brand new to knitting.
UPDATED: MAY 15, 2025 BY BRITTANY
This post may contain affiliate links. See our Disclosure Policy for more information.
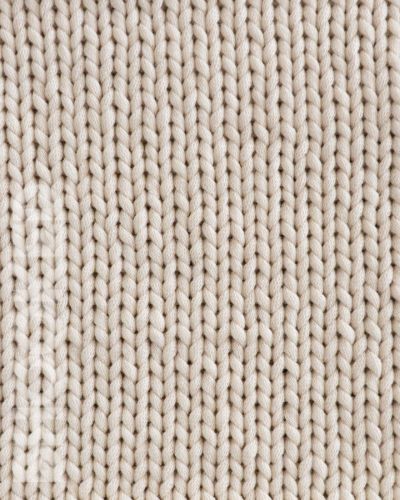
Knit stockinette stitch is what gives knitting that smooth “V” pattern on the front and soft, bumpy texture on the back. You’ll find it in scarves, sweaters, hats, and just about every type of knitting project out there.
It’s one of my favorite stitches to work with, not to mention, it’s one of the easiest!
You can pair it with your favorite yarn and let your creativity take the lead. Its simple, soothing repeat makes it ideal for relaxing stitch sessions when you just want to unwind and knit.
In the rest of this tutorial, we’ll explore all aspects of the knit stockinette stitch: what it is, how to knit it, and what projects it’s best suited for. Plus I’ll answer some frequently asked questions so you don’t have to go searching for the answers you need.
Here’s a quick overview of the topics we’ll cover in this article:
- What is the Knit Stockinette Stitch?
- Knit Stockinette Stitch Tutorial
- Stitch Multiple
- Knit Stockinette Stitch Abbreviations
- Knit Stockinette Stitch Step-by-Step Video
- Tips for Success
- Common Mistakes to Avoid
- Stockinette Stitch FAQ
- Knit Stockinette Stitch Project Ideas
What is the Knit Stockinette Stitch?
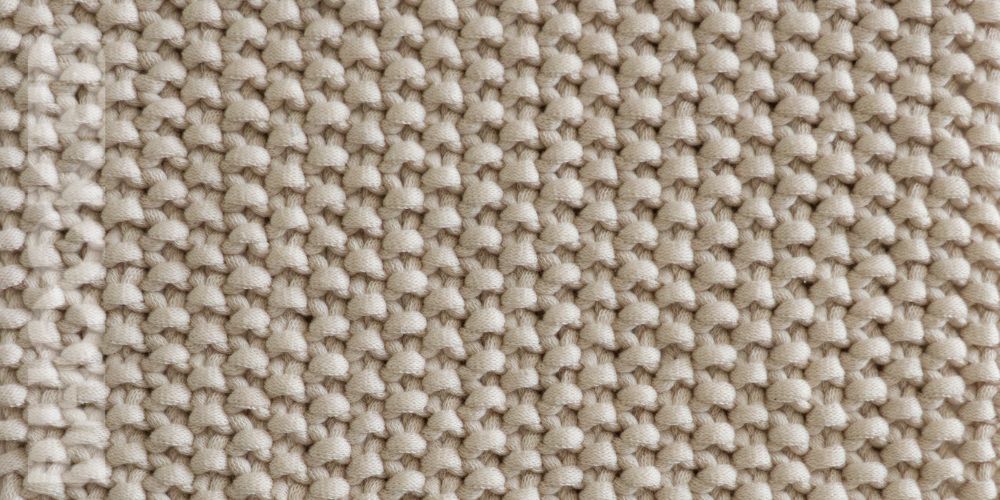
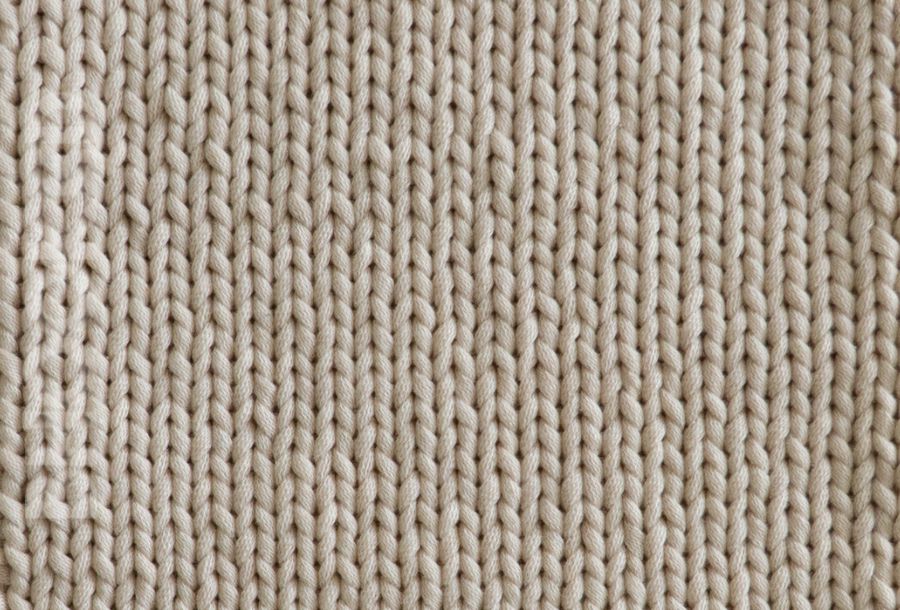
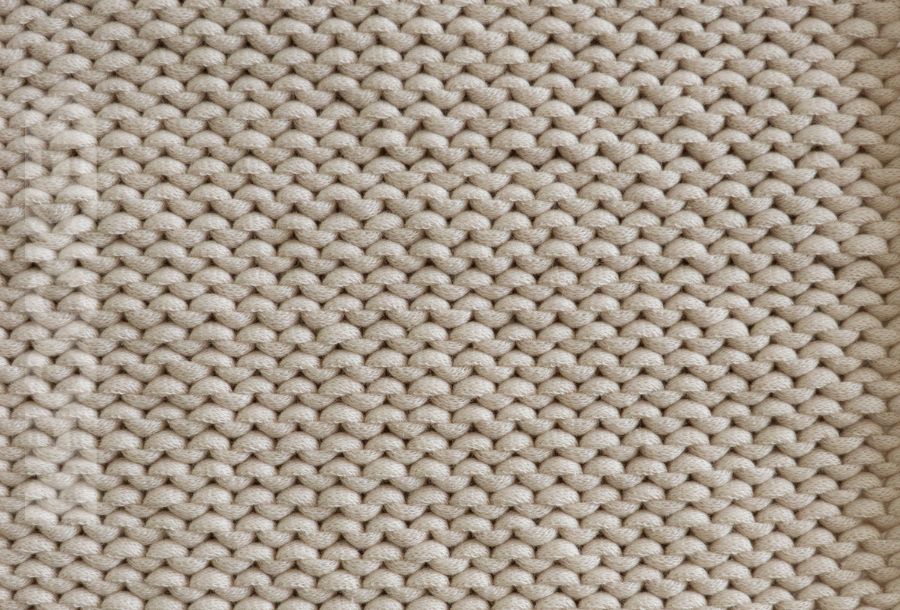
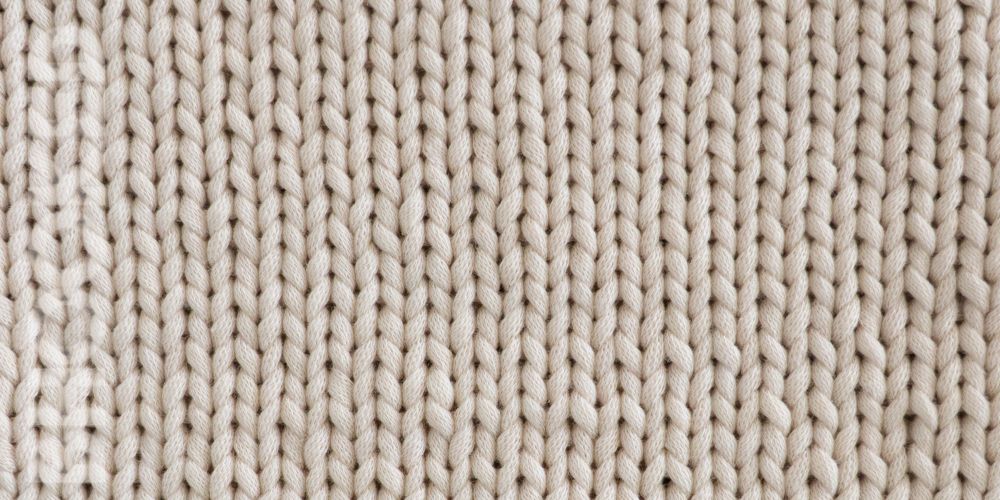
Stockinette stitch is one of the most common knitting stitches—and for good reason. It creates a smooth, neat fabric that looks like little “V” shapes on the front (called the right side) and a bumpy, textured pattern on the back (called the wrong side).
To knit stockinette stitch flat (back and forth), all you do is:
- Knit one row
- Purl the next row
Then repeat those two rows again and again!
It’s that simple—and it forms the base for tons of knitting projects, like sweaters, beanies, blankets, and more.
Right side = knit row
Wrong side = purl row
Because the stitch is made up of smooth rows on one side and bumps on the other, it naturally wants to curl at the edges. Don’t worry—this is totally normal, and I’ll share a few tips for dealing with that later in the post.
Knit Stockinette Stitch Tutorial
Knit stockinette stitch is incredibly versatile so you can pair it with just about any yarn in your stash from lightweight to super bulky. In order to see the stitch pattern best, choose a smooth yarn that’s easy to see the stitches as you knit.
Supplies
- Yarn: For practice, use medium-weight yarn. You’ll only need a small amount to make a practice swatch.
- 5.5 mm Knitting Needles
Pattern Notes
- There is a clear right and wrong side to this stitch pattern. The right side will look like smooth v’s, and the wrong side will look like smooth bumps.
Stitch Multiple
Stockinette stitch doesn’t require a specific stitch multiple—you can cast on any number of stitches.
That means it’s super flexible! Whether you want to knit a small swatch to practice or start a larger project, you can cast on as few or as many stitches as you like. Just remember: if you’re following a pattern, always use the stitch count it gives—even if it’s using stockinette.
Abbreviations
- CO Cast On
- K Knit
- P Purl
- St(s) Stitch(es)
Additional Notes: You’ll notice in the tutorial there is a garter stitch border around the swatch I’m making. The stockinette stitch has a tendency to curl and this border helps reduce the curl. If you want to work a border around your swatch or project, work the garter stitch a few rows initially. Then, after you start the stockinette stitch pattern, knit the first few and last few stitches (even if you’re on a purl row).
Start by casting on any number of stitches—try 20 to make a small practice swatch. You can use any cast-on method you like, such as the long-tail cast-on.
Row 1: With the yarn in the back, knit every stitch across the first row. This is the right side of your fabric—the side that will show those smooth little “V” shapes.
Row 2: Turn your work and purl across the second row. Keep the yarn in front as you work each purl stitch. This creates the wrong side of the fabric, which has a bumpy texture.
Repeat: Keep repeating these two rows:
- Knit one row (right side)
- Purl one row (wrong side)
After a few rows, you’ll start to see the smooth stockinette pattern take shape.
Bind Off
Once your stockinette swatch is as long as you like, it’s time to bind off. Here’s how to do a basic knit bind-off:
- Knit the first two stitches.
- Use your left needle to lift the first stitch over the second stitch and off the needle.
- Knit one more stitch, then lift the previous stitch over again.
- Repeat until you have one stitch left.
- Cut the yarn, leaving a few inches of tail, and pull it through the last loop to secure it.
Tip: Try to keep your tension loose while binding off, so the edge doesn’t pull too tight.
Knit Stockinette Stitch Step-by-Step Video
Video not displaying? Watch this tutorial on YouTube instead.
How to Knit Stockinette Stitch in the Round
Knitting stockinette stitch in the round is a little different from knitting flat because you’re always working on the right side of your fabric.
When you knit flat, you alternate rows of knitting and purling to create the stockinette pattern:
- Knit one row (right side)
- Purl one row (wrong side)
But when knitting in the round, you don’t turn your work. Instead, you keep knitting every stitch on every round, because you’re always facing the right side.
So, to knit stockinette stitch in the round:
- Simply knit every stitch on every round.
This creates the same smooth “V” pattern as flat stockinette stitch, but without the need to purl every other row.

Tips for Success with Knit Stockinette Stitch
Knitting stockinette stitch is simple, but a few helpful tips can make it easier to knit smoothly and spot mistakes as you go:
- Watch Your Edges: Stockinette stitch naturally curls at the edges—it’s just how the stitch behaves. If you’re making a swatch, don’t worry about it. For bigger projects, you can add a border of garter stitch or ribbing to help it lie flat.
- Learn to Spot the Right Side: The right side is the one with the smooth “V” stitches. If you’re ever unsure, place a stitch marker or safety pin on the right side after your first knit row so you can keep track.
- Practice Even Tension: Try to keep your yarn tension consistent while knitting and purling. This helps your stockinette stitch look neat and even. If one row looks tighter or looser than the others, that’s totally normal for beginners—it improves with practice!
- Check Your Stitch Count: Especially as a beginner, it’s easy to accidentally add or drop a stitch. Count your stitches every couple of rows to make sure you’re staying on track.
And always remember that small mistakes are part of the learning process—every great knitter started right where you are!
Common Mistakes to Avoid with Knit Stockinette Stitch
Learning stockinette stitch can feel tricky at first, but knowing what mistakes to watch out for will help you improve faster.
- Accidentally Purling Two Rows in a Row: Remember: stockinette stitch is knit one row, purl the next. If you purl two rows back to back, the pattern won’t look right. Keep track of which row you’re on to avoid this.
- Not Knowing Which Side You’re On: It’s easy to get confused about the right (knit) side and the wrong (purl) side. Use a stitch marker or pin to mark the right side if you lose your place.
- Uneven Tension: If your stitches look tight on one row and loose on the next, your tension might be uneven. Try to relax your hands and keep your yarn at the same tightness throughout. It’s also common for a beginner to make purls more loosely than knits. This will improve with practice!
- Dropped or Added Stitches: Check your stitch count every few rows to avoid accidentally dropping or adding stitches, which can throw off the pattern.
Frequently Asked Questions About Knit Stockinette Stitch
Why is my stockinette stitch curling at the edges?
Stockinette stitch naturally curls because of the way knit and purl stitches pull on the fabric. To prevent curling, add a border of garter stitch, seed stitch, or ribbing along the edges.
Can I knit stockinette stitch in the round?
Yes! When knitting in the round, you simply knit every stitch to create stockinette stitch since you’re always working on the right side.
What’s the difference between garter stitch and stockinette stitch?
Garter stitch is made by knitting every row, creating a bumpy, squishy fabric that lies flat. Stockinette stitch alternates knit and purl rows, creating a smooth “V” pattern but with edges that tend to curl.
How do I count rows in stockinette stitch?
Count each knit row as one right-side row and each purl row as one wrong-side row. Together, every two rows create one full repeat of stockinette stitch.
Knit Stockinette Stitch Project Ideas
The knit stockinette stitch creates a light fabric with no holes or gaps. These qualities make it an excellent choice for projects where drape is important (clothing), and projects where you don’t want a lacey look (blankets).
Here are a couple easy patterns to get you started!