If you’ve come across a pattern that mentions M1R or M1L knitting increases, and you’re not quite sure what that means—you’re not alone. These increases can sound a little technical at first, but they’re actually simple once you see them in action.
M1R stands for make one right, and M1L stands for make one left. Both are ways to add stitches in your knitting without leaving a hole behind. The difference? It’s all about which direction the new stitch leans.
UPDATED: MAY 8, 2025 BY BRITTANY
This post may contain affiliate links. See our Disclosure Policy for more information.
This guide will walk you through exactly what these increases are, when to use them, and how to do each one step-by-step. I’ve also included helpful tips, photos, and a small practice swatch to make it all easier to remember. Whether you’re just getting started or need a quick refresher, this is everything you need to feel more confident with M1R and M1L knitting increases.
Here’s a quick overview of the topics we will cover in this article:
- What is a “Make One” Increase?
- When and Why to Use a M1R and M1L knitting increases
- How to M1L Step-by-Step
- How to M1R Step-by-Step
- Common Mistakes to Avoid
- How to Remember Which is Which
- Practice Swatch Instructions
- Frequently Asked Questions
What is a M1R and M1L in Knitting?
In knitting, an increase simply means adding a stitch. The “make one” (or M1) increase is a popular way to do that—without leaving a hole or gap in your fabric.
Instead of knitting into an existing stitch, a make one increase uses the little bar of yarn between two stitches. By lifting that bar onto your needle and knitting into it a certain way, you create a brand-new stitch that looks smooth and blends right in.
There are two versions of this increase:
- M1L (Make One Left): The new stitch leans to the left.
- M1R (Make One Right): The new stitch leans to the right.
Both are nearly invisible once worked into your project, and they’re often used together to create balanced shaping—like on either side of a sleeve or neckline.
Up next, we’ll look at how to tell the difference between them and when you might choose one over the other.
When and Why to Use M1R and M1L Knitting Increases
M1R and M1L knitting increases are often used as a pair to shape your knitting in a clean, symmetrical way. You’ll most commonly see them in garment patterns—like sweaters, sleeves, and necklines—where the shaping needs to look even on both sides.
Here’s how they typically work:
- M1L (Make One Left): Used on the left side of a shaping section. The new stitch leans to the left, pointing in toward the center.
- M1R (Make One Right): Used on the right side. The stitch leans to the right, also pointing inward.
When used together, these increases mirror each other and give your project a polished, professional finish. You can think of it like this: M1L and M1R don’t just add stitches—they help those stitches blend in and move your fabric in the direction you want it to go.
You don’t have to use directional increases in every project, but when a pattern calls for them (or you want your shaping to look especially tidy), they’re a great tool to have in your skill set.
How to Make One Left (M1L)
The M1L (Make One Left) increase creates a new stitch that leans slightly to the left. It’s worked by lifting the strand of yarn between two stitches and knitting into it in a specific way.
Here’s how to do it, step by step:
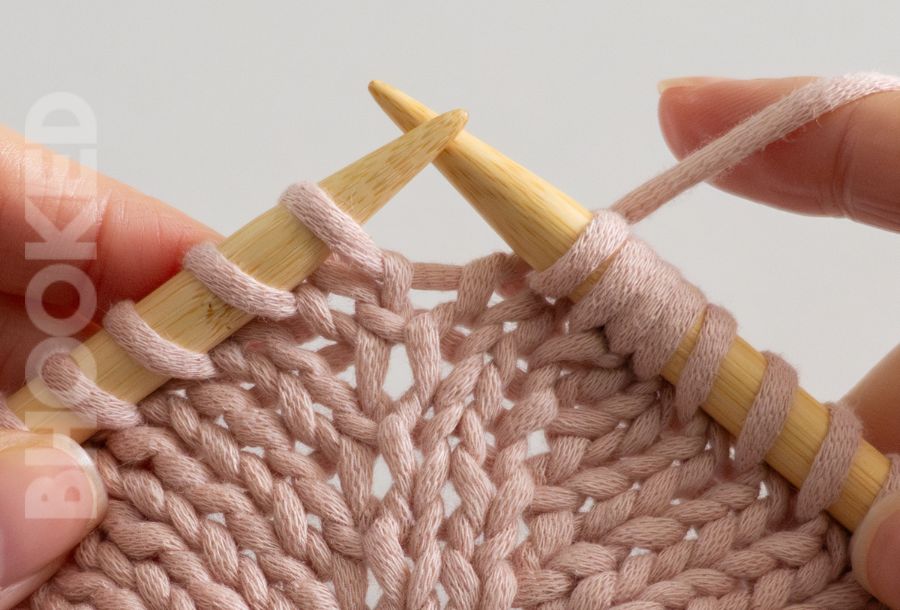
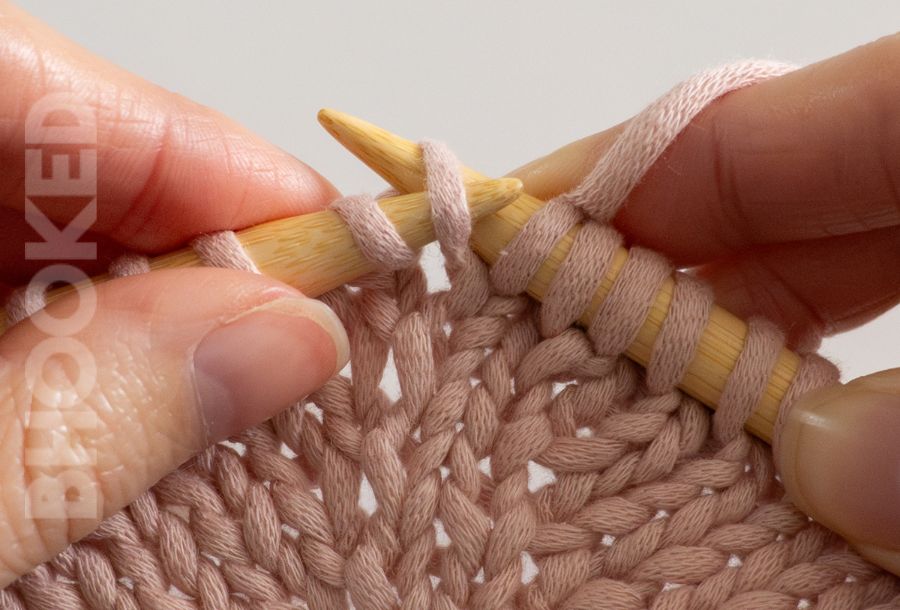
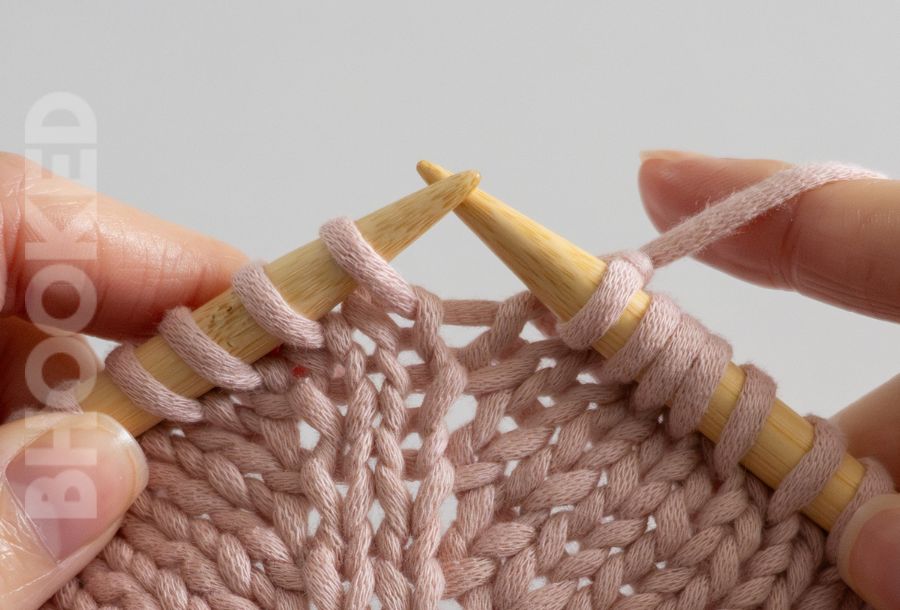
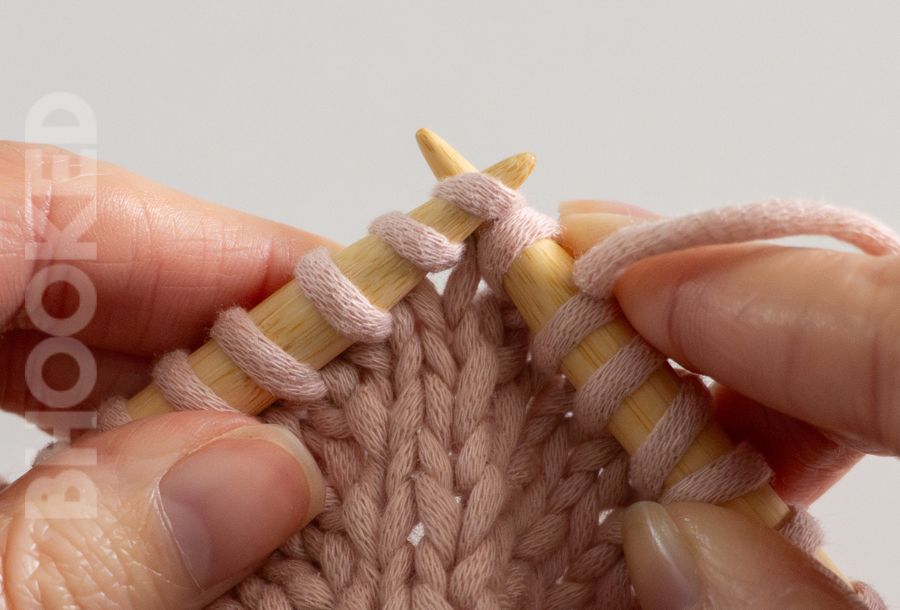
- Find the bar between the stitch you just knit and the next stitch on your left needle.
- Use your left needle to lift that bar from front to back.
- Knit into the back leg of the lifted loop. This part can feel a little tight, but it’s what makes the stitch twist and close up—no hole!
That’s it! You’ve made one stitch, and it will lean gently to the left.
Tip:
If the loop feels too tight to knit into, try loosening the bar a little with your fingers before you lift it. It gets easier with practice. Here’s a video to show you how it’s done!
How to Make One Right (M1R)
The M1R (Make One Right) increase is similar to M1L, but this time, the new stitch will lean to the right. Like M1L, it’s worked by picking up the yarn bar between two stitches—but the direction is key here.
Follow these steps to make an M1R:
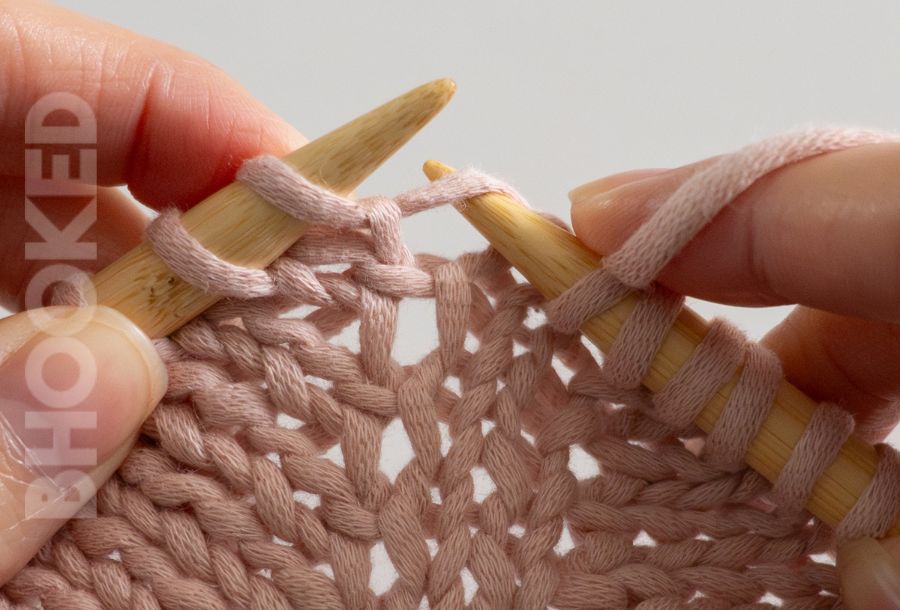
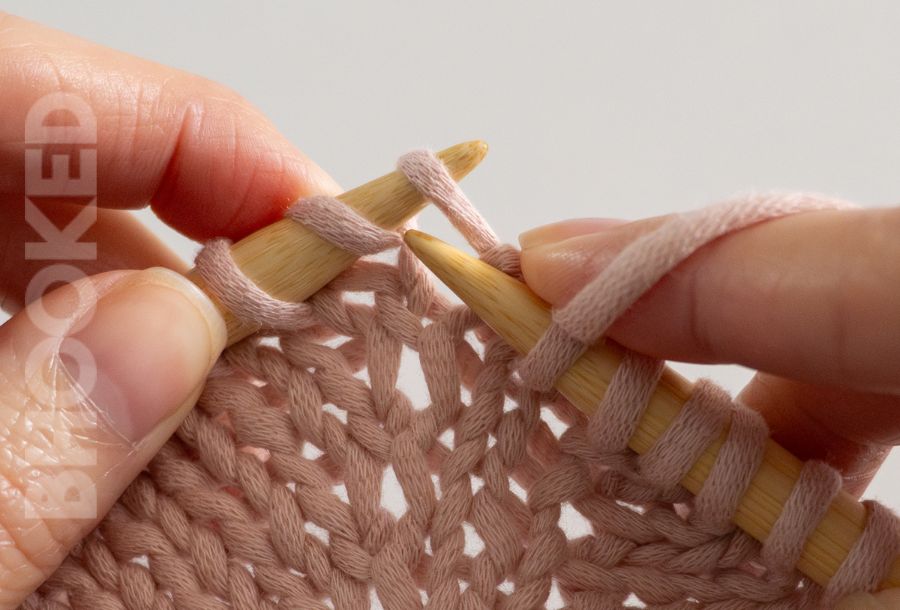
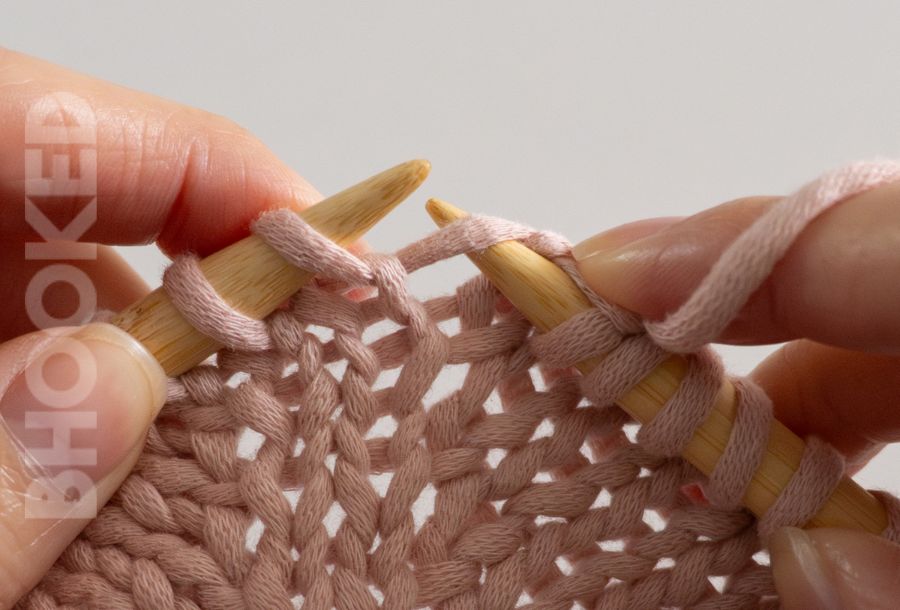
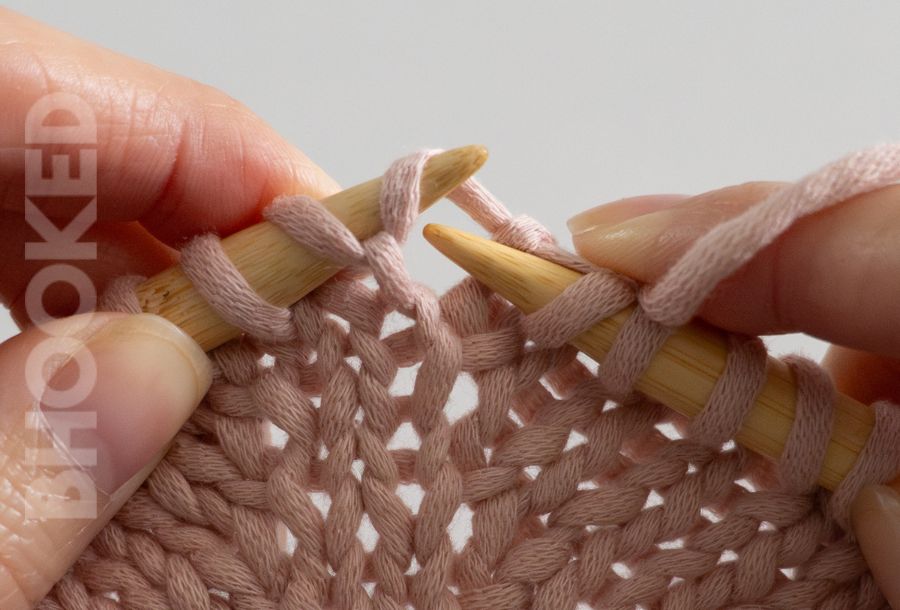
- Find the bar between the stitch you just knit and the next one on your left needle.
- Use your left needle to lift that bar from back to front (this is opposite to how you lift it for M1L).
- Knit into the front leg of the lifted loop. This twist will make the stitch lean right and blend smoothly into the fabric.
That’s all there is to it! The stitch will slant to the right, creating a neat and mirrored increase when paired with M1L.
Tip:
As with M1L, if the bar feels tight, gently loosen it with your fingers to make it easier to work into. Here’s a video to show you how it’s done!
Common Mistakes to Avoid
Even experienced knitters can make a mistake with M1R and M1L knitting increases. The good news is that with a little awareness, you can easily fix most of them! Here are some common pitfalls to watch for:
1. Twisting the Stitch the Wrong Way
It’s easy to accidentally twist the stitch in the wrong direction, especially if you’re moving quickly. Make sure you’re following the correct direction for each increase:
- M1L should lean to the left
- M1R should lean to the right
Fix: If you spot a twisted stitch, just unknit it and try again, making sure the bar is lifted in the right direction.
2. Forgetting Which Direction is Which
Since M1L and M1R sound similar, it’s easy to mix them up. Here’s a simple way to remember:
– M1L = left = lift the bar from front to back
– M1R = right = lift the bar from back to front
3. Accidentally Using a Different Increase
Sometimes, it’s tempting to use other increases like kfb (knit front and back) or a yarn over (YO), but they create a different result. Stick with the step-by-step instructions for M1L and M1R to avoid creating an unwanted hole or a stitch that looks completely different.
4. Making the Increase Too Tight
If your increases feel tight or don’t have room to stretch, your knitting may start to bunch up. Loosen the tension in the bar before you lift it, or knit a bit more loosely overall.
How to Remember Which is Which?
If you’re finding it tricky to remember the difference between M1L and M1R, don’t worry—it’s a common challenge, especially when you’re just getting started. The good news is that with a bit of practice, it’ll become second nature. Here are a few tricks to help you keep them straight.
One way to remember is by thinking about the direction the stitch leans. M1L (Make One Left) creates a stitch that leans to the left, while M1R (Make One Right) creates a stitch that leans to the right. Picture the shape of a “V”—M1L leans toward the left side, and M1R leans toward the right. The direction the stitch tilts is a simple but helpful visual.
Another trick is to focus on how you lift the yarn bar. For M1L, you’ll lift the bar from front to back, which is what makes the stitch lean left. For M1R, you lift it from back to front, making the stitch lean right.
If you’re ever uncertain, think of the first letters of each technique. The “L” in M1L stands for left, and it’s paired with the “front to back” motion, while the “R” in M1R stands for right, and it’s paired with the “back to front” motion. This can be a helpful little mnemonic to quickly recall which is which.
The more you practice, the easier it will become to recognize the difference instinctively. Before long, you won’t even need to think twice about which way to make the increase!
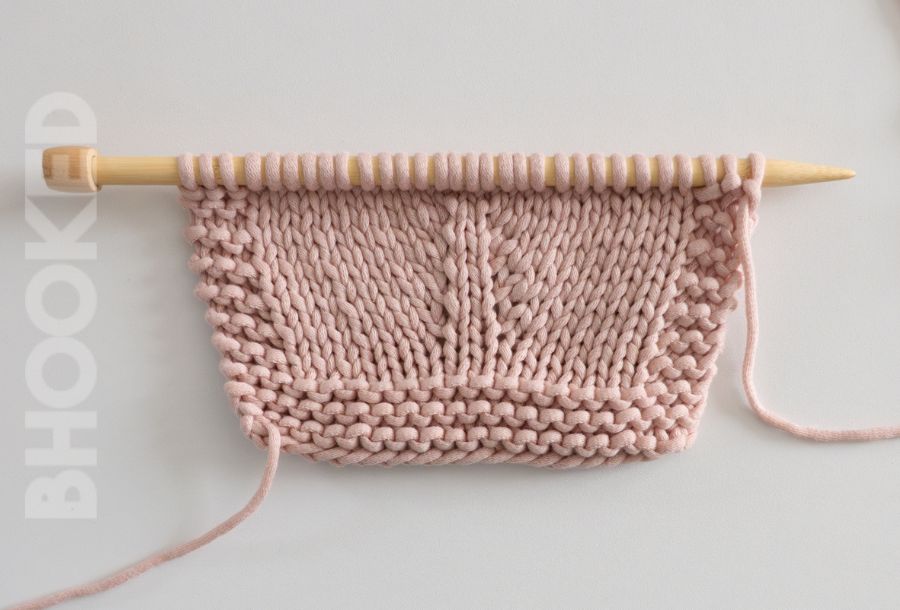
Practice Swatch for M1R and M1L Knitting Increases
Now that you know how to make M1R and M1L increases, the best way to get comfortable with them is by practicing. A small swatch is the perfect way to see how these increases work in action. Plus, it gives you a chance to make sure everything is flowing smoothly before you try them on a bigger project.
Here’s how to get started:
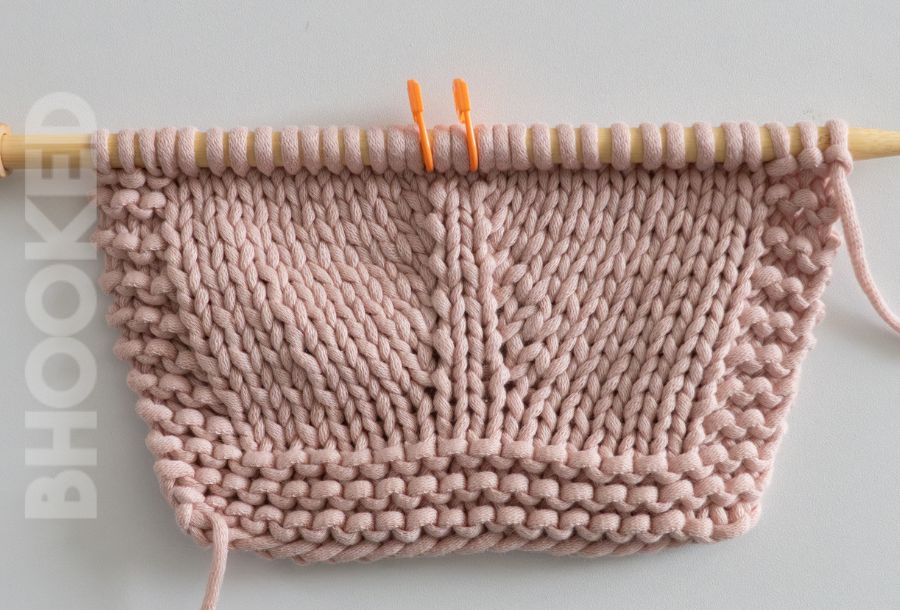
- Cast on about 20 stitches for your swatch. This gives you enough room to work with the increases and see them clearly.
- Work a few rows in your pattern (or just in plain stockinette) to get a solid base.
- On a knit row, start practicing the M1L and M1R increases. As you come to the area where you want to add a stitch, use M1L on one side of the row, place a marker, knit about 4 stitches, place another marker, and M1R next, so you can see the difference in how the stitches lean.
- Continue knitting the row and look at how the increases blend in.
- Turn your work and purl all stitches.
- Then repeat the make one stitches on the knit side when you reach the markers. Do this for a few rows (purling on the back side) until you’re comfortable with the motions and direction.
Tip:
If you notice any mistakes, don’t worry! The beauty of a swatch is that it’s a safe space to make mistakes and learn from them. Just rip out the row if needed and try again.
After working through the swatch a few times, you’ll have a much clearer sense of how M1R and M1L increase stitches should feel and look in your project. And, best of all, you’ll have a solid foundation for using them in your future knitting projects!
Frequently Asked Questions About M1R and M1L Knitting Increases
What’s the difference between M1L and M1R?
The main difference is the direction each stitch leans. M1L (Make One Left) creates a stitch that slants to the left, while M1R (Make One Right) leans to the right. These increases are usually worked together to create symmetrical shaping in your project.
Can I use M1L and M1R on any project?
Yes, you can use these increases on almost any project that calls for a neat, invisible increase. They’re especially useful in shaping garments like sweaters, where you want the increases to blend seamlessly into the fabric.
How do I prevent holes when using M1L and M1R?
If you find that M1L or M1R is creating small holes in your fabric, it may be due to tension. Try knitting a little looser or making sure you’re lifting the bar of yarn without stretching it too much. Practicing with a swatch will help you find the right balance.
Can I use these increases in lace or other textured projects?
Absolutely! M1L and M1R can be used in lace and textured patterns to add stitches without disrupting the overall design. Just be sure to follow the pattern’s instructions to maintain the proper flow.
Is there a way to do these increases without a noticeable seam?
Yes, the beauty of M1L and M1R is that they’re designed to create almost invisible increases. If you’re still noticing seams, check your tension and practice on a swatch. The more relaxed you are with your tension, the cleaner the increase will look.


