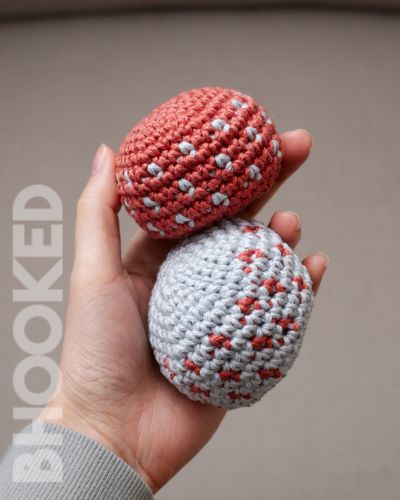
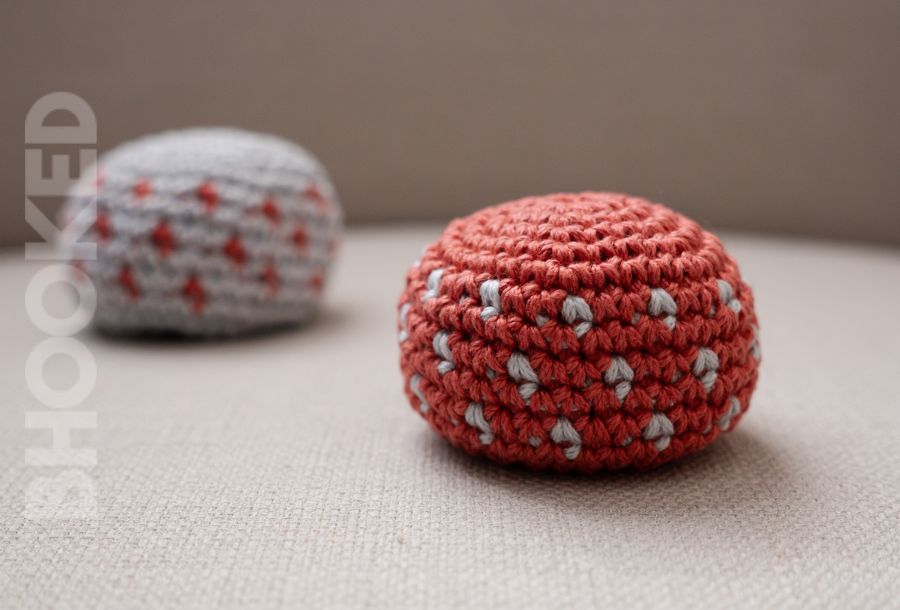
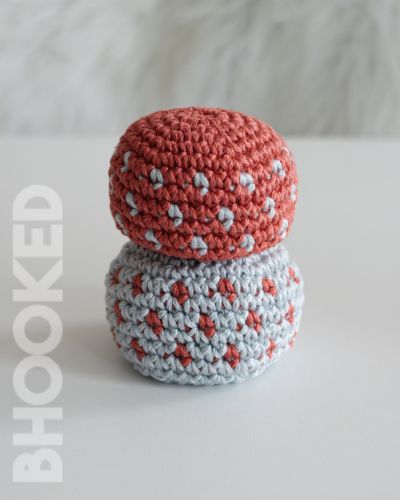
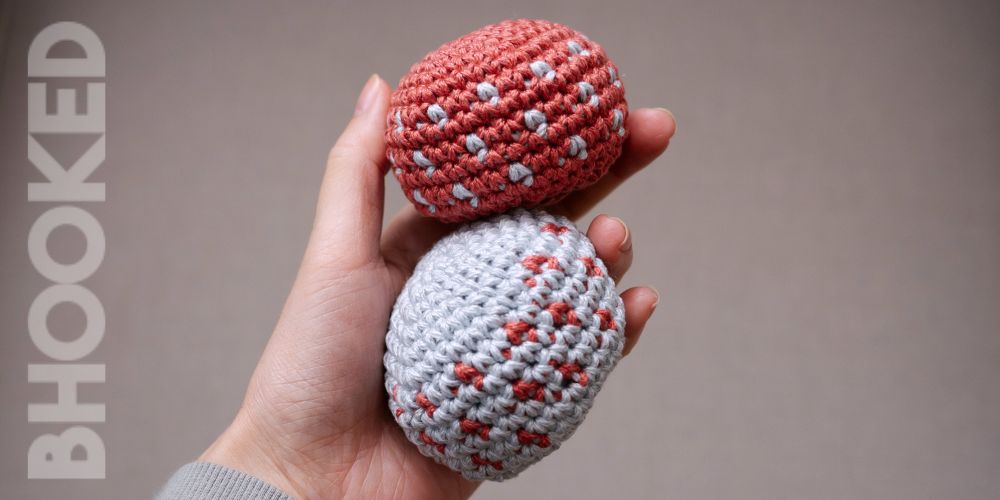
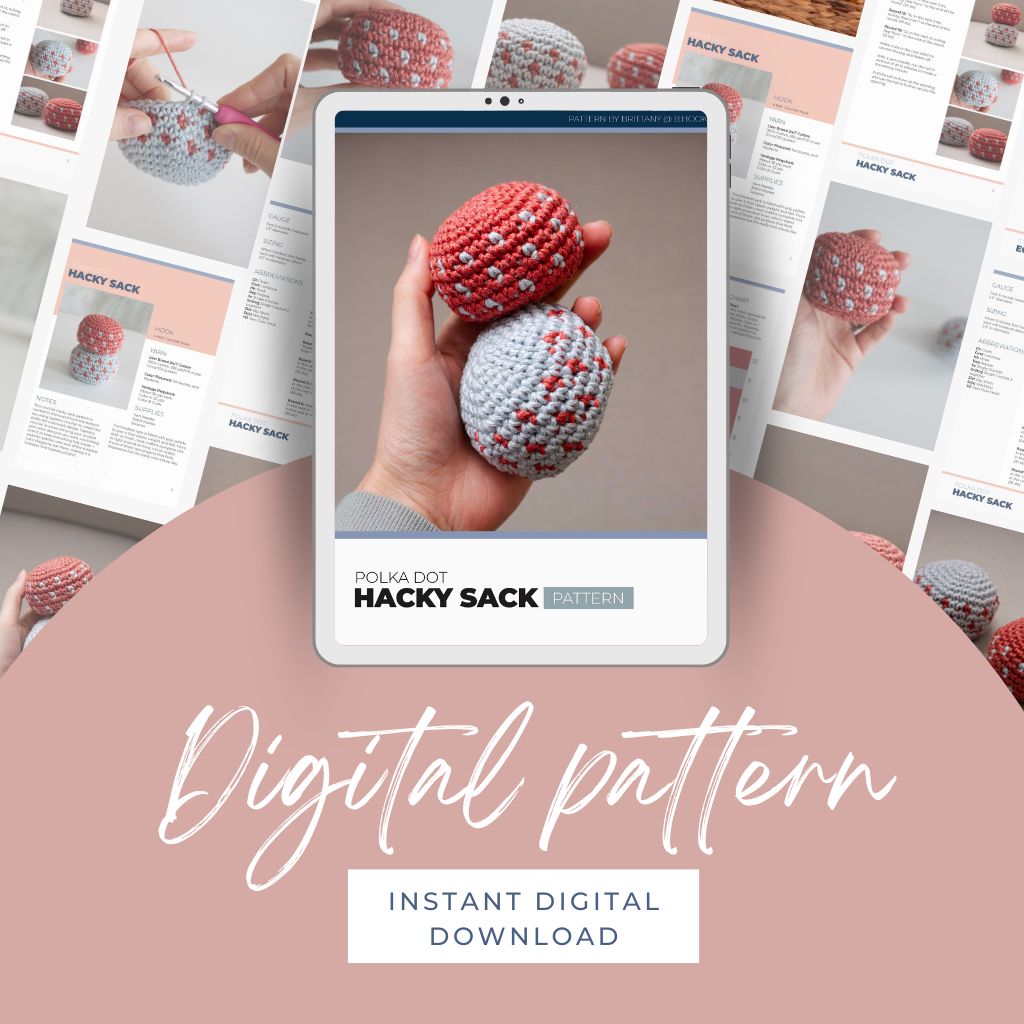
Crochet hacky sacks are having a serious comeback, and this Polka Dot Crochet Hacky Sack is the perfect way to stitch into the trend. It works up in about an hour and makes a wonderful handmade gift for the kids and teens in your life. The free crochet pattern can be found right here on the page, or you can pick up a printable PDF available for purchase in the shop.
UPDATED: JUNE 12, 2026 BY BRITTANY
This post may contain affiliate links. See our Disclosure Policy for more information.
Skill Level | Intermediate
Finished Size | 2.5″ diameter
This crochet hacky sack is one of the most approachable tapestry crochet projects you’ll ever make — and that’s exactly what makes it so special. The polka dot color diagram is simple and straightforward, so you get to learn a new technique without feeling overwhelmed by a complicated chart.
It’s a wonderful gift to make for the kids, grandkids, nieces, or nephews in your life, and it’s equally popular as a handmade market item. Since the whole thing works up in about an hour, you can easily make a whole batch in an afternoon once you get your rhythm going.
About Our Polka Dot Crochet Hacky Sack Pattern
This crochet hacky sack pattern is worked in the round from the top down, using tapestry crochet to create the polka dot colorwork design. Tapestry crochet involves carrying your unused yarn color along as you work, crocheting over it to keep everything tidy inside — and this pattern uses one of the simplest color diagrams out there, making it a fantastic first tapestry project. The finished sack is filled with poly pellets to give it that classic weight and feel. From start to finish, most crafters complete this in right around an hour, which makes it one of those rare projects that feels impressive but fits easily into a busy day.
Keep reading for more frequently asked questions and pattern details, or jump down to the free pattern.
You can view our airy woven summer crochet blanket pattern completely free on this page. But, if you prefer having a digital copy that you can save or print, we’ve got you covered with that option as well.
If you’d like to support our work here at B.Hooked, purchasing the digital pattern is a wonderful way to do so!
Recommended Supplies
- About 38 yds; Medium-weight (#4) Cotton Yarn
- Color A: 32 yds
- Color B: 6 yds
- 4 mm crochet hook
- Poly Pellets
- Yarn needle
- Scissors
For this pattern, I used Lion Brand 24/7 Cotton in Terracotta and Wisteria, and I love this yarn for a project like this. It’s smooth, stitch-definition is excellent, and the colors are rich and consistent — which really matters when you’re working a colorwork design and want those polka dots to pop.
That said, any cotton or cotton-blend yarn at the same weight will work beautifully here, and you could even use an acrylic or acrylic blend if that’s what you have on hand. Just be sure to check your gauge and adjust your hook size as needed to hit that 2.5″ finished size — a little too loose and those poly pellets will start to peek through.
Abbreviations
This pattern is written using standard US crochet terminology.
- Ch Chain
- Cont Continue
- Hk Hook
- Rep Repeat
- Sc Single Crochet
- Sc2tog Single Crochet 2 together
- Slst Slip Stitch
- St(s) Stitch(es)
- YO Yarn Over Hook
Polka Dot Crochet Hacky Sack Pattern Notes
This crochet hacky sack pattern is worked in the round from the bottom up, using tapestry crochet to create the polka dot colorwork design. Tapestry crochet involves carrying your unused yarn color along as you work, crocheting over it to keep everything tidy inside — and this pattern uses one of the simplest color diagrams out there, making it a fantastic first tapestry project. The finished sack is filled with poly pellets to give it that classic weight and feel. From start to finish, most crafters complete this in right around an hour, which makes it one of those rare projects that feels impressive but fits easily into a busy day.
Finished Size: 2.5″ diameter
Gauge:
First 6 rounds measures 2.5” diameter.
Polka Dot Crochet Hacky Sack Pattern
Add Your Project to Ravelry!
Round 1: With color A, make a magic ring with 6 sc. Do not join. Cont to work in a spiral, and use a stitch marker to mark the first st of the round throughout,
Round 2: Make2 sc in every stitch. (12 sts)
Round 3: Make 1 sc in the first st. 2 sc in the next st. *Make 1 sc in the next st, and 2 sc in the next st. Rep from * to the end of the round. (18 sts)
Round 4: Make 1 sc in the first 2 sts. Then make 2 sc in the next st. *Make 1 sc in the next 2 sts, and 2 sc in the next st. Rep from * to the end of the round. (24 sts)
Round 5: Make 1 sc in the first 3 sts. Then make 2 sc in the next st. *Make 1 sc in the next 3 sts, and 2 sc in the next st. Rep from * to the end of the round. (30 sts)
Round 6: Make 1 sc in the first 4 sts. Then make 2 sc in the next st. *Make 1 sc in the next 4 sts, and 2 sc in the next st. Rep from * to the end of the round. (36 sts)
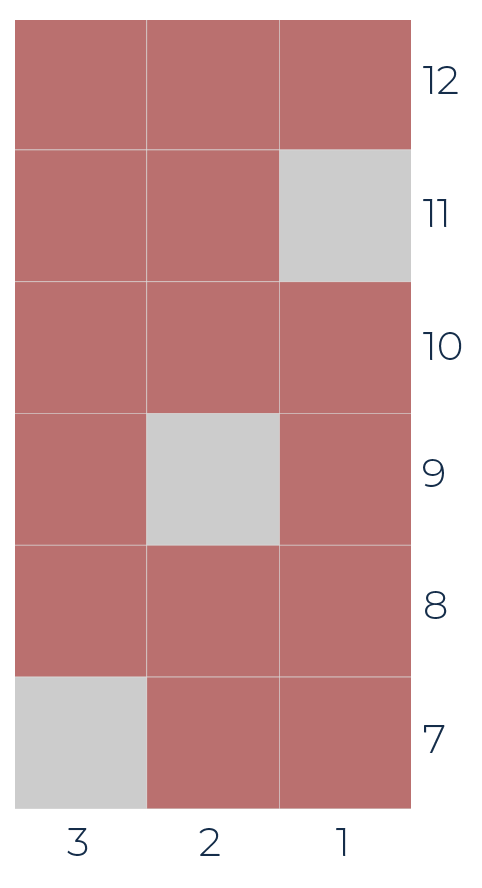
Join color B in the third stitch of the next round. Crochet over the non-working color for rounds 7-12.
Color Chart and Instructions
Round 7: *Sc with A in the next 2 sts, sc with B in the next st. Rep from * to the end of the round.
Round 8: Sc with A in each st around.
Round 9: Sc with A in the first st, sc with B in the next st. *Sc with A in the next 2 sts, sc with B in the next st. Rep from * to the last st. Sc with A in the last st.
Round 10: Sc with A in each st around.
Round 11: Sc with B in the first st. *Sc with A in the next 2 sts, sc with B in next st. Rep from * to the last 2 sts. Sc with A in the last 2 sts.
Round 12: Sc with A in each st around.
Reading the Color Chart: Each square in the chart represents one single crochet stitch. Colors are indicated as follows: Color A = Terracotta, and Color B = Wysteria. The chart is read from bottom to top, with each row representing one round.
Break color B and continue crocheting the remainder of the pattern with color A.
Round 13: *Sc in the next 4 sts, sc2tog. Rep from * to the end of the round. (30 sts)
Round 14: *Sc in the next 3 sts, sc2tog. Rep from * to the end of the round. (24 sts)
Round 15: *Sc in the next 2 sts, sc2tog. Rep from * to the end of the round. (18 sts)
Round 16: *Sc in the next st, sc2tog. Rep from * to the end of the round. (12 sts)
Make a slst in the next stitch to correct the jog, and fasten off.
With a yarn needle, run the tail in and out of all 12 stitches to create a drawstring closure.
Pull the tail to draw up the opening, and use the tail to further secure the opening.
TERMS OF USE:
This pattern is for personal use only. You agree not to modify, publish, transmit, sell, create derivative works or in any way exploit any of the content within this page, in whole or in part. If you wish to share this pattern, share a link to this webpage only. You may sell finished items made from this pattern.
Copyright, B.Hooked Crochet, LLC


