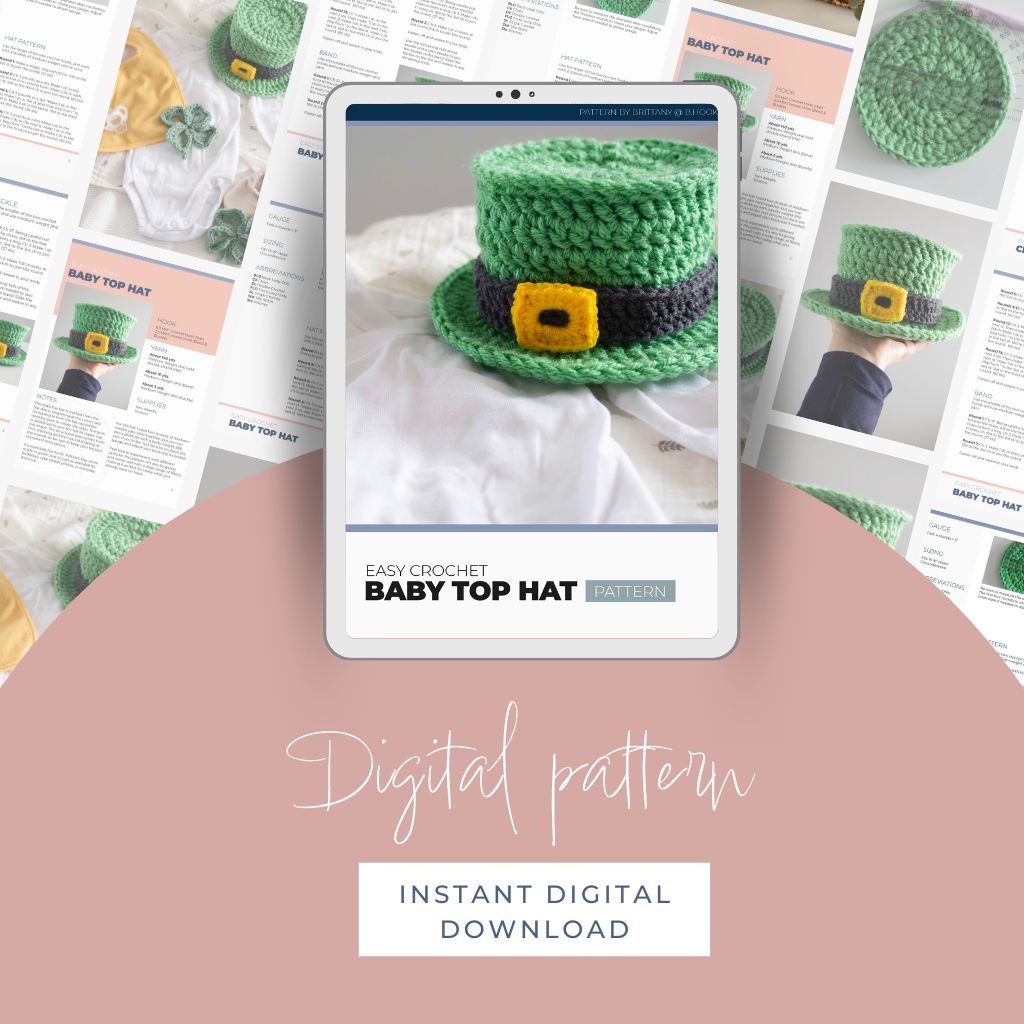
This baby top hat crochet pattern is the perfect little project when you want something cute, classic, and completely photo-ready. You can view the pattern completely free on this page, or you can buy the ad-free, printable PDF from our shop.
UPDATED: FEBRUARY 24, 2026 BY BRITTANY
This post may contain affiliate links. See our Disclosure Policy for more information.

Skill Level | Intermediate
Finished Size | About 4″ wide x 6.5″ long
It’s especially fun for St. Patrick’s Day when made in green, but it’s just as adorable for birthdays, cake smash photos, or everyday dress-up.
With a simple color change, you can match any theme or occasion. It’s a small project that makes a big statement in photos.
About Our Easy Baby Top Hat Crochet Pattern
If you’re looking for something quick and memorable, this baby top hat delivers. It works up fast with simple stitches and has a structured shape that gives it that timeless top hat look. Whether you’re making it for your own little one or as a handmade gift, this is the kind of project that’s hard to stop at just one.
It’s a great project for using up leftover yarn and smaller scraps you may already have on hand. Since it works up quickly, it’s also perfect for last-minute gifts when you need something thoughtful in a hurry.
Keep reading for more frequently asked questions, and pattern details, or jump down to the free pattern.

You can view our simple ribbed beanie knitting pattern completely free on this page. But, if you prefer having a digital copy that you can save or print, we’ve got you covered with that option as well.
If you’d like to support our work here at B.Hooked, purchasing the digital pattern is a wonderful way to do so!
Recommended Supplies
- About 140 yds; Medium-weight (#4) Yarn, held double strand (hat)
- 10 yds; Medium-weight yarn (band)
- 5 yds; Medium weight (#4) yarn (buckle)
- 6.5 mm crochet hook (hat)
- 5 mm crochet hook (buckle and band)
- Yarn needle
- Scissors
For this hat I used two strands of medium-weight yarn held together, but you can also substitute with a bulky weight (#5) yarn if you’d like. Just be sure to check the gauge and adjust your hook size if needed.
Feel free to experiment with different yarns for this pattern. It’s very forgiving and works well with a wide range of fibers, making it perfect for using what you already have on hand.
Abbreviations
This pattern is written using standard US crochet terminology.
- BLO Back Loop Only
- Ch Chain
- Dc Double Crochet
- FLO Front Loop Only
- Sc Single Crochet
- Slst Slip Stitch
- Sts Stitches

Crochet Baby Top Hat Pattern Notes
This baby top hat is worked from the top down, beginning at the crown and increasing to form the flat top before working even to create the sides. The brim is added last to give the hat its classic top hat shape. The structured look comes from firm stitching and the natural shaping of the rounds, so be sure to keep your tension consistent throughout.
The hat is designed to fit snugly, especially for newborn photos, but you can easily adjust the size by adding or subtracting increase rounds at the crown. Always check your gauge if you are between sizes or using a different yarn. Small changes in tension can make a noticeable difference in fit.
For St. Patrick’s Day, try making your baby top hat in green and adding a simple band in black or gold. You can also customize it for other occasions by changing colors or adding a small embellishment like a bow or flower. This pattern is simple at its core, which makes it a great base for getting creative.
Additional Notes: Chain 3 at the beginning of rounds counts as a double crochet.
This pattern recommends using the magic ring to start crocheting in the round. Learn how to make a magic ring with our tutorial here.

Finished Size: Fits 15-16″ Head Circumference
Gauge: First 4 rounds measures 5″ in diameter
Not sure what gauge is? Check out our comprehensive guide to learn all about it here.

Crochet Baby Top Hat Pattern Instructions
Hat
Use the larger of the two crochet hooks, and work with 2 strands of medium-weight yarn at once.
Round 1: Make a magic ring with 10 Dc. Slst to the first st to join the round. (10 sts)
Round 2: Ch 3 (counts as a dc). Make 1 dc in the same st the ch is coming from. Make 2 dc in each rem st. Slst to the third ch to join the round. (20 sts)
Round 3: Ch 3 (counts as a dc). *Make 2 dc in the next st. Make 1 dc in the st after that. Rep from * to the last st. Make 2 dc in the last st. Slst to the third ch to join the round. (30 sts)
Round 4: Ch 3 (counts as a dc). Make 1 dc in the next st. *Make 2 dc in the next st. Make 1 dc in the next 2 sts. Rep from * to the last st. Make 2 dc in the last st. Slst to the third ch to join the round. (40 sts)
A digital pattern is available in our shop so you can print out the pattern
Round 5: Ch 3. BPdc every st. Slst to the 3rd ch to join the round. (40 sts)
Rounds 6-11: Ch 3. Make 1 dc in every st. Slst to the third ch to join the round. (40 sts)
Round 12: Ch 3. Make1 dc in the next st. Then make *2 dc in the next stitch. Make 1 dc in the next 2 sts. Rep from * to the last st. Make 2 dc in the last st. Slst to the 3rd ch to join the round. (60 sts)
Round 13: Ch 3. Make 1 dc in the next 2 sts. Then make *2 dc in the next st. Make 1 dc in the next 3 sts. Rep from * to the last st. Make 2 dc last st. Slst to the third ch to join the round. (80 sts)
Fasten off and weave in your ends.
Band
Use the smaller of the two crochet hooks and use medium-weight (#4) yarn.
Round 1: Ch 57. Being careful not to twist the chain, slst to the first chain to form a ring. Ch 3. Make 1 dc in every ch. Slst to the 3rd ch to join the round. (57 sts)
Round 2: Ch 3. Make 1 dc in every st. Slst to the 3rd ch to join the round.
Fasten off and weave in your ends.
Buckle
Use the smaller of the two crochet hooks and use medium-weight (#4) yarn.
Round 1: Ch 8. Being careful not to twist the chain, slst to the first chain to form a ring. Ch 1 (doesn’t count as a st). In the center of the ring: 3 hdc, ch 2, 4 hdc, ch 2, 6 hdc, ch 2, 4 hdc, ch 2, 3 hdc. Slst to the first hdc to join the round.
Finishing
Use the remaining tails of the buckle and a yarn needle to sew the buckle to the band. Slide the buckle on the hat and weave in any remaining ends.
TERMS OF USE:
This pattern is for personal use only. You agree not to modify, publish, transmit, sell, create derivative works or in any way exploit any of the content within this page, in whole or in part. If you wish to share this pattern, share a link to this webpage only. You may sell finished items made from this pattern.
Copyright, B.Hooked Crochet, LLC
More Quick Crochet Projects + Free Patterns
I love making quick and easy-to-make projects. Check out some of our other tutorials with free crochet patterns that work up in a jiffy: