Who knew a hat without crown shaping could be so cute!
Skill Level | Easy
Available Sizes | Preemie, Baby, Toddler & Child
Full of texture and color, our tassel crochet baby hat is one of our favorite one skein projects. It’s perfect for last minute shower gifts or just because.

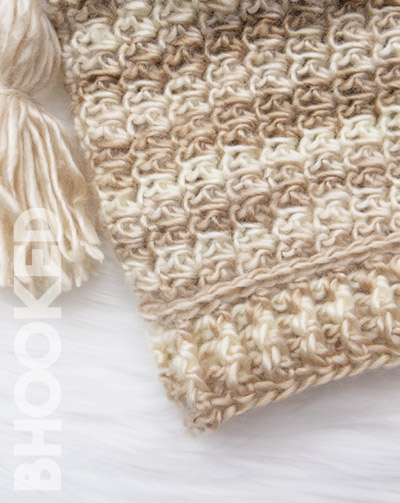
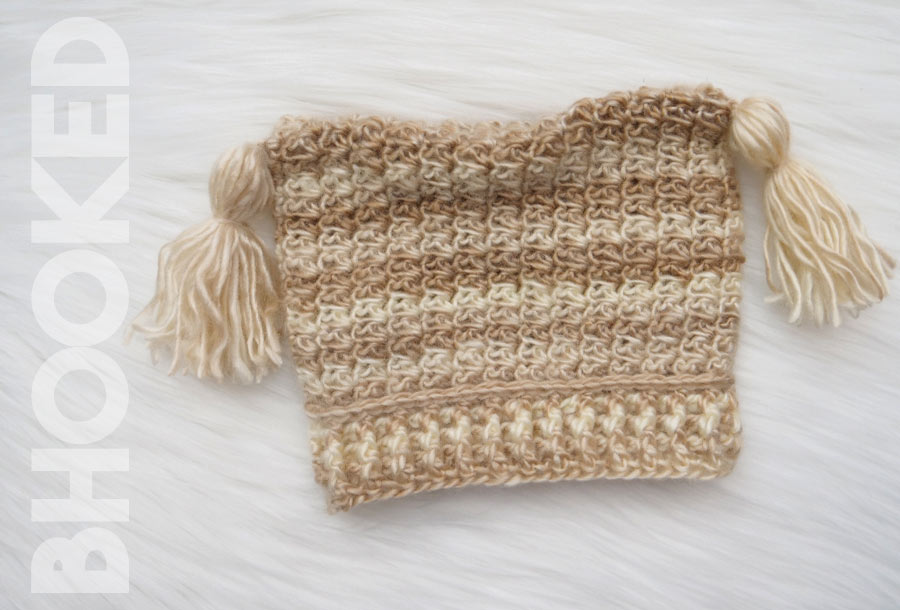
If you’re looking for a quick project to use up that skein of Unforgettable in your stash, you’re in the right place. Our tassel crochet baby hat works up in a matter of hours.
With this project you’ll get to practice foundation crochet stitches and see firsthand how using this technique with ribbing gives a neater result and a great looking band. The stitch pattern within the hat is unique in that the “wrong side” is actually the right side of the hat; a technique that’s achieved by flipping it inside out.
Before you begin, review this page entirely so you understand the full scope of the project. We prepared a list of recommended supplies and abbreviations you’ll need to get started and, of course, written instructions to walk you through our tassel crochet baby hat step-by-step.
- Red Heart Unforgettable Yarn; Approx 70 (105, 140, 162) yds; (Colorway pictured: Cappuccino)
- 5.5 mm Crochet Hook
- Yarn Needle
- Scissors
- BLO Back Loop Only
- Ch Chain
- Dc Double Crochet
- FLO Front Loop Only
- Fpdc Front Post Double Crochet
- Hdc Half Double Crochet
- Slst Slip Stitch
- St(s) Stitch(es)

Finished Size
- Preemie | 8.5″ Circumference; 4.5″ length
- Baby | 16″ circumference; 7″ length
- Toddler | 18″ circumference; 7.5″ length
- Child | 20″ circumference; 8″ length
Gauge
16.5 sts = 4″
(band stitch pattern)
This pattern recommends you start with foundation double crochet stitches for a neater band. To learn how to crochet the foundation double crochet, check out our tutorial here.
Additional Notes: Instructions for sizes are given as follows:
Preemie (Baby, Toddler, Child)
Round 1: Make 38 (56, 64, 74) foundation double crochet. Taking care not to twist the foundation, join with a slst to third chain to form a ring. Use tail to secure bottom of row. Ch 2. *Fpdc, bpdc. Rep from * to end of round. Join with a slst to first fpdc. {38 (56, 64, 74) sts}
Round 2: Ch 2. *Fpdc, bpdc. Rep from * to end of round. Join with a slst to first fpdc. {38 (56, 64, 74)}
Repeat: Rep last round 1 (2, 4, 5) more times.
Next Round: Ch 1 and slst in same st as ch. Slst in the FLO of each rem st. Join with a slst to firs slst, catching both loops. Slst to BLO of first st of previous round. {38 (56, 64, 74) sts}
With hat laying flat in front of you, flip it as you would if you were crocheting in rows. This will make the wrong side of the stitch pattern show on the outside of the hat.
Next Round: Ch 2 and sc in same st as ch. *Sk next back loop from two rounds below. 1 dc and 1 sc in next BLO from two rounds below. Rep from * to end of round. Join with a slst to 2nd ch.
Next Round: Ch 1 and sc in same st as ch. In next st, 1 dc and 1 sc. *Sk next st. 1 dc and 1 sc in next sc. Rep from * to end of round. Join with a slst to first sc.
Repeat: Rep last round until it measures 4.5 (7, 7.5, 8)” from starting edge.
Fasten off leaving a 12″ tail.
Finishing
Step 1: Turn hat inside out. Thread tail on yarn needle and whip stitch the top opening of the hat closed. Weave in the end. Turn hat right side out.
Step 2: Make two identical tassels. Use tassel maker or see how to make a tassel by hand with our tutorial here.
Step 3: Secure a tassel to each corner of hat.