If you’ve ever stared at a crochet pattern and felt like it was written in a different language, you’re not alone. Learning how to read a crochet pattern is one of those skills nobody really sits down and teaches you — you’re just expected to pick it up on your own. Between the abbreviations, the asterisks, and the little numbers tucked into brackets, it’s easy to feel lost before you’ve even picked up your hook.
Here’s the good news: crochet patterns aren’t actually complicated once you know what you’re looking at. They follow a system — the same handful of building blocks, every single time. Once you can recognize them, you’ll be able to pick up almost any pattern, from a simple dishcloth to a full garment, and know exactly where to start.
This guide walks you through that system from start to finish — what’s in a pattern, how to read it in the right order, and how to avoid the most common mistakes that trip up new crocheters. (Never picked up a hook before? Start with How to Crochet for Beginners: 10 Steps (with Videos) first. Already know your basic stitches? 10 Things Every Beginner Crocheter Must Know is a great next read before diving into this one.)
UPDATED: AUGUST 5, 2026 BY BRITTANY
This post may contain affiliate links. See our Disclosure Policy for more information.

- What's Actually in a Crochet Pattern
- Crochet Abbreviations: The Shorthand You'll See Everywhere
- Understanding Stitch Counts
- The Part That Trips Up Almost Everyone: Repeats
- Working in Rows vs. Working in Rounds
- Right Side vs. Wrong Side
- Why Gauge Actually Matters
- Common Mistakes When Reading a Pattern (and How to Avoid Them)
- How to Read a Crochet Pattern in 4 Simple Steps
- How to Read a Crochet Pattern FAQ's
What’s Actually in a Crochet Pattern
The first step in how to read a crochet pattern is knowing what you’re looking at. Most patterns are built from the same core sections, usually in this order:
- Skill level — a quick indicator (beginner, easy, intermediate, experienced) of how much prior knowledge the pattern assumes
- Materials — the yarn, hook size, and any notions you’ll need (not sure what any of that means yet? Yarn Weights Simplified: What You Need to Know and the Crochet Hook Size Chart + How to Pick the Right Size will get you up to speed)
- Finished size — the measurements of the completed project, sometimes with multiple sizes listed
- Gauge — a small measurement that tells you if your tension matches the designer’s
- Abbreviations — a key explaining every shorthand term used in the pattern
- Special stitches — any stitch used in the pattern that isn’t a standard, universal stitch
- Pattern notes — special instructions, techniques, or reminders specific to this project
- Instructions — the row-by-row or round-by-round directions
- Finishing — how to weave in ends, block, or assemble your project
Knowing these sections exist — and reading through all of them before you start stitching — saves you from missing something important halfway through your project. It’s tempting to skip straight to the instructions, but the notes and special stitches sections especially are where designers tuck away information that makes the rest of the pattern make sense.
Crochet Abbreviations: The Shorthand You’ll See Everywhere
Patterns are written in shorthand to keep them readable. Instead of writing “double crochet” fifty times in a row, a pattern will simply say “dc.” Here are a few of the most common ones you’ll run into:
- ch — chain stitch
- sc — single crochet
- hdc — half double crochet
- dc — double crochet
- slst — slip stitch
- st(s) — stitch(es)
- sk — skip
- rep — repeat
- blo / flo — back loop only / front loop only
- rs / ws — right side / wrong side
- tog — together (as in a decrease, like “sc2tog”)
A quick note: these abbreviations follow US crochet terms. If you ever pick up a pattern written in UK terminology, the same abbreviations can mean different stitches — a UK “dc” is actually a US single crochet, not a double crochet. Always check which system a pattern is using before you start, especially with patterns from UK or Australian designers.
Most patterns you find will include a glossary of abbreviations that are in that pattern, but bookmark our crochet abbreviations page to reference if you ever get stuck or find an abbreviation you don’t recognize.
Understanding Stitch Counts
You’ll often see a number in parentheses at the end of a row or round, like this:
Sc in each st around. (24 sts)
That number tells you how many stitches you should have once you finish the row. It’s not decoration — it’s a built-in check-in point. If your count doesn’t match, it’s much easier to fix a mistake right then than three rows later.
Get in the habit of counting at the end of every row when you’re working on something new. It becomes second nature fast, and it will save you from frogging entire sections later. If your count is off, the most likely culprits are an accidentally skipped stitch, an extra stitch worked into the same spot twice, or a turning chain that was miscounted as a stitch.
The Part That Trips Up Almost Everyone: Repeats
This is where most beginners freeze — and it’s usually because nobody ever explains that there are really only three types of repeats you’ll ever encounter:
- Row repeats, marked with an asterisk (*), telling you to repeat a sequence of stitches across a row
- Bracket groups [ ], which repeat a cluster of stitches a specific number of times
- Parenthesis groups ( ), which tell you to work several stitches into the same spot
They look similar at a glance, which is exactly why they’re so easy to mix up. But each one has a distinct job, and once you can tell them apart, you can work through even a pattern with all three stacked together — asterisks, brackets, andparentheses in the same row — without missing a beat.
There’s also a fourth pattern you’ll see often in multi-row designs: a range of rows (like “Rows 4–10”) or a note that simply points you back to an earlier row (“Row 14: As 3rd row”). These work the same way — they’re just repeating whole rows instead of stitches within one.
(This is honestly the part I get the most questions about, so I put together a free guide that walks through all three stitch-level repeat types with real pattern examples — you can grab it below.)
Working in Rows vs. Working in Rounds
Patterns are written one of two ways, and it changes how you read them.
Rows are worked back and forth. You’ll typically chain a set number of stitches to start, work across, turn your work, and repeat. Most rows require a turning chain at the start — a small chain that brings your hook up to the correct height for the next row’s stitch. Patterns will tell you whether that turning chain counts as your first stitch or not, so check the pattern notes for this detail. (Not sure how many chains to start with in the first place? How Many Chains Do You Need to Start Your Project? breaks it down.)
Rounds are worked in a continuous spiral or joined circle, most commonly used for amigurumi, hats, and anything worked from the center out. Many round-based patterns start with a magic circle rather than a chain — if that term is new to you, How to Make the Magic Circle (or Magic Ring) in Crochet walks through it step by step. Joined rounds usually end with a slip stitch into the first stitch of the round, followed by a chain to begin the next one. Spiral rounds skip the joining slip stitch entirely — instead, you’ll use a stitch marker to track where each round begins, since there’s no clear seam to reference.
If a pattern doesn’t explicitly say which method it’s using, check the materials list for a stitch marker — that’s usually your clue that you’re working in a spiral.
Right Side vs. Wrong Side
Many patterns will refer to the “right side” (RS) and “wrong side” (WS) of your work — this simply means the side that will be visible on the finished project versus the side that faces inward or backward. For stitches like single crochet, both sides can look nearly identical, so patterns often have you mark the right side with a small scrap of yarn or a stitch marker as soon as you start, so you never lose track of which side you’re on. This matters most for textured stitches, colorwork, and anything where the front and back look noticeably different.
Why Gauge Actually Matters
Gauge tells you how many stitches and rows fit into a specific measurement — usually a 4×4 inch square — when a pattern’s designer worked it. Everyone crochets with slightly different tension, so gauge is how you check that your finished project will come out the size it’s supposed to.
To check your gauge, crochet a small swatch using the exact stitch pattern, yarn, and hook listed, then measure it against the pattern’s stated gauge. If your swatch has more stitches per inch than the pattern calls for, your tension is tighter than the designer’s — try a larger hook. Fewer stitches per inch means your tension is looser, so size down.
For amigurumi and small accessories, gauge often matters less, since a slightly different size rarely affects wearability. For anything sized — garments, fitted items, blankets meant for a specific bed size — it’s worth taking a few extra minutes to swatch before you commit to an entire project. For a deeper dive into swatching and troubleshooting gauge issues, see The Most Important Things You Need to Know About Crochet Gauge.
Common Mistakes When Reading a Pattern (and How to Avoid Them)
Once you know how to read a crochet pattern, a few simple habits solve the vast majority of the frustration that trips people up:
- Skipping the pattern notes. This is where designers explain anything unusual about the pattern — and skipping it is the most common reason a pattern feels harder than it should.
- Not checking gauge before starting a sized project. A gauge swatch takes ten minutes; a sweater that doesn’t fit takes hours to redo.
- Losing track of row or round count. Use a row counter, tally marks, or an app — don’t rely on memory once a project gets past a few rows.
- Confusing brackets and parentheses. Remember: brackets repeat a group, parentheses cluster stitches into one spot.
- Working from the wrong side without realizing it. Mark your right side early, especially on textured stitches.
How to Read a Crochet Pattern in 4 Simple Steps
Before you make a single stitch, try this:
- Read it once, all the way through — just to get the shape of the project in your head
- Read it again, this time noting anything unfamiliar — an abbreviation, a stitch, a repeat structure
- Look up anything you don’t recognize before you start, not mid-row
- Work the first repeat slowly, checking your stitch count before moving on
This takes a few extra minutes up front, but it saves you from the frustrating stop-start-frog cycle that makes patterns feel harder than they are.
How to Read a Crochet Pattern FAQ’s
You’ve got this! Every experienced crocheter once stared at a pattern full of asterisks and brackets and felt exactly the way you might feel right now. The difference isn’t talent — it’s just knowing how to read a crochet pattern, step by step. Now you do too.
If you want to go deeper on repeats specifically — the part that trips up nearly everyone — grab the free guide below. It walks through real examples of asterisks, brackets, and parentheses so you can work through them with total confidence.
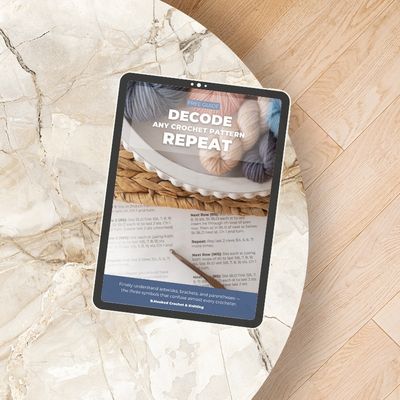
Still unsure about repeats? Download “Decode Any Crochet Pattern Repeat” free and work through it side-by-side with your next pattern.
Ready to put this into practice? Browse 9 Easy and Fun Free Crochet Patterns for Beginners and pick one to try your new pattern-reading skills on.