You can make your granny squares as colorful as you want WITHOUT creating extra ends to weave in with a simple granny square trick you can learn in a matter of minutes. In this blog post, I’ll show you how it’s done step-by-step.
UPDATED: JULY 27, 2023 BY BRITTANY
This post may contain affiliate links. See our Disclosure Policy for more information.

Once you learn this clever technique, you’ll wonder why you haven’t tried it sooner. It’s a game-changer that saves you serious time, effort, and frustration.
In this guide, I’ll show you how to use the magic knot to reduce the number of ends per granny square to only two – no matter how many color changes you have.
Don’t know how to crochet a granny square yet? No worries! I have a beginner-friendly How to Crochet a Granny Square guide that’ll walk you through it step-by-step.
Here is a quick overview of the topics we will cover in this article:
- Avoid Weaving Ends With This Granny Square Tip
- The Magic Knot Step-by-Step for Granny Squares
- Clever Granny Square Tip Step-by-Step Tutorial
- Reduce the Number of Ends in Granny Squares to Just Two
- How Secure Is This Magic Knot?
- What Else Can You Do To Make Perfect Granny Squares?
- More Granny Square Tutorials + Free Patterns
- More Granny Square Resources We Think You’ll Love
Avoid Weaving Ends With This Clever Granny Square Trick
The fantastic trick that’ll help you minimize the number of ends in your granny square project is called the magic knot. This tried-and-true technique has been passed down for years and is a valuable skill for you to know.
By mastering the magic knot, not only can you avoid weaving nearly all ends in your granny square project, but this easy method goes beyond granny squares. From blankets to scarves, and everything in between, the magic knot can be your ultimate secret weapon. Curious to learn more? We’ve got you covered with an insightful and detailed post that walks you through the process step by step.
The Magic Knot Step-by-Step for Granny Squares
The magic knot is a technique that connects two yarns, allowing for a smooth transition from one color to another in your crochet (or knitting) project. It’s especially useful for projects with lots of color changes, but it’s great for simply joining a new ball of the same color yarn. Any time you want to avoid weaving ends in crochet project, the magic knot can get the job done.
Now, let’s see how it’s done. While the process remains consistent across various project types, it’s important to note that when working with granny squares, proper placement is key. Making sure the color change aligns precisely at the beginning of a new round is essential for achieving a flawless result.
- Finish the round before you want the color change to occur.
- Pull up slightly on the crochet hook and remove it, leaving the working loop open.
- Cut the working loop in the middle.
- Remove the slip stitch and last double crochet of the round.
- Tie the new color around the old color tail that was created from removing those stitches, roughly in the middle. Leave about 3 inches of the new color on the other end of that knot.
- With the remaining yarn end of the old color, tie a knot around the new color strand, toward the new ball of yarn.
- Being careful not to undo more stitches in your granny square, pull the old color and new color on the outside of each knot. That will slide the two knots together. Don’t break the yarn, but pull pretty firm on this to tighten the magic knot.
- Trim the remaining tails down to the knot.
Then you can work the last stitch and join to finish the round.
If the knot rests at the front of the work, remove the double crochet and try making it tighter. The idea is to have the knot hidden in the stitch or at the very least, resting to the back of the square.
Magic Knot Granny Square Trick : Step-by-Step Tutorial
If you’ve yet to experience the wonders of the magic knot, I highly recommend checking out the tutorial. Trust me, it’s a lot simpler in practice than the instructions may make it seem! Once you see it in action, you’ll realize just how effortless and efficient this technique can be.
Video not displaying? Watch this tutorial on YouTube instead.
Right-Handed Tutorial on YouTube
SUBSCRIBE TO B.HOOKED ON YOUTUBE
Reduce the Number Of Ends In Granny Squares With The Magic Knot Granny Square Trick
When it comes to color changes in granny squares, each transition typically results in two ends: one at the beginning and another at the end of the round. However, with the magic knot, you can wave goodbye to this tedious task altogether (almost).
By usinging the magic knot, you’ll only need to weave in two ends per granny square: the one created right at the start and the one formed at the very end.
How Secure Is This Magic Knot?
While it’s understandable that having a knot in your project may raise concerns for some, we believe it’s a reasonable trade-off considering the time saved and the prevention of loose ends that tend to poke out over time.
I’ve been using the magic knot in all of my projects since publishing this video about it in late 2022, and it hasn’t failed me yet.
Ultimately, it’s a personal decision whether the benefits outweigh the potential drawbacks. We encourage you to give it a try and determine if the convenience and efficiency of the magic knot align with your preferences. You might just discover that it’s a worthwhile technique that enhances your crochet experience.
What Other Granny Square Tricks Make Perfect Squares?
At B.Hooked, we’re passionate about granny squares and dedicated to providing a wealth of resources to help you create the most stunning versions. If you haven’t yet discovered the magic of “wet blocking,” we highly recommend exploring this technique. We’ve prepared a comprehensive guide, similar to the one you’re currently reading, that will carefully walk you through the process, step-by-step.
When it comes to granny squares, it’s not uncommon for them to lack that perfect look right off the hook. You might notice rounded corners, slightly wavy sides, or even a spiral appearance. But it’s not a reflection of your skills! We tested the most popular tricks to see which ones work. See the results in our article here.
Believe it or not, the right joining method can make or break your project. Here are five simple and classic ways to join granny squares.
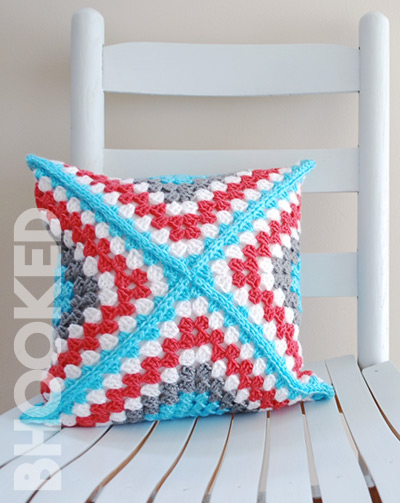
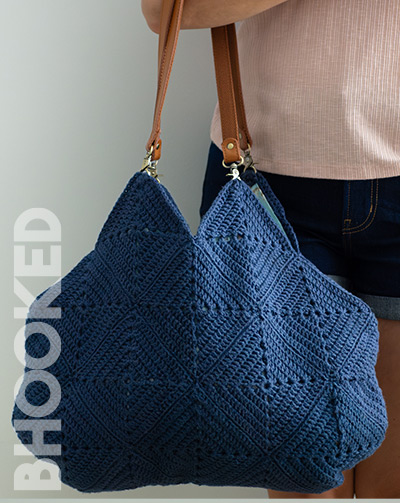
More Granny Square Tutorials + Free Patterns
Here are a few free patterns that we have available using the classic granny square and some familiar variants. We’re always adding to this list so bookmark this page and check back when you need some more granny square inspiration.

*Disclosure: Some of the links in this post are affiliate links, which means as an Amazon Associate, I earn from qualifying purchases made through these links. Please note that prices and availability of products are subject to change. This comes at no additional cost to you and helps support the content on this site. I only recommend products that I have personally used and genuinely believe in. Thank you for your support!


