If you’re new to knitting, you may have heard of double pointed needles, or DPNs for short, and wondered what they’re all about. While they might look a bit intimidating at first, DPNs are actually a fantastic tool for knitting in the round—perfect for projects like socks, sleeves, and hats.
But what exactly are they, and why should you consider using them? In this post, we’ll break down what DPNs are, how to use them, and when they’re the best option for your knitting projects. By the end, you’ll feel more confident about tackling your next project with DPNs in hand!
UPDATED: APRIL 23, 2025 BY BRITTANY
This post may contain affiliate links. See our Disclosure Policy for more information.

In this guide, I’ll walk you through the steps to fully understand what are DPNs in knitting, and why they’re used. Whether you’ve heard of them before, or you’re just doing some knitting research, you’re in the right place. Let’s get started!
Here’s a quick overview of the topics we will cover in this article:
- What are DPN’s?
- Why and When Should You Use Double Pointed Needles
- How to Use DPN’s in Your Project
- Common Mistakes to Avoid
- Alternative to Double Pointed Needles
- Tips for Knitting with Double Pointed Needles
What Are DPN’s in Knitting?
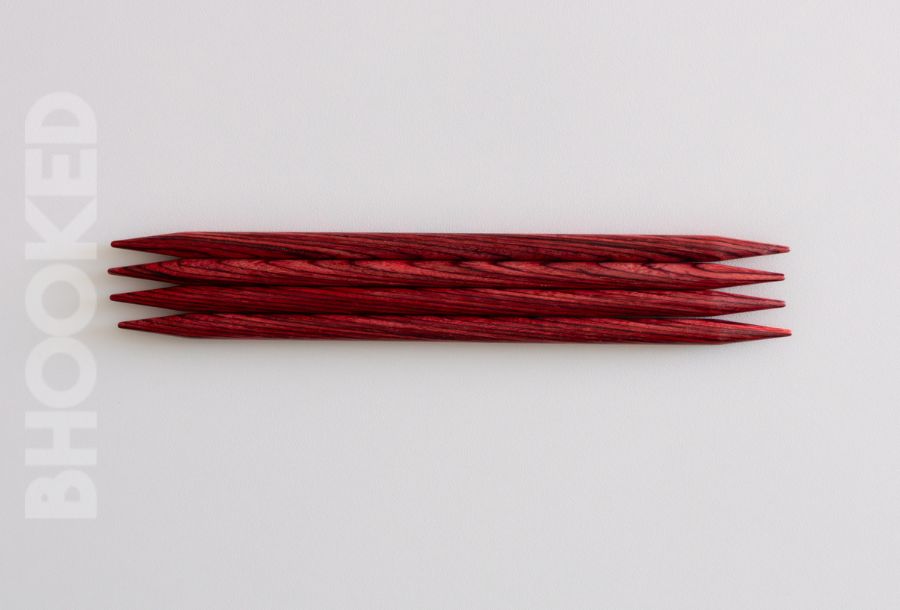
Double-pointed needles (DPNs) might sound a little intimidating at first, but once you get the hang of them, they’re a total game-changer for knitting! DPNs are special needles designed for knitting in the round, especially when you’re working on small, circular projects. What makes them different from regular knitting needles is that they have a point at both ends of each needle. Most sets come with three or four needles (though some knitters like to use five), and these extra points help you divide your stitches across the needles, making it easier to knit around a smaller circumference.
So, why would you use DPNs? Well, they’re perfect for projects like socks, mittens, and the tops of hats—anything that requires knitting in a circle but isn’t big enough to work with a circular needle. DPNs let you knit in a smooth, continuous round, and because they’re smaller, they’re ideal for those cozy, snug items we love to knit.
DPNs come in different materials—like metal, wood, or plastic—and vary in length (usually around 6 to 8 inches). Each type feels a little different, so it’s worth trying a few to see what you like best. While DPNs might feel a bit tricky at first, they really open up a whole new world of knitting possibilities. Stick with it, and soon you’ll be breezing through your circular projects with confidence!
When and Why Should You Use DPNs?
Now that you know what DPNs are, let’s talk about when and why you might want to use them in your knitting projects. If you’re just starting out, you might be wondering, “Why not just use circular needles for everything?” And that’s a totally fair question! Circular needles are super versatile, but when it comes to small, round projects, DPNs are often the better choice. Here’s why:
Small Circumferences Made Easy
One of the biggest reasons to use DPNs is that they’re designed specifically for knitting small circumferences, like the toes of socks, the fingers of mittens, or the tops of hats. These projects are too small to use a standard circular needle without using a technique called the magic loop. With DPNs, you can spread your stitches out across three or four needles, which makes it possible to knit around a small tube without worrying about running out of room.
No Seams, No Problem!
Another awesome reason to love DPNs is that they allow you to knit in the round without seams. When you’re working on things like socks or mittens, you want that smooth, seamless look, and DPNs help you achieve that. No need to worry about seaming up your work later—just knit it all in one continuous round, and you’re done!
Perfect for Complex Shaping
DPNs are also great for projects that involve shaping as you go. Take a simple pair of socks like my free pattern here, for example: as you start the toe, you need to increase the stitches at certain points to form the toe. DPNs make it easy to manage the shaping of your project while keeping all your stitches neatly organized, and without the need to change your needles mid-project.
When Circular Needles Won’t Cut It
While you can use the “magic loop” method with a long circular needle for some small circumference projects, DPNs have a slight advantage when it comes to keeping things neat and tidy. Circular needles can sometimes create awkward gaps between stitches when working small circumferences, especially when you don’t have a lot of stitches. DPNs eliminate that problem by keeping your stitches neatly divided and evenly spaced.
DPNs for More Than Just Socks
While DPNs are often associated with socks, they’re great for a lot more than just that! If you’re working on a knitted hat, mittens, or even a sleeve of a sweater, DPNs come in handy. Anything that’s knit in a tube shape and is small enough to fit on these needles is a perfect candidate for using DPNs.
How to Use Double Pointed Needles
Alright, now that you know why you should use double-pointed needles (DPNs), let’s walk through how to actually use them. It might seem tricky at first, but with a little practice, you’ll be knitting like a pro in no time! Here’s a simple step-by-step guide to get you started:
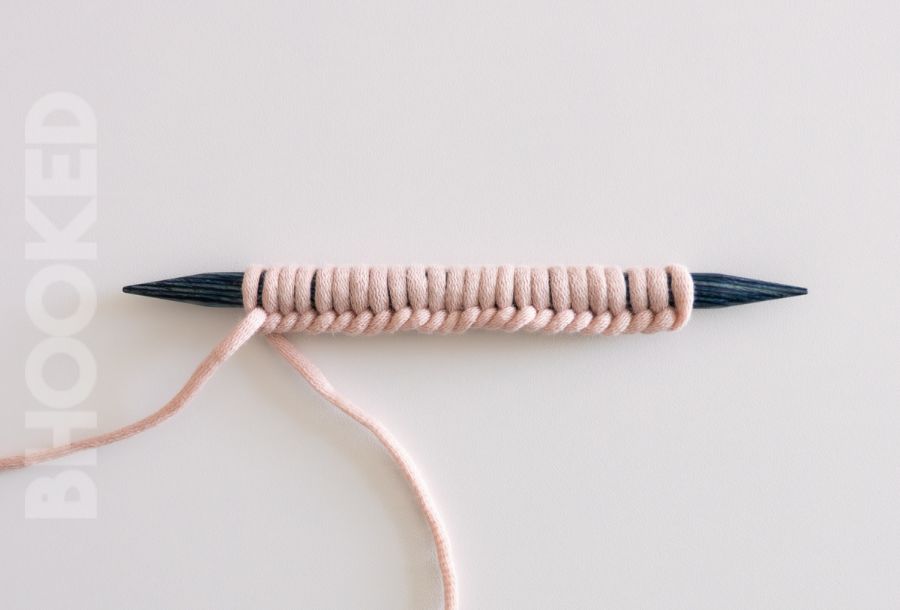
1. Casting On Stitches
The first step is to cast on the number of stitches required for your project.
Once you’ve cast on, you’ll need to divide your stitches evenly across the needles.
- If you’re using three DPNs, divide your stitches into three equal parts (or as evenly as possible).
- If you’re using four needles, divide the stitches across four needles.
After dividing your stitches, place them on the needles, making sure to spread them out evenly. It’s helpful to use a stitch marker to mark the first stitch of the round, so you know when your round starts and ends.

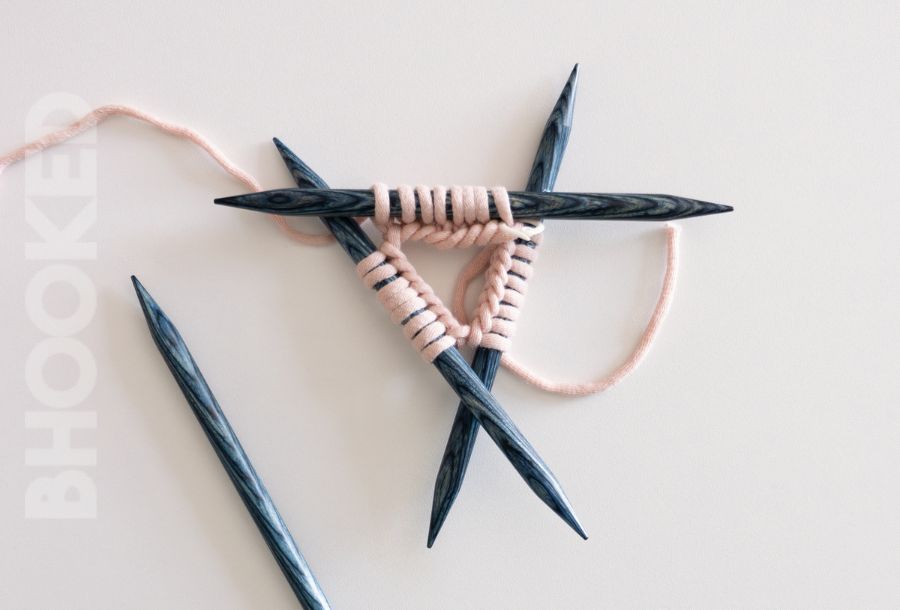
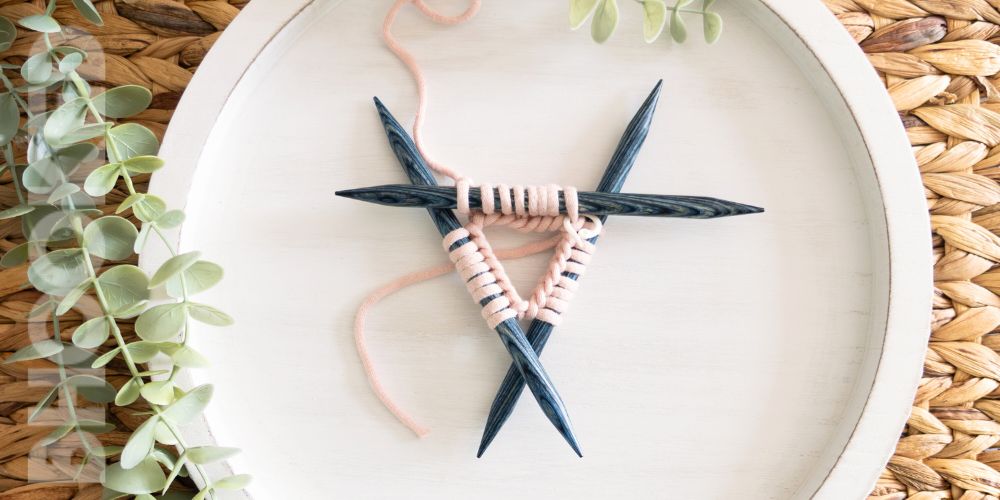
2. Joining the Round
Now comes the tricky part: joining the round. This is where many beginners get stuck, but don’t worry—it’s easier than it sounds!
- Once your stitches are divided onto the needles, gently bring the first needle and last needle together, making sure that your stitches are not twisted.
- Be sure to carefully check that the cast-on edge isn’t twisted before joining—this is a common mistake that can be hard to spot but will affect your project. You want all your stitches to be facing the same direction.
- Once you’ve aligned everything, pull the first stitch of the round onto the third needle, and start knitting! Make sure to use the stitch marker to track where your round begins.
3. Knitting the Round
Now, you’re ready to start knitting! You’ll be working with three or four needles at once, knitting from one needle to the next. Here’s how:
- Begin knitting with the first needle, as you would with any regular knitting project.
- When you get to the end of the needle, pick up the next needle with your left hand, and continue knitting in the round.
- When you finish all the stitches on one needle, the process is the same: just pick up the next needle and keep knitting!
At first, it might feel a little awkward managing multiple needles at once, but don’t worry—it becomes second nature after a few rounds. You’ll be juggling the needles and knitting away before you know it!
4. Switching Between Needles
As you knit, you’ll be switching between needles as you work around your project. Keep an eye on your tension, and try to keep it even between needles. Don’t worry if your stitches feel a bit tight at first—it can take some time to get comfortable with the needle-switching process.
One tip: always make sure that you’re knitting in the same direction on each needle (clockwise or counterclockwise) to avoid any twisting.
Here’s a video that’ll help you with these steps:
Video not displaying? Watch this tutorial on YouTube instead.
5. Keeping the Stitches Neat
It’s important to keep an eye on your tension and stitch placement as you go. If your stitches are too tight, it can make your work harder to manage and lead to uneven stitches. If they’re too loose, you might get gaps where the needles meet.
It’s totally okay if things don’t look perfect right away! DPNs can be a bit tricky at first, but with practice, you’ll find your rhythm. Soon, you’ll be working through rounds smoothly, with no problem at all.
6. Tips for Easy DPN Knitting
- Use stitch markers: These can help you keep track of your rounds and the start of each needle. They’re a game-changer for staying organized.
- Try different needle lengths: If you find your needles are a bit long or short for your project, experiment with different sizes to see which works best.
- Keep your needles close together: Don’t let your needles flop around too much. Hold them together, and keep them in line to avoid dropping stitches or creating gaps.
- Practice with a simple project: Start with something small and easy, like a hat or a simple cuff, to get used to the feel of DPNs. Once you get comfortable with the technique, you can move on to more complicated projects.
Common Challenges with DPNs and How to Overcome Them
Like any new technique, knitting with DPNs can come with its challenges. But don’t worry—every knitter has been there, and with a little patience, you’ll soon be breezing through your projects. Here are a few common problems you might encounter while using DPNs and tips for overcoming them:
1. Twisted Stitches
One of the most common issues for beginners is accidentally twisting your stitches when joining the round. This can be a tricky mistake because it’s not always immediately obvious, but it will affect the shape of your project.
How to fix it:
- Double-check your work before joining the round. Make sure your stitches are all facing the same direction, and the cast-on edge is not twisted.
- Take it slow. Once you’ve joined the round, carefully examine your stitches as you go. If you spot a twist, you’ll need to unravel and fix the twist before continuing.
2. Needles Slipping Out
DPNs can be a little tricky to handle when you’re not used to knitting with multiple needles at once. Sometimes, the needles can slip out of your stitches, especially if you’re knitting loosely.
How to fix it:
- Try wooden DPNs . Wooden needles tend to be lighter weight, and “grip” the yarn a little better making it a little less likely for the needles to slip through the stitches.
- Use longer DPNs if you can so you have a little more space at each end of the stitches. It’ll be a little more to hold in your hands, but the extra length might save your edge stitches.
- Invest in needle stoppers. These are small rubber or plastic tips that go on the ends of your needles to keep the stitches from slipping off.
3. Awkward Needle Juggling
If you’re working with three or more DPNs, you might feel like you’re juggling needles instead of knitting! It can feel a little overwhelming at first, especially if your needles keep getting tangled or caught on each other.
How to fix it:
- Stay organized. Try to keep your needles close together, and don’t be afraid to adjust the position of your needles as you work. Hold them at a comfortable angle to make the transitions between needles smooth.
- Practice makes better! The more you use DPNs, the easier it will become to manage the needles. It may feel a bit awkward at first, but soon you’ll be switching between them with ease.
4. Gaps Between Needles
Sometimes, as you switch from one needle to the next, you might notice small gaps forming between the stitches where the needles meet. These gaps can create a loose or uneven seam that’s visible in your project.
How to fix it:
- Check your tension. Try to keep your tension even across all needles. If you’re pulling too tightly on one needle and too loosely on another, you’ll get gaps.
- Use a tighter stitch on the last stitch of one needle and the first stitch of the next needle. This can help close up any unwanted gaps.
5. Dropping Stitches
It’s easy to drop a stitch when you’re working with multiple needles, especially when you’re first getting used to DPNs. Dropping a stitch mid-round can be frustrating, but it’s a problem you can fix!
How to fix it:
- Use a crochet hook to pick up dropped stitches. Carefully pick up the stitch and work it back onto your needle.
- Work slowly and keep your needles under control. If you feel like your needles are slipping or your hands are getting tired, take a short break and return to your work with fresh eyes and hands.
6. Confusion with Needle Placement
Sometimes, especially if you’re switching between multiple needles, you might lose track of where your stitches are or get confused about which needle to knit with next. This can lead to uneven tension or incorrect stitch placement.
How to fix it:
- Use a stitch marker. Mark the first stitch of your round so that you can always tell where your round starts and ends.
- Stick to a rhythm. Find a consistent pattern or motion when switching needles so that you can maintain a smooth, predictable flow as you knit.
Alternatives to Double Pointed Needles
While DPNs are the go-to tool for knitting small, circular projects, they’re not the only option. Some knitters prefer different methods or tools based on comfort, convenience, or personal preference. Let’s explore some of the alternatives to DPNs that you might want to try out:
1. Magic Loop Method
The Magic Loop method is a popular alternative to DPNs, especially for knitting small tubes like socks or sleeves. It involves using a long circular needle (usually 32” or longer) to knit in the round, pulling the cord between stitches to create a “loop” of slack that you can work with.
How it works:
- Cast on your stitches and divide them evenly on the needle.
- Pull the cable through to create a loop, with the rest of the stitches on the cable.
- Knit as you would with DPNs, pulling the cable between the stitches as needed.
Here’s a video to show you how it’s done!
Why use it:
- You only need one circular needle, which makes it a space-saving option.
- Some knitters find it easier to manage than juggling multiple needles.
When to use it:
- When you prefer not to use DPNs.
- When working on projects with small circumferences, like socks or sleeves, but you don’t mind using the Magic Loop method.
2. Circular Needles for Larger Projects
If your project is still small but not quite small enough to need DPNs, you might find that a smaller circular needle (e.g., 9″ or 16” length) works just fine for knitting in the round.
How it works:
- Simply use a short circular needle to knit in the round for smaller circumference projects, like hats or baby garments.
- As the circumference of your work grows, you can transition to a longer circular needle or DPNs if necessary.
Why use it:
- No juggling multiple needles—just a single circular needle.
- It’s great for people who don’t want to manage several needles at once.
When to use it:
- When working on projects that are slightly too small for a regular-sized circular needle but don’t quite require DPNs.
- If you’re knitting something like a small hat or toy that fits easily on a 16” circular needle.
3. Flexible Double-Ended Needles
Some knitters also experiment with flexible double-ended needles, which are designed for small, circular knitting in a way that combines elements of both Magic Loop and two circular needles.
How it works:
- These needles are flexible, allowing you to move them between stitches, creating a continuous round without needing multiple needles or cables.
- You work with the flexible needle just like a circular needle, but the ends bend to help you manage small circumferences.
Why use it:
- It’s a unique alternative for knitters who want something in-between Magic Loop and DPNs.
- Offers flexibility and can be more comfortable than traditional DPNs.
When to use it:
- For small circular projects when you want something other than the traditional tools.
- If you’re a more adventurous knitter looking to try something new.

Tips for Knitting with DPNs
Knitting with DPNs can feel like a whole new world when you’re first starting out. But once you get the hang of it, you’ll be able to create beautiful, seamless pieces with ease. Here are some tips to help you improve your DPN knitting skills and boost your confidence along the way:
1. Keep Your Needles Close
One common mistake when using DPNs is letting the needles get too far apart while you’re knitting. This can make your stitches harder to manage and lead to tension issues.
Tip:
- Try to keep your needles close together while you knit and your stitches in close proximity. This will help maintain even tension across all your needles and prevent any awkward gaps or uneven stitches.
- You don’t need to keep the needles at a perfectly rigid angle—just try to maintain a relaxed grip that keeps them at a comfortable distance from each other.
2. Practice the “First Stitch” Transition
The first stitch of a new needle can feel a little tricky, especially if you’re getting used to switching between needles. Sometimes, this stitch feels looser or uneven.
Tip:
- To make sure your first stitch is neat, try knitting into the first stitch of each needle tightly. This helps to eliminate any slack and ensures a more seamless transition from needle to needle.
- If you’re having trouble with a gap, don’t be afraid to adjust your tension slightly on the first few stitches to keep everything nice and tight.
3. Don’t Overthink Needle Changes
It can be easy to overthink the process of switching needles, especially when you’re first learning. But in reality, it’s just part of the natural flow of knitting in the round!
Tip:
- When you finish knitting one needle, that becomes your new “working needle”—just slide your stitches from the next needle so they’re easy to reach and keep going. The more you practice, the easier it becomes to get into a rhythm, and soon you’ll find yourself knitting without even thinking about it.
4. Use Stitches Markers to Keep Track of the Round
Keeping track of where your round starts and ends is crucial when you’re knitting in the round with DPNs. It’s easy to lose your place, especially when you’re switching between multiple needles.
Tip:
- Mark the beginning of your round with a stitch marker, so you can always tell where you are. You can use a locking stitch marker or a simple piece of scrap yarn to mark your starting point.
- This simple step will save you a lot of headaches and help you keep your rounds even.
5. Have Fun with the Process!
Knitting with DPNs doesn’t have to be stressful. The more you practice, the more natural it will feel. So, don’t be afraid to make mistakes and have fun with the learning process!
Knitting with double-pointed needles (DPNs) may seem tricky at first, but with a little practice and the right tips, you’ll be knitting in the round with ease. Whether you’re working on socks, hats, or sleeves, DPNs are a fantastic tool for creating seamless, beautiful pieces.
Remember, there’s no one-size-fits-all approach to knitting, so experiment with different methods, find what works best for you, and don’t be afraid to make mistakes along the way. Every stitch you knit is progress, and soon you’ll feel confident and comfortable using DPNs.
So grab your needles, pick a project, and start knitting! You’ve got this. Happy knitting!


