If you’ve ever wished you could knit a cozy hat in less than an hour, you’re going to love what a hat knitting machine can do. Whether you’re short on time, making gifts, or just looking for a quicker way to finish projects, this tool is a total game-changer. In fact, once you get the hang of it, you can crank out a basic hat in just 30 minutes—no complicated patterns or hours of stitching required.
UPDATED: MAY 7, 2025 BY BRITTANY
This post may contain affiliate links. See our Disclosure Policy for more information.

In this post, I’ll walk you through exactly how to knit a hat using a hat knitting machine, step by step. Even if you’re brand new to machine knitting, you’ll be able to follow along and finish your first hat with confidence. It’s a great project for beginners, and it’s also perfect if you’ve been looking for a faster way to use up yarn in your stash.
By the end, you’ll have a warm, handmade hat ready to wear or gift—plus a fun new skill that opens the door to all kinds of quick machine-knit projects.
Here is a quick overview of the topics we’ll cover in this article:
- What is a knitting machine?
- Materials You’ll Need
- Before You Start: Quick Tips for Success
- How to Knit a Hat with a Knitting Machine
- Step-by-Step Video
- Tips for Customizing Your Hat
What is a (Hat) Knitting Machine
A hat knitting machine is a circular knitting machine designed to knit tubes of fabric quickly and easily—perfect for making hats, headbands, sleeves, and more. While it’s often called a hat knitting machine because hats are such a popular project, it’s actually a versatile tool that can help you whip up all kinds of knitted items without ever picking up traditional needles.
These machines typically come with a rotating handle, a series of latch hooks (or needles), and a tension guide to keep your yarn feeding smoothly. As you turn the crank, the machine does the knitting for you—creating a seamless tube that you can finish into a hat in no time.

Brands like Addi, Sentro, and Loopa are common, and many work with worsted-weight yarns, though some are more flexible than others. Whether you’re using a high-end machine or a more budget-friendly version, the basic process is the same—and surprisingly satisfying.
So if you’ve ever looked at a ball of yarn and thought “I wish I could turn this into something fast,” a hat knitting machine might just be your new favorite tool!
Materials You’ll Need
Before you get started with your hat knitting machine, let’s make sure you have everything you need. This project is very beginner-friendly and doesn’t require much—just a few simple tools and your favorite yarn.

Here’s what you’ll need:
- Hat knitting machine – A circular knitting machine like this 46-pin Addi Express King Size. (Make sure yours has enough needles to fit an adult-sized hat—usually 40+ pins.)
- Medium-Weight (#4) yarn – Look for smooth, medium-weight yarn (labeled “#4”) that glides easily through the machine. Avoid textured or super bulky yarns to start.
- Yarn needle – For gathering the top of the hat and weaving in ends.
- Scissors – Always handy!
- Optional: Pom-pom, faux fur topper, leather tag, or decorative label
A Quick Yarn Tip:
Machines can be a little picky with yarn. Stick with acrylic or acrylic blends at first—brands like Red Heart Soft, Caron Simply Soft, or Lion Brand Heartland often work well. If your yarn is too thick or fuzzy, it may cause the machine to jam or drop stitches.
Once you’ve got your materials gathered, you’re ready to start cranking out your hat!
Before You Start: Quick Tips for Success
If this is your first time using a knitting machine, don’t worry—it’s easier than it looks! These quick tips will help you get smoother results and avoid some common beginner frustrations.
- Test Your Yarn First: Before jumping into your project, try a few test cranks with your yarn. If it feels too tight or the machine skips stitches, swap it out for a smoother or slightly thinner yarn. Some yarns are just easier for beginners to manage than others.
- Keep Your Cranking Steady: Try to crank at a steady, relaxed pace—not too fast and not too jerky. This helps prevent dropped stitches and keeps your tension even. If you’re right-handed, you’ll turn the handle clockwise; lefties may need to adjust how they hold the machine.
- Watch the First Few Rows Closely: The first few rounds are the most likely to have issues. Make sure each peg catches the yarn properly before settling into your rhythm. It’s okay to restart if needed!
- Don’t Pull the Yarn Too Tight: Keep some slack in the working yarn (but not too much). Pulling too tight can make the crank hard to turn and stress the needles. Let the tension guide on the machine do most of the work.
- Secure the Hat Knitting Machine to the Table: If your hat knitting machine came with a way to secure it to your table while you work, don’t skip those! It’s easier to learn how to knit a hat on a knitting machine if it’s not moving around on you while you crank.
How to Knit a Hat With a Hat Knitting Machine
Cast on with your Main Yarn
- Set the row counter to 0 if it’s not already.
- Leave a tail that’s about 10″ long and loop the yarn around the first peg of your machine (it will often be labeled with a 1).
- Slowly start cranking the handle and run the yarn behind the next peg.
- Then move the yarn forward to catch it under the next peg.
- Repeat the last two steps, weaving the yarn back and forward until you get back to the first peg.
- Make sure the first peg catches the yarn, and thread the yarn through the tension guide.
Crank the Yarn to Knit the Length of the Hat
- Slowly crank the yarn for the first couple of rounds to make sure the yarn doesn’t catch or the stitches aren’t dropped.
- Once you get past the first few rounds, you can pick up the pace.
- For a double-layered adult hat, knit 130 rounds.
- Keep a consistent tension and pace while cranking
Remove the Tube from the Machine
- Carefully cut the yarn leaving a tail at least 20″ long.
- Thread it onto your yarn needle and begin removing the live stitches by catching each loop with the needle (and tail) in order.
- Gently slide the project off the machine as you go.
Close the Top and Bottom of the Tube
- Pull the tail to gather the top closed, just like a drawstring.
- Weave the yarn through and around the opening a few times to secure it.
- Repeat on the opposite side.
Fold the Hat
- Fold the long tube inside out so the two closures meet and the inside becomes the lining.
- Use your yarn needle and tail to sew the two closures together.
- Add a pompom if you want, and weave in the ends!
Hat Knitting Machine Step-by-Step Video
Tips for Customizing Your Hat
Once you’ve mastered the basic method on your hat knitting machine, the fun really begins—you can customize your hat in so many ways! Here are a few simple ideas to make your hat look less “machine-made” and more like a boutique item.
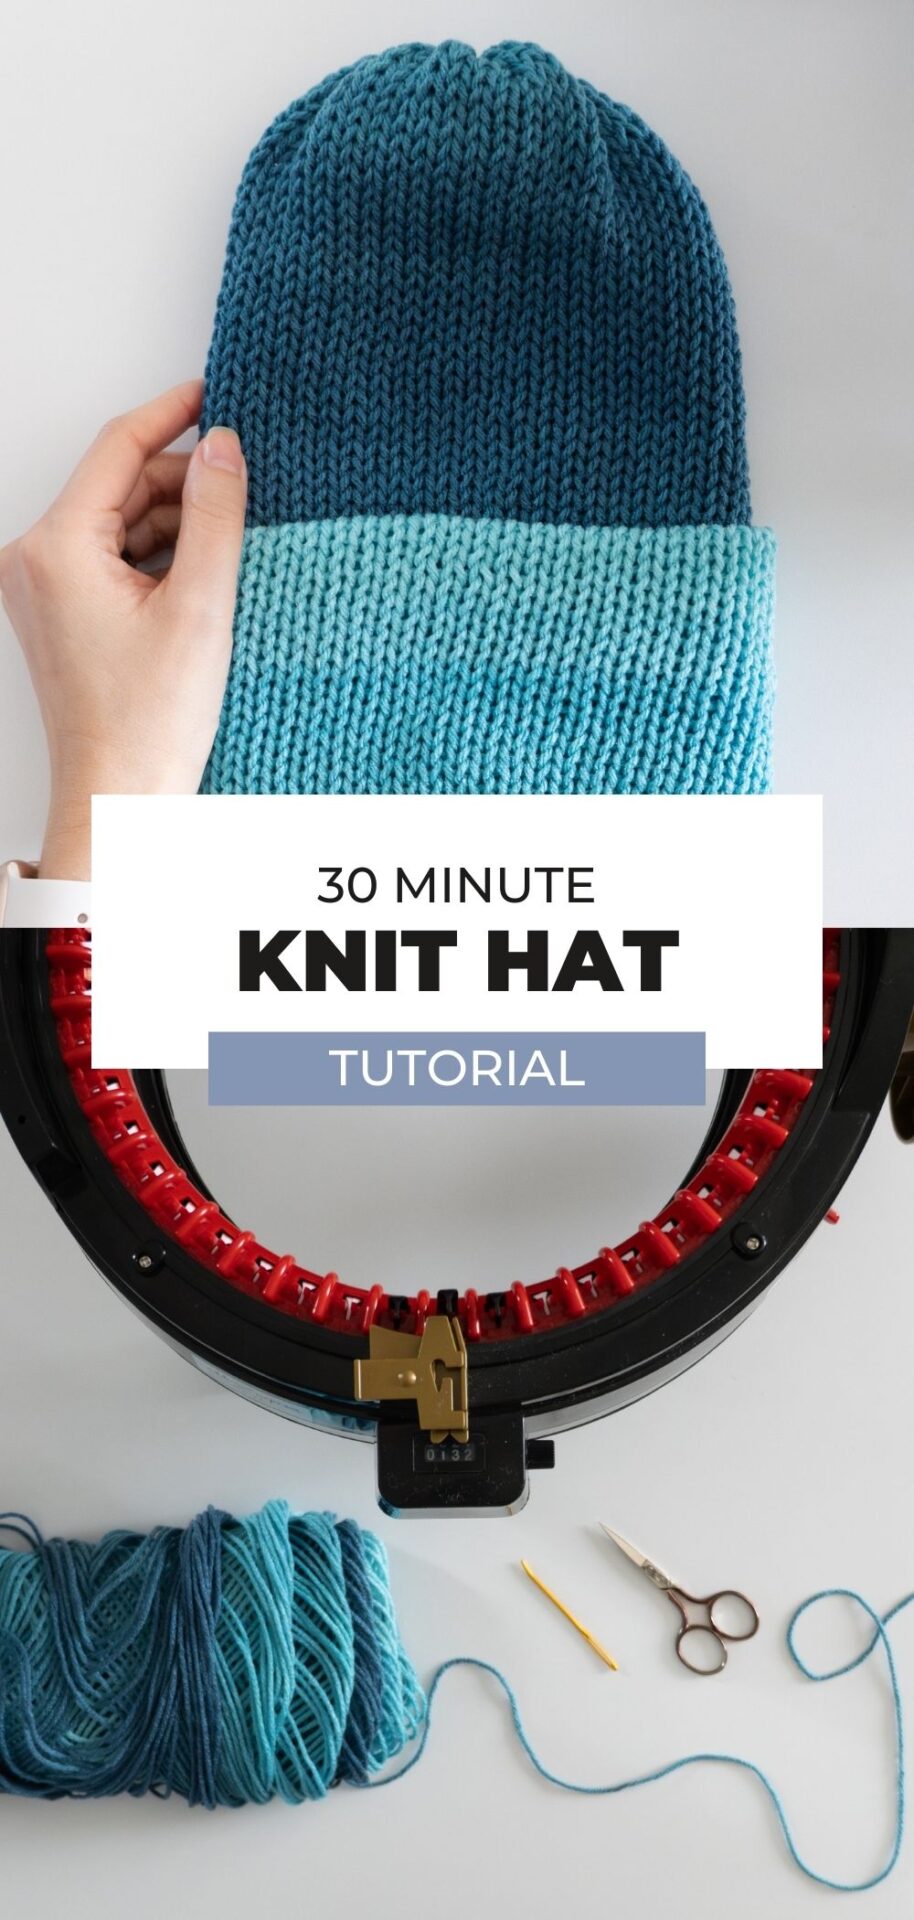
1. Try a Color Block
Change yarn colors partway through your rows to create a bold stripe or color block design. Just tie on the new color and keep cranking. Make sure to hide the color join inside the fold for a clean look.
2. Use Self-Striping or Variegated Yarns
Let the yarn do the work! Self-striping or variegated yarns create fun effects without any extra effort. It’s an easy way to add interest to your hat without changing colors manually.
3. Add a Pom or Faux Fur Topper
A pom-pom instantly gives your hat a cozy, playful vibe. You can use a yarn pom-pom, snap-on faux fur one, or even a felted wool ball. Attach it securely with strong thread or a button on the inside of the hat.
4. Add a Tag or Label
Sew on a cork or leather label to give your hat a polished, finished feel. It’s a small detail that makes a big difference—especially if you’re gifting or selling your hats!
5. Adjust the Slouch
More rows = more slouch. Fewer rows = a beanie fit. You can experiment with 140, 150, or even 160 rounds to get the shape you like best. Fold the hat differently to style it snug or relaxed.
Knitting a hat with a hat knitting machine is one of the fastest, easiest ways to make something warm, cozy, and giftable—no needles required. Whether you’re making hats to donate, sell, or wear yourself, this quick project is a great way to get comfortable with your machine and end up with something you’ll actually use.
Don’t worry if your first hat isn’t perfect. Every time you crank that handle, you’ll learn a little more—and before you know it, you’ll be whipping up hats in your sleep (well, almost).