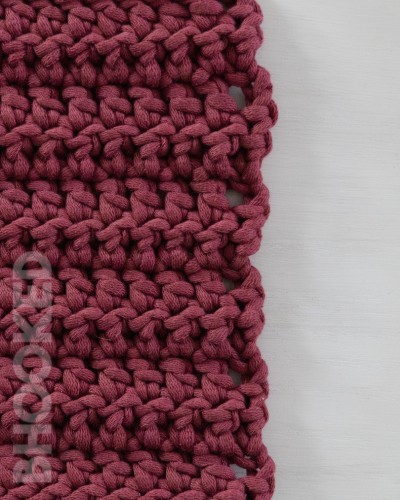
Learning to crochet edges that are straight is tough when you’re new. But don’t worry – everyone starts this way, and your crochet edges will get better with practice. To make straight edges, you need to focus on two things: counting your stitches and your turning chains.
UPDATED: JULY 18, 2024 BY BRITTANY
This post may contain affiliate links. See our Disclosure Policy for more information.
This article will help you understand crochet edges, and how to make them as straight as you possibly can. You’ll learn how to make straight edges for scarves, blankets, and other projects without worry.
I’ll show you how to find the first and last stitch in each row, and when to count the turning chain as a stitch. I’ll also help you fix the uneven edges you may already have in your project, and share tips to keep your edges straight for future projects.
If you spend some time learning these skills and practice a bit, your edges will get better. I’m sure of it!
Here’s a quick overview of the topics we’ll cover in this article:
- Why Your Crochet Edges Get Uneven
- What is the First and Last Stitch of the Row
- Does the Turning Chain Count as a Stitch?
- Why Use a Turning Chain?
- How Many Turning Chains Do You Need?
- The Single Crochet is Different
- Finding Problems in Your Crochet Edges
- How to Fix Uneven Crochet Edges
Why Your Crochet Edges Get Uneven
The most common reason for uneven crochet edges is adding or dropping a stitch in a row by mistake. You might not notice it the first time, but if it keeps happening, it becomes more obvious.
If you make one stitch too many or too few in a row, you’ll see it in your edges. This often happens because of confusion about the turning chain. In patterns, the turning chain sometimes counts as a stitch, but other times it doesn’t. The pattern will tell you which way to do it.
Once you understand turning chains, it’s very important to know where to put the first and last stitch of each row. This helps keep your edges straight. Most patterns don’t explain this part because they think you already know. But don’t worry – it’s easy to learn and remember once someone explains it to you.
Finding the First and Last Stitch in a Row
When figuring out the first and last stitch of a row, remember this rule:
If the turning chain counts as a stitch, it’s always the first stitch of the row. The last stitch of the row goes into the top of the turning chain from the row below.
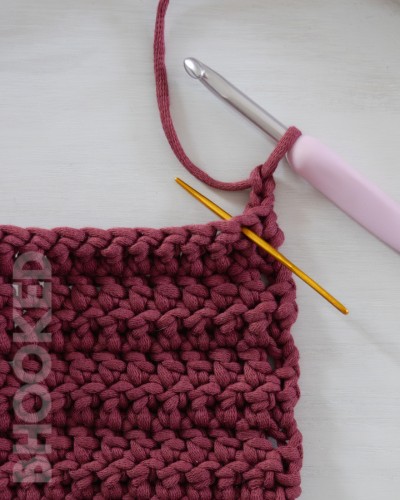
You’ll see this a lot with tall stitches like double crochet. The turning chain helps you move up to the next row, matching the height of other stitches. There is a way to avoid turning chains, but it doesn’t work for all stitch patterns. So it’s best to learn as much as you can about turning chains.
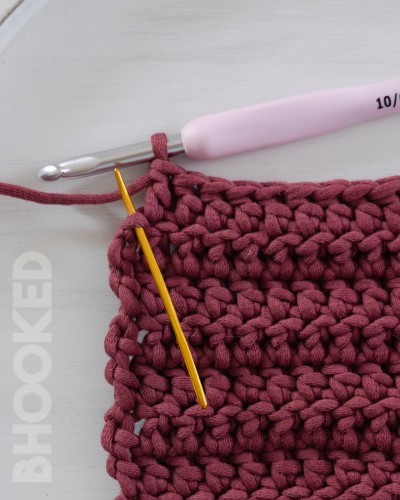
If the turning chain doesn’t count as a stitch, make the first stitch in the same spot as the turning chain. The last stitch of the row goes into the first real stitch of the row below (not a turning chain).
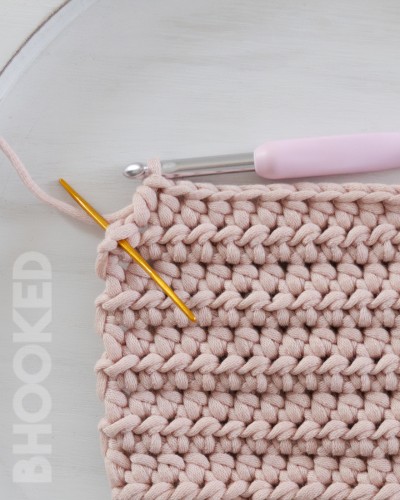
When using shorter stitches, the turning chain often doesn’t count as a stitch. For example, with single crochet, you usually make one turning chain. This chain helps you move up to the next row and match the height of other stitches, but you don’t usually count it as a stitch. Your pattern will always say what to do, so it’s important to read the pattern notes carefully.
Does the Turning Chain Count as a Stitch?
This can be confusing because the turning chain sometimes counts as a stitch and sometimes doesn’t. The good news is that it’s always one or the other, and the pattern will always tell you which. You just need to know where to look.
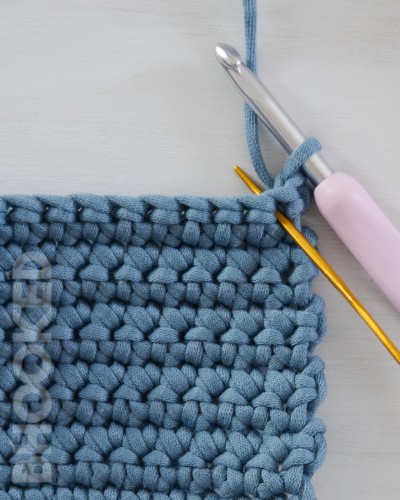
There are two main places to check if the turning chain counts as a stitch. The first place is in the pattern notes at the start of your pattern.
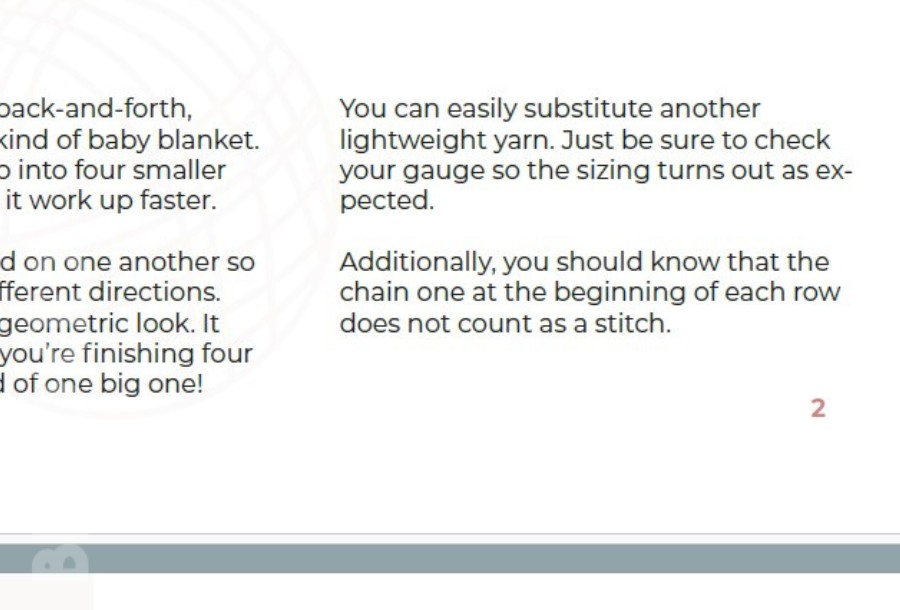
This is a look at our Easy Crochet Baby Blanket digital pattern. In the notes section, it says, “the chain one at the beginning of each row does not count as a stitch”. So in this pattern, you make the first stitch in the same spot as the turning chain. The last stitch of the row goes into the first stitch of the row below.
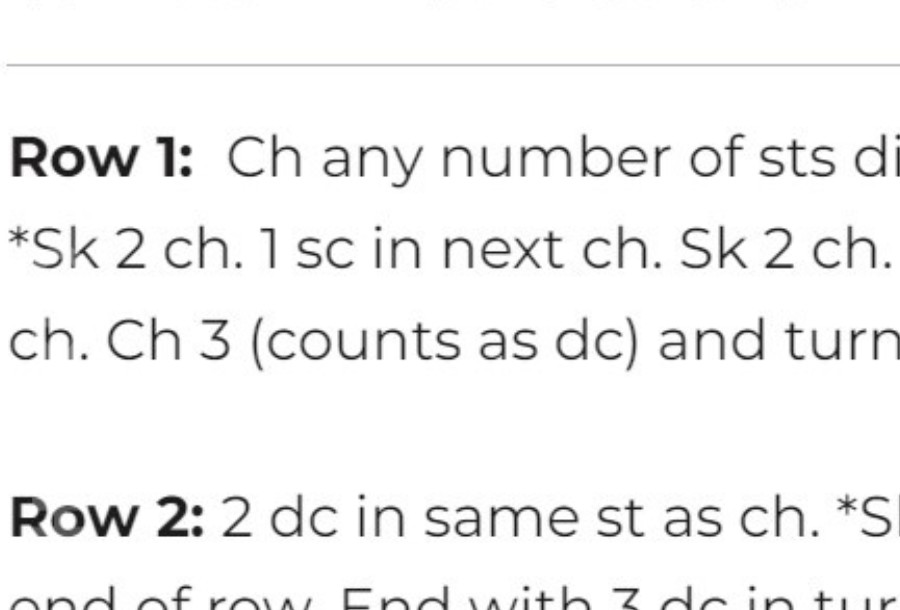
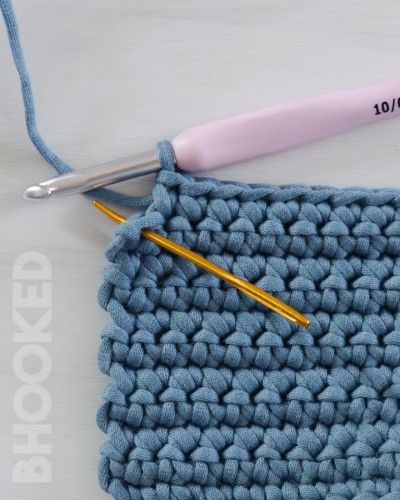
If you don’t find a blurb like this in the notes section of your pattern, you may find it within the pattern itself. It can look something like this:
Understanding the turning chain’s role is the first step to making straight edges easily. Once you know this, you’ll know where to put the first and last stitch of each row. When you get this right, your edges will stay straight. You’ll also be less likely to add or drop stitches by mistake.
Why use a turning chain?
The turning chain is important because it helps your rows start at the right height. Without it, the beginning of each row would look squished. Here’s why:
- When you finish a row, your hook is still at the bottom.
- The next row needs to start at the same height as its stitches.
- The turning chain is like a step that lifts your hook to the right height for the new row.
This way, all your stitches can be the same height, making your work look neat and even.
How Many Turning Chains Do You Need?
There’s a general rule for how many chains to use for different stitches:
- Half double crochets = 2 turning chains
- Double crochets = 3 turning chains
- Treble crochets = 4 turning chains
- Double Treble crochets = 5 turning chains
But these numbers don’t always work for everyone. Remember, the turning chain should be the same height as the other stitches in the row. This makes your edges look neat. If you crochet tighter like me, these “standard” numbers might not work for you.
When I make three chains for a double crochet row, they end up taller than my other stitches. This makes the edge stick out and look messy. But two chains are just right for my double crochet stitches, so that’s what I use.
No matter what the rules say, for the neatest edges, use the number of turning chains that best match how tall your stitches are.
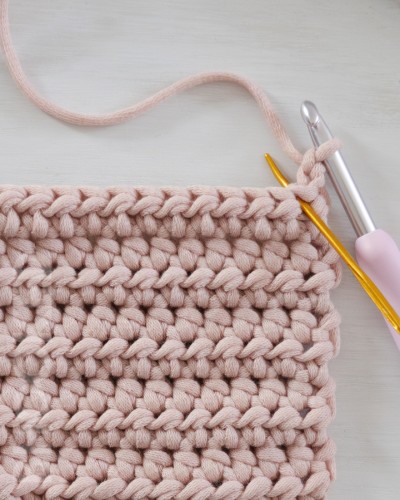
The single crochet is a little different.
You might have noticed I didn’t mention single crochet in the list above. That’s because it’s treated the same way by almost everyone. It’s hard to find and crochet into a single chain, so the turning chain for a single crochet usually never counts as a stitch.
For single crochet, the beginning and end of a row will look like this:
Finding Problems in Your Crochet Edges
The first step to fixing your uneven crochet edges is to know what you’re doing wrong in the first place. Now you know why crochet edges can be uneven, but how do you know where you’re going wrong, and why your edges aren’t straight? There’s a few things to look for to figure out where you went wrong:
Is it slanted instead of straight?
You might be adding or missing a stitch in every row. Count your stitches to check. To fix this, focus on where the first and last stitch should go. Count as you crochet until you get used to it.
If your turning chain is supposed to count as a stitch, and you have another stitch worked right here, this is a classic example of adding a stitch where there shouldn’t be a stitch. This can lead to the edges slanting.
If your turning chain is supposed to count as a stitch, and you aren’t making a stitch in the top turning chain at the end of the row, this is a classic example of dropping a stitch. This will also lead to the edges slanting.
Is there a small bump or dip in the edge?
You probably added or missed a stitch in that row. Count your stitches and remind yourself where the first and last stitch should be. Count as you go until it feels natural.
It’s not uncommon for there to be a combination of missed and added stitches. Go back to where you think things went wrong, count your stitches, and pinpoint where you went wrong.
Does the edge just look bumpy?
If your stitch count is right but the edge looks weird, your turning chains might be too tall.
Try using one less chain and see if that makes your edges look better.
How to Fix Uneven Crochet Edges
I wish I could tell you there’s a magic fix for uneven edges. Sadly, there isn’t a perfect way to make a dip, bump, or slant look straight without undoing your work back to where it went wrong.
But don’t give up! If you don’t want to undo everything, try these ideas:
- If only a few rows are uneven, try blocking. This helps “force” the stitches straighter. It won’t be perfect, but it can help a lot.
- Add a border in the same color. Use taller stitches for dips and shorter stitches for bumps. This won’t fix everything, but it can make it look better.
These aren’t perfect fixes, but they can help. The only way to make edges truly straight is to undo and redo. Whether you choose to redo or keep it as is, you’ll learn from this and do better next time.
If you’re feeling upset, don’t worry. It’s hard to keep track of the first and last stitch, tension, and turning chains all at once. It will get easier, and your edges will get better with each project. Figure out what went wrong and use that knowledge next time. If you’re not sure, practice with some extra yarn. Don’t rush, and don’t pressure yourself to finish until you feel ready.


