Ready to learn how to make a textured crochet wave stitch? This step-by-step tutorial will show you how to crochet the interesting, and beautifully textured wave stitch stitch and give you tips for using this stitch in patterns.
UPDATED: AUGUST 16, 2023 BY BRITTANY
This post may contain affiliate links. See our Disclosure Policy for more information.

This textured crochet wave stitch is a fantastic way to add some extra texture to your projects.
Pair it with your favorite yarn, and let your creativity flow. This stitch is perfect for a variety of home decor items, and it also works great for accessories like bags when you choose the right yarn.
It isn’t a reversible stitch, so it’s best suited for projects where both sides won’t show at the same time (like a scarf for example).
In the rest of this tutorial, we’ll explore all aspects of the crochet textured wave stitch: what it is, how to crochet it, and what projects it’s best suited for. Plus I’ll answer some frequently asked questions so you don’t have to go searching for the answers you need.
Here’s a quick overview of the topics we’ll cover in this article:
- What is This Textured Crochet Wave Stitch?
- Textured Crochet Wave Stitch Tutorial
- Stitch Multiple
- Textured Crochet Wave Stitch Abbreviations
- Textured Crochet Wave Stitch Step-by-Step Video
- Textured Crochet Wave Stitch Project Ideas
- How Do You Calculate Textured Crochet Wave Stitch Patterns?
- More Beginner-Friendly Stitch Tutorials + Free Patterns
What is This Textured Crochet Wave Stitch?
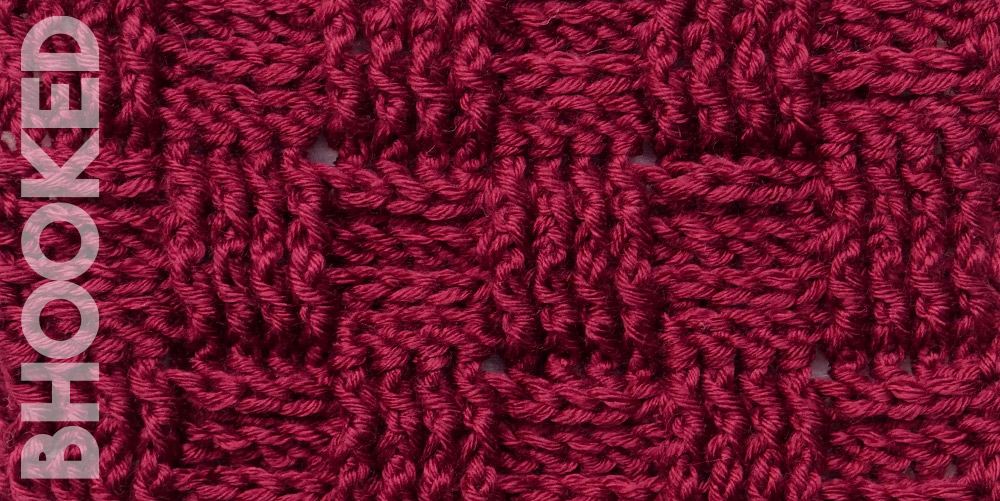
This textured crochet wave stitch is an intermediate-level technique with an eye-catching 3D texture. It combines several basic stitches to create its unique look.
Different stitch heights are carefully arranged to form the wave pattern. While each stitch is easy to crochet on its own, the real magic happens when they’re combined in the right order. So, you’ll need to pay a bit of attention when you’re learning it. This clever stitch pattern is a great next step for new crocheters who are ready to move beyond the basics.
Textured Crochet Wave Stitch Tutorial
The textured wave stitch is incredibly versatile, so you can use it with a range of yarns, from lightweight to super bulky. Remember, this stitch creates a thick fabric, so the heavier the yarn, the sturdier your final piece will be. To really showcase the stitch pattern, opt for a smooth yarn that will highlight the waves. Alternatively, you can pair it with a slightly textured yarn for an even more dynamic look in your project.
Supplies
- Yarn: For practice, use medium-weight yarn. You’ll only need a small amount to make a practice swatch.
- 6 mm Crochet Hook
Pattern Notes
- The side you’re looking at while you crochet is considered the right side.
- This crochet pattern is written in US terms.
In the pattern instructions below, the chain 1 at the end of the rows does not count as a stitch. So the first stitch of the row is the half double crochet you make with the chain.
To avoid dropping stitches at the beginning and end of the row, your first stitch is worked in the same stitch where the chain 1 is coming from. The last stitch of the row should be worked in the first stitch of the previous row.
Stitch Multiple
This textured crochet wave stitch multiple is 10 + 6.
This means that there are 10 stitches within the waves. When planning a project that uses this textured crochet wave stitch, chain in groups of 10 and add 6 chains only at the very end.
While chaining until it’s as wide as you need is a fine strategy for basic stitches, it doesn’t quite work for the textured wave stitch. Since the chain is condensed a little bit into the wave pattern, the length will seemingly “shrink” after finishing the first row.
This just means you need to do a little extra work to plan the length of your starting chain for textured wave stitch projects. When you’re ready for that, or when you want to improvise your own blanket pattern, I have an article that will help you figure out how many starting chains you need for your ripple, chevron, and wave stitch projects.
Stitch Abbreviations
- BLO Back Loop Only
- Ch Chain
- Slst Slip Stitch
- Hdc Half Double Crochet
- Hk Hook
- Rep Repeat
- RS Right Side
- St(s) Stitch(es)
- WS Wrong Side
Row 1: Ch any number of sts divisible by 10 and add 6 at the end. Loosely slst in 2nd ch from hk and in next 4 ch. *1 hdc in next 5 ch. 1 slst in next 5 ch. Rep from * to end of the row. Ch 1 and turn.
Row 2 (WS): Working in the BLO, slst in the first 5 sts. *1 hdc in the BLO of the next 5 sts. 1 slst in the BLO of the next 5 sts. Rep from * to end of row. Ch 1 and turn.
Row 3 (RS): 1 hdc in the BLO of the first 5 sts. *1 slst in the BLO of the next 5 sts. 1 hdc in the BLO of the next 5 sts. Rep from * to end of row. Ch 1 and turn.
Row 4 (WS): 1 hdc in the BLO of the first 5 sts. *1 slst in the BLO of the next 5 sts. 1 hdc in the BLO of the next 5 sts. Rep from * to end of row. Ch 1 and turn.
Row 5 (RS): Working in the BLO, slst in first 5 sts. *1 hdc in BLO of next 5 sts. 1 slst in the BLO of next 5 sts. Rep from * to end of row. Ch 1 and turn.
Repeat: Rep rows 2-5 until your project measures the length you want, ending on a 5th row. Fasten off as usual.
Textured Crochet Wave Stitch Step-by-Step Tutorial
Video not displaying? Watch this tutorial on YouTube instead.
Right-Handed Tutorial on YouTube
Left-Handed Tutorial on YouTube
Textured Crochet Wave Stitch Project Ideas
The textured wave stitch creates a dense and stretchy fabric. These qualities make it an excellent choice for projects where warmth and durability are important (home decor), where both sides won’t show at the same time (scarves), and projects where you don’t want a lacey look (blankets).
More Beginner-Friendly Stitch Tutorials + Free Patterns
When you’ve mastered the four basic stitches: single crochet, half double crochet, double crochet, and treble crochet, the next step is to use these stitches together to make up more interesting stitch patterns. Here are some more stitches for you to try next: